Papakon Mitsanit via Getty Images
How to Master Arm Balances In Yoga—Plus 8 Poses to Try
Get ready for liftoff.
By Ingrid Yang•
What Are Arm Balances In Yoga?
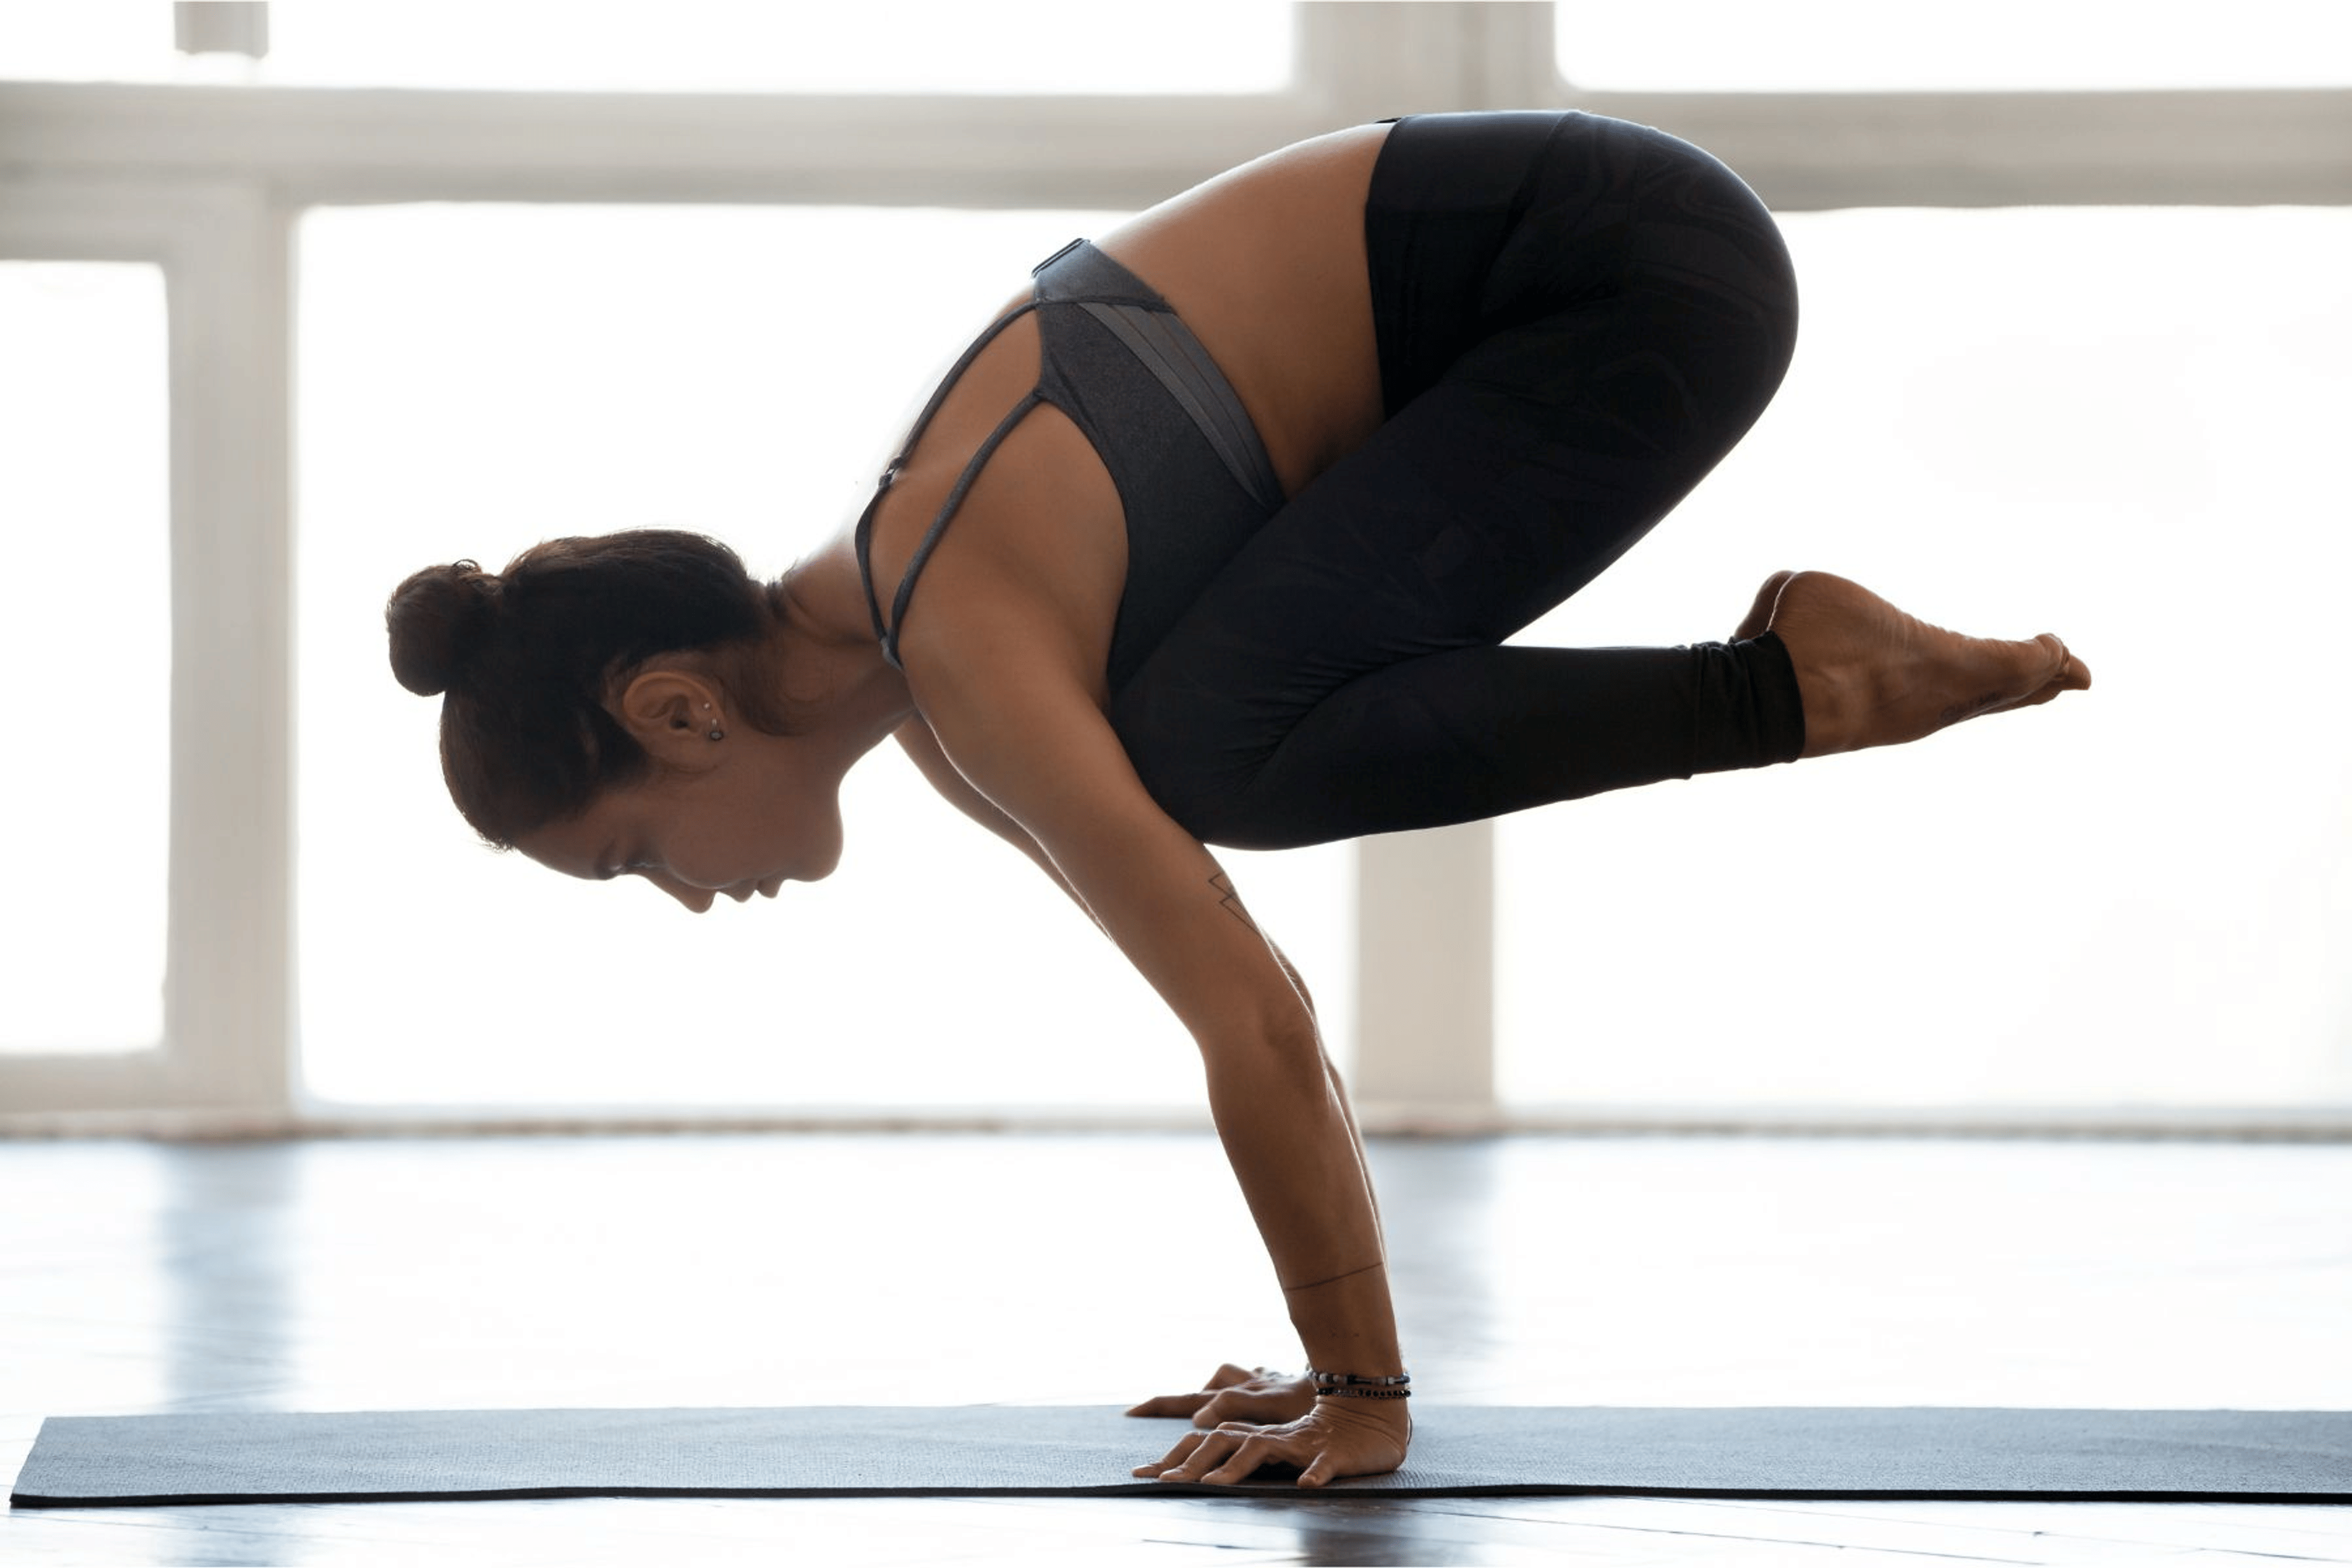
Crow Pose (Bakasana)
Side Crow (Parsva Bakasana)
Crane Pose
Flying Pigeon (Eka Pada Galavasana)
Firefly Pose (Tittibhasana)
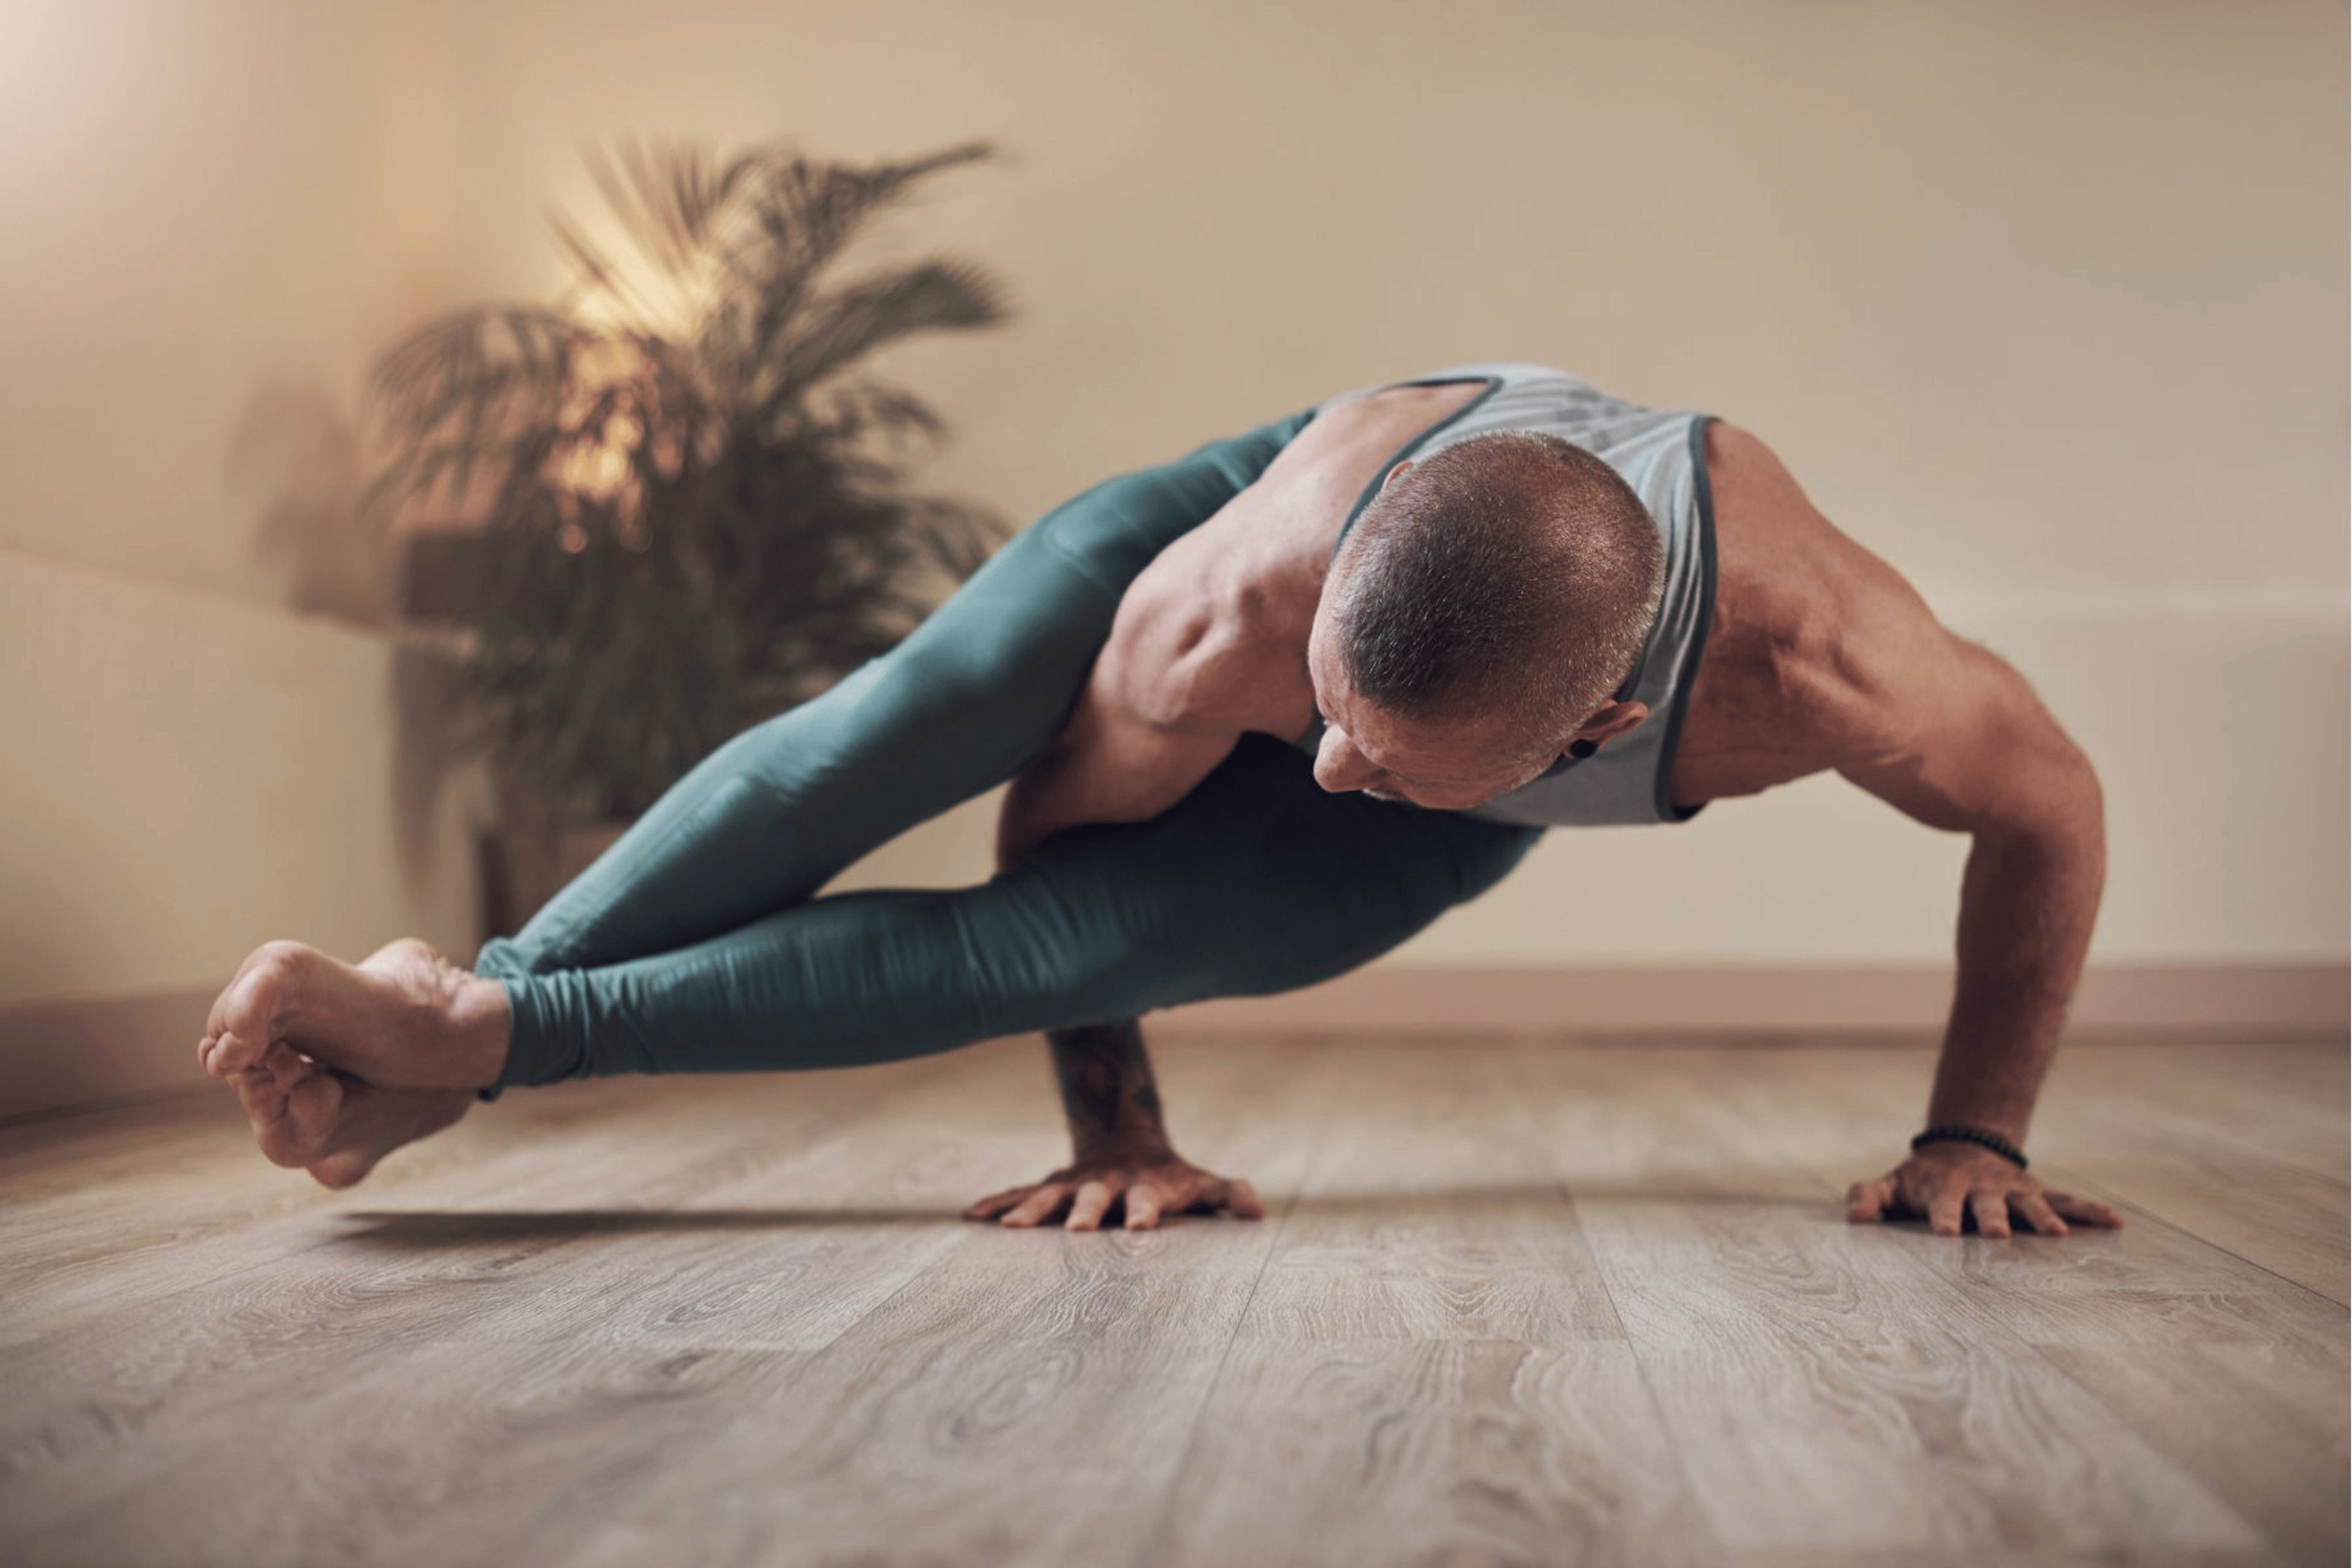
Eight-Angle Pose (Astavakrasana)
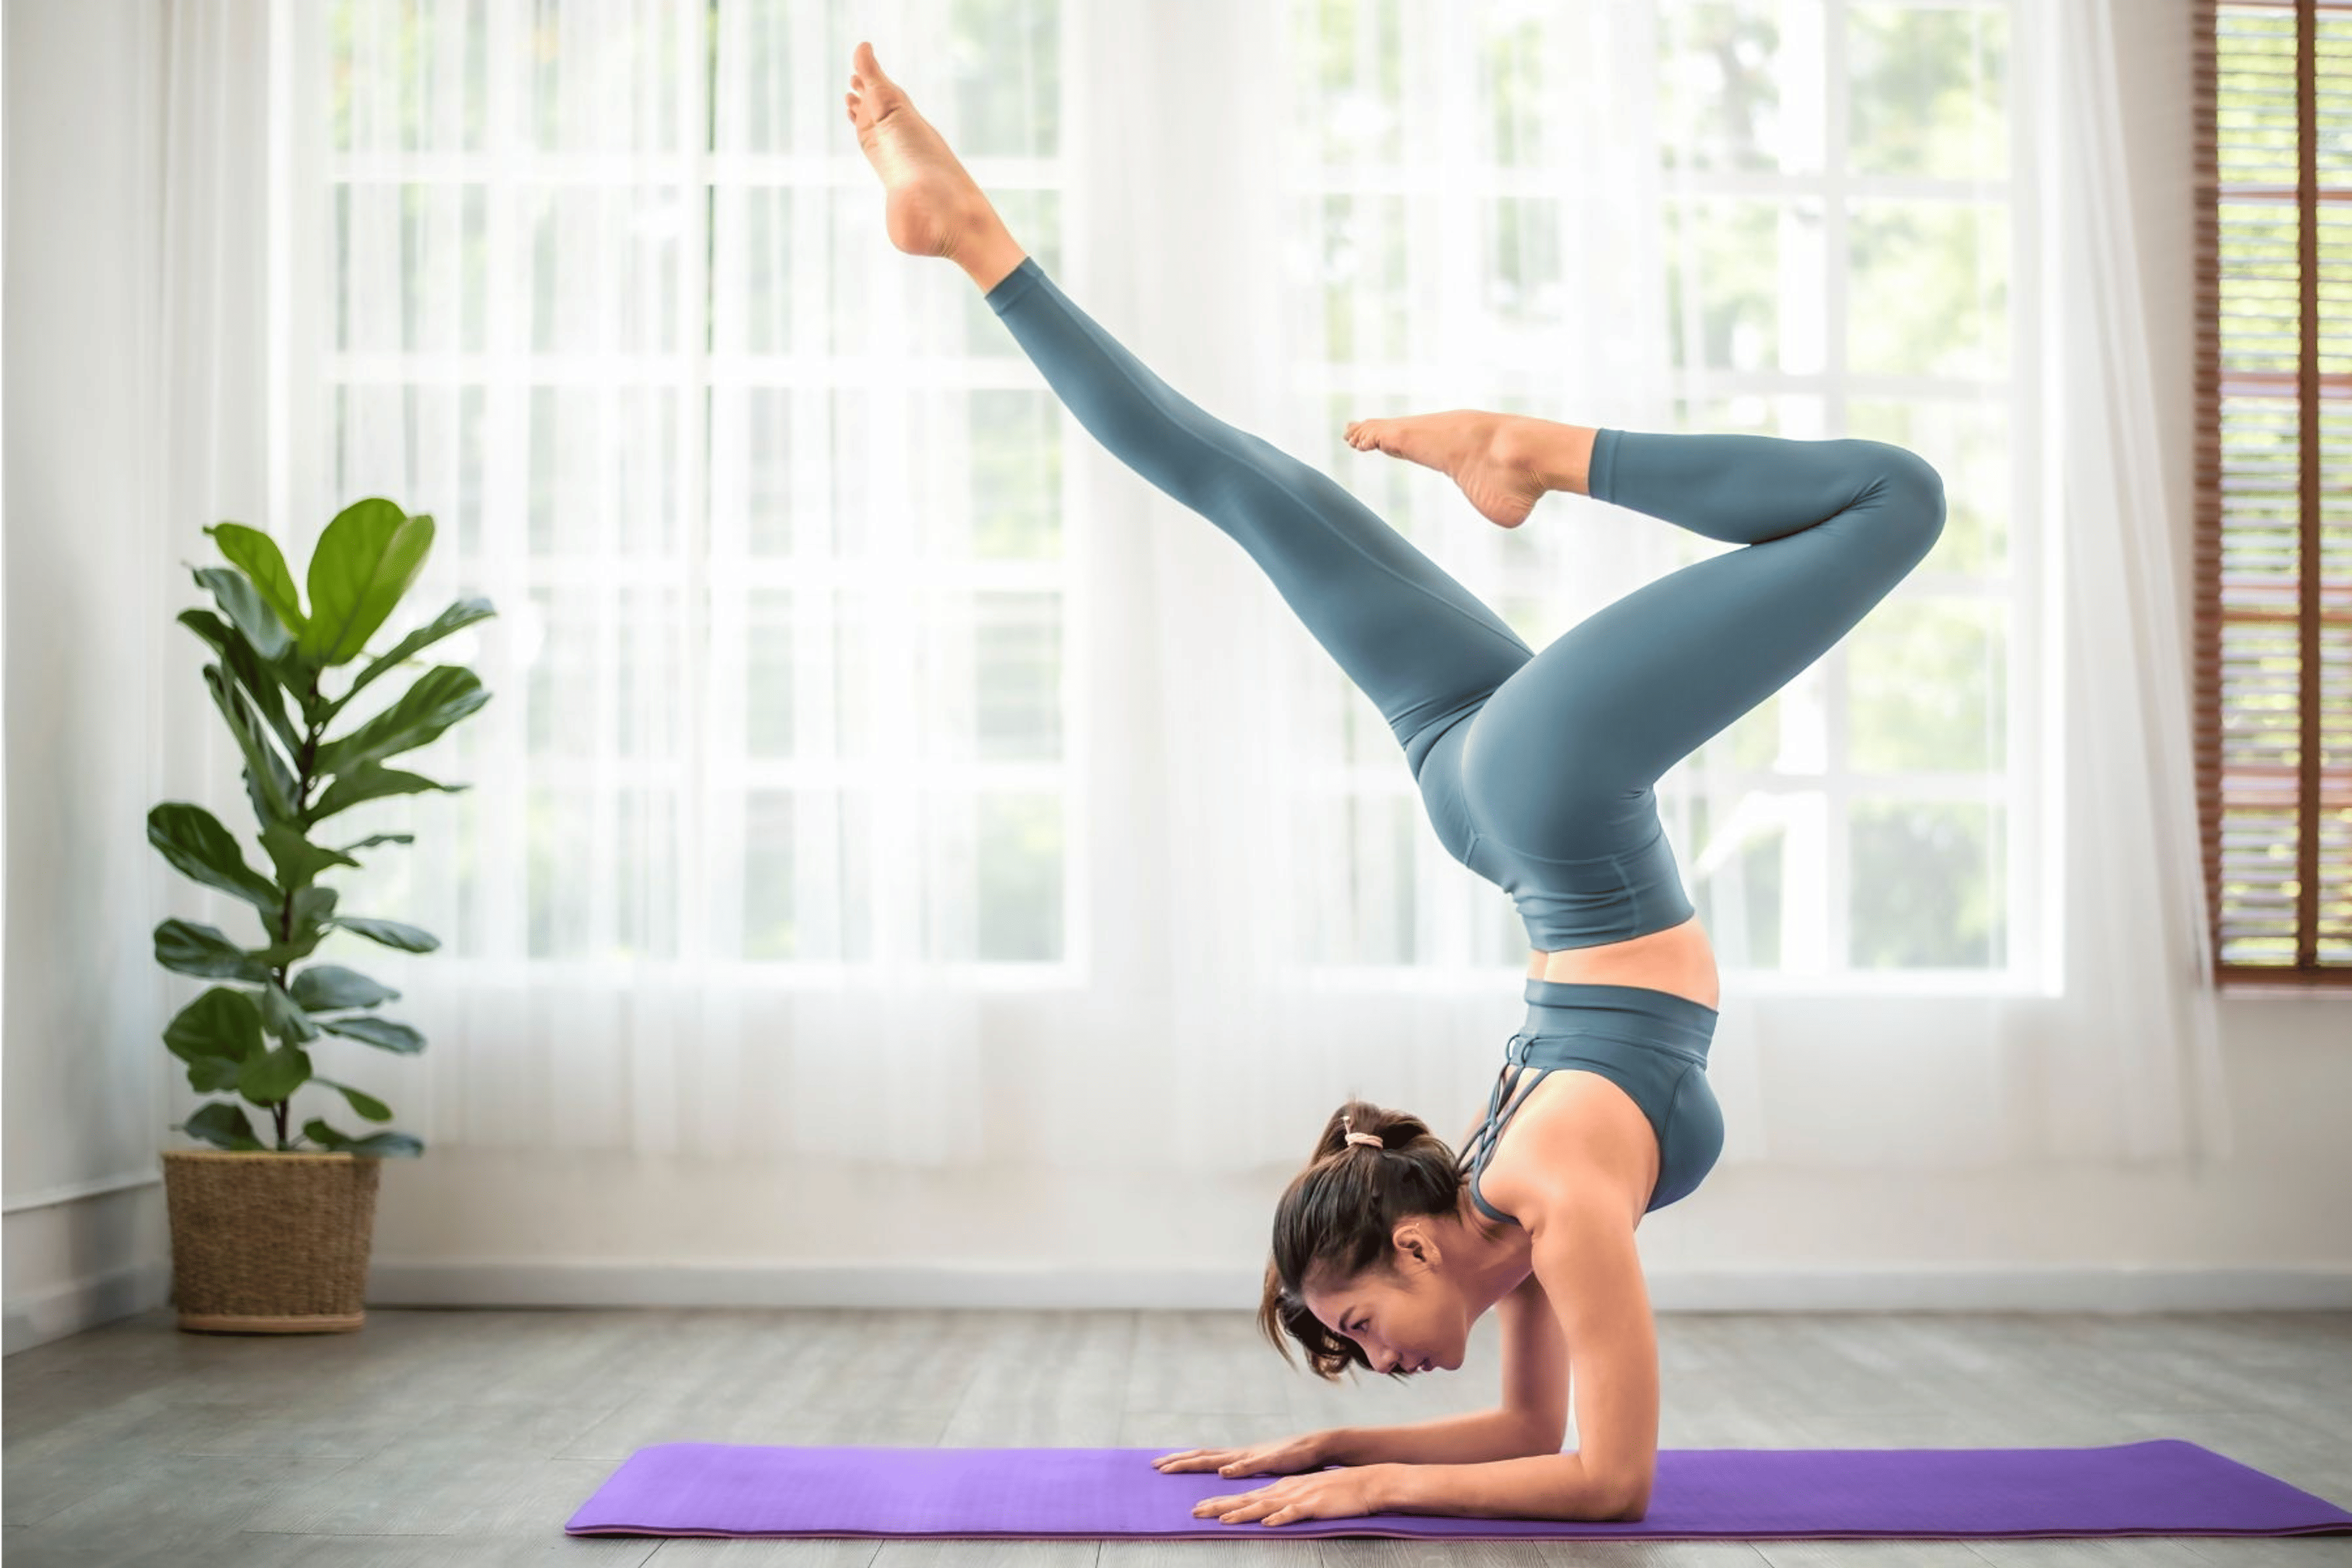
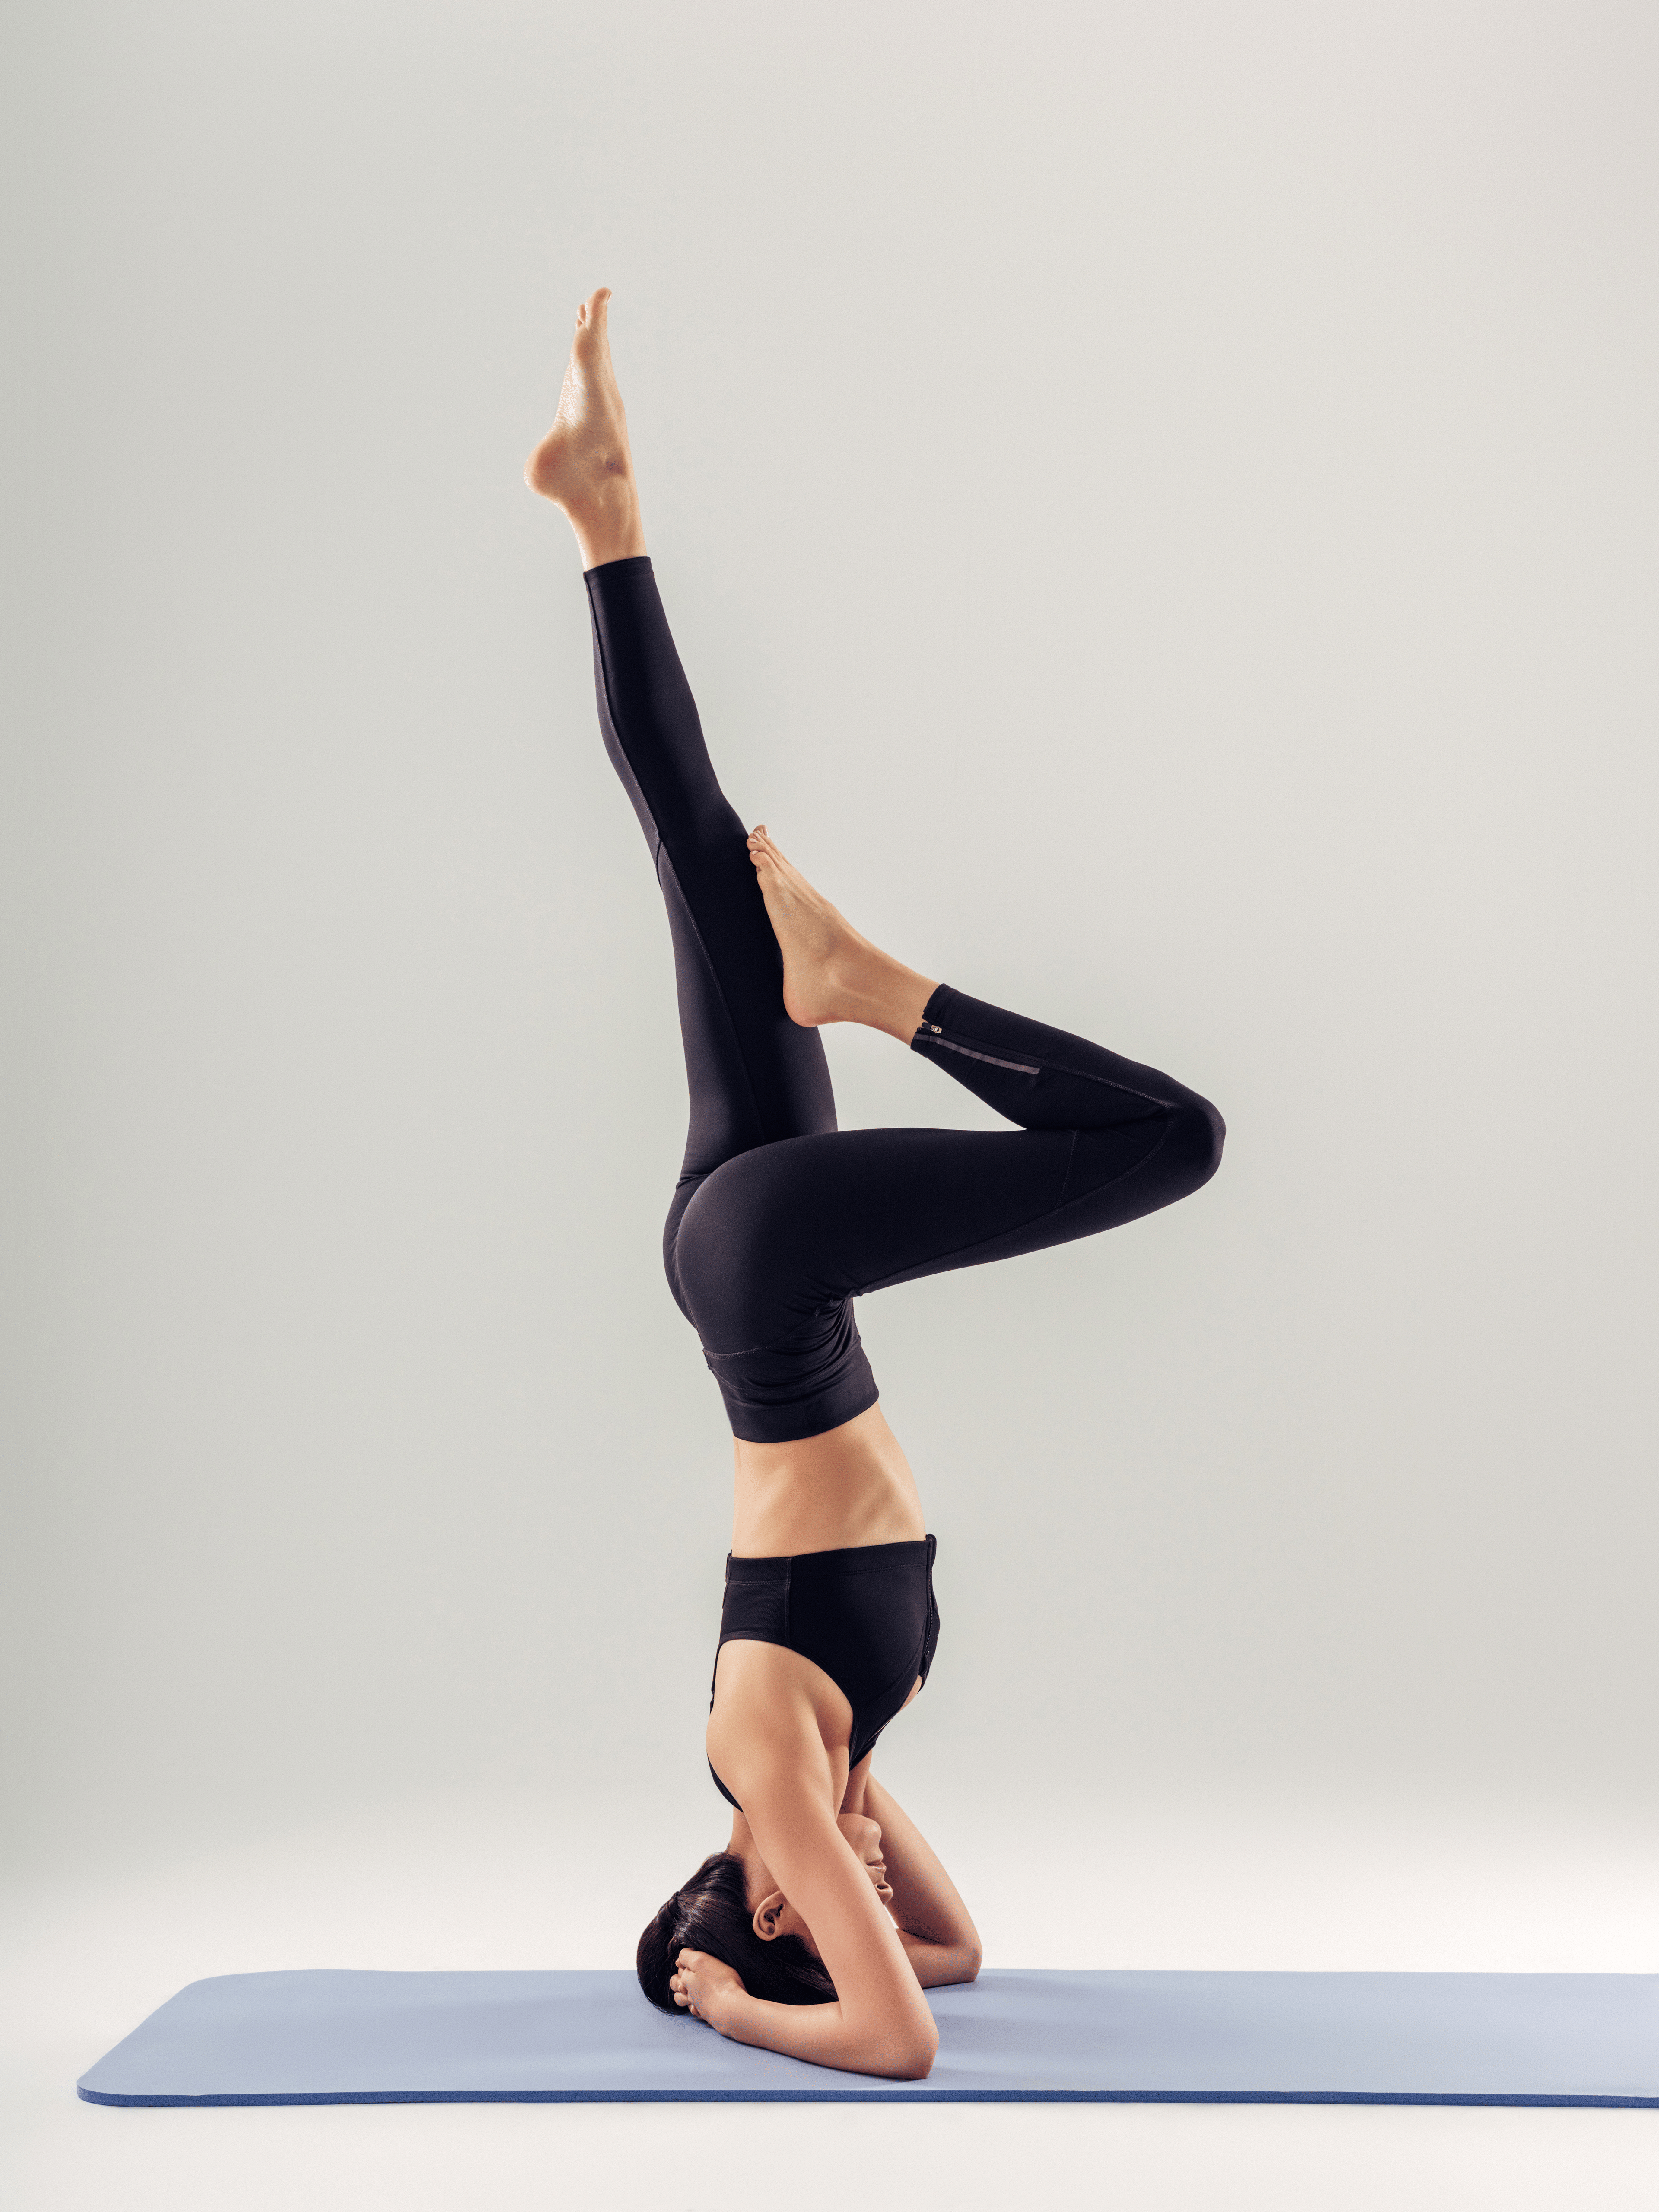
Forearm Stand (Pincha Mayurasana)
Handstand (Adho Mukha Vrksasana)
How to Build Up to Arm Balances in Yoga
The Takeaway
Arm balances are the moon landings of yoga. We’ve all watched someone gracefully defying gravity in an arm balance and thought, I could never do that! So it’s no wonder that the move inspires awe and excitement for yogis of all experience levels.
But believe it or not, the yoga arm balance is more achievable than it seems. In this guide, you’ll learn what makes arm balances so special (and demanding), how to approach them safely, and which foundational poses and practices can help you progress. We’ll break down some of the most popular arm balancing asanas, offering step-by-step instructions and pro tips along the way. So roll out your mat, fire up your courage, and let’s get you a few inches closer to lifting off the ground.
What Are Arm Balances In Yoga?
Yoga arm balances are postures that require you to support the weight of your body predominantly on your hands, forearms, or a combination of your hands and head. “Arm balances require focus, proprioception, control, balance, strength, and mobility,” says Peloton instructor Kirra Michel. “All of which can be challenging on their own, so combining all these elements together becomes very difficult, but not impossible!”
Arm balances can give a big boost to your confidence. Kirra recalls the first time she stood freely on her hands: “I felt wobbly, and extremely accomplished and proud.” That’s why she encourages arm balances as a source of empowerment: “There was still a lot of fear around it for a long time, but I kept practicing until it became very steady,” she says. “I had dedicated so much time to it that when I got it, I felt like I could do anything I set my mind on.”
Ready to explore yoga arm balances for yourself? Let’s look at some of the most popular ones you might see in class.
Crow Pose (Bakasana)

Crow Pose is a more beginner-friendly arm balance because you’re relatively close to the ground, according to Kirra. It requires balance more than raw power or extreme mobility.
Start in a low squat with your feet hip-width apart.
Place your palms on the ground, shoulder-width apart, fingers spread wide.
Bend your elbows slightly and bring your knees toward your armpits or the backs of your triceps.
Slowly shift your weight forward, lifting one foot at a time off the ground.
Engage your core, draw your belly button in, and keep your gaze forward.
Once both feet lift, bring them toward each other.
Breathe steadily and try to hold for a few seconds, then gently release down.
Side Crow (Parsva Bakasana)

This posture is a fun twist (literally!) on Crow Pose because you incorporate a rotational element. It requires you to pivot at your hips, challenging stability in a different plane of motion.
From a low squat, twist your torso to the right and place both palms on the ground, roughly shoulder-width apart, on the right side of your body.
Hug your right thigh toward your torso as your left elbow connects with the outer edge of your right knee or thigh.
Lean forward, shifting more weight into your hands.
Lift your feet off the ground, squeezing your legs together for stability.
Keep your elbows bent at about a 90-degree angle to help support your weight.
Look forward slightly and breathe steadily.
To exit the pose, sit back and put your feet down on the ground.
Relax in Child’s or Garland Pose for a few breaths before moving to the left side.
Crane Pose
fizkes via Getty Images
Crane Pose looks similar to Crow, but your arms are much straighter. It demands more shoulder and core strength than the bent-arm version.
Start in a low squat with your feet hip-width apart.
Shift forward so your knees tuck high up toward your armpits (or upper arms).
Work toward straightening your arms rather than keeping them bent.
Draw your hips upward and engage your lower belly for lift.
Eventually, your elbows should be over your wrists while your arms stack in a straight line.
To exit the pose, sit back to let your feet down on the ground.
Flying Pigeon (Eka Pada Galavasana)

This pose combines the deep hip opening of pigeon pose with an arm balance. If you have tight hips, it’ll be both an arm-balance challenge and a flexibility booster.
From standing, bend your right knee to bring your right ankle on the left quadricep, just above the knee, forming a figure-four shape.
Bend your left knee as if you’re moving into a one-legged chair pose.
Lean forward and place your palms on the ground. Hook your right foot and ankle around your upper right arm.
Bend your elbows and shift your weight forward into your arms, lifting your left foot off the ground.
Engage your core and stabilize your shoulders.
Straighten your left leg straight back behind you if possible, or keep it bent for more control.
To exit, place your feet back on the mat and rest before switching to the other side.
Firefly Pose (Tittibhasana)

Firefly Pose provides a deep hamstring stretch while building arm and core strength. It’s visually impressive and requires a delicate balance of flexibility and power.
Start in a wide stance, feet about mat-width apart.
Fold forward and bend your knees enough to place your hands behind your calves, fingers pointing forward. Inch your shoulders behind your thighs.
Shift weight into your palms, lifting your heels off the mat.
Extend your legs forward, straightening them as much as possible while keeping your thighs on your arms.
Engage your core to keep your hips lifted and your chest elevated.
To exit, bend the knees to place your feet back on the mat to sit on your buttocks.
Eight-Angle Pose (Astavakrasana)
PeopleImages via Getty Images
Eight-Angle Pose offers a unique challenge for your obliques, shoulders, and triceps. It’s often considered a “twisting arm balance,” demanding both core engagement and flexibility in the hips and hamstrings.
Begin seated on the mat with your legs extended.
Draw your right knee toward your chest and work your right shoulder behind your right thigh.
Plant your hands on either side of your hips.
Cross your left ankle over your right, squeezing your legs together.
Bend your elbows and shift your weight forward, lifting your hips and feet off the ground.
Extend your legs to the right side, parallel to the floor, letting the weight of your crossed ankles rest on the back of your arms.
To exit, you can sit down on your buttocks to unravel and rest before switching to the other side.
Forearm Stand (Pincha Mayurasana)
CoffeeAndMilk via Getty Images
Forearm Stand builds serious shoulder and upper back strength while placing less pressure on your wrists compared to full Handstand. It’s also a great way to practice balancing upside-down without compressing your neck.
Start in Dolphin Pose (like Downward-Facing Dog but on your forearms). Your forearms should be parallel on the mat, shoulder-width apart.
Walk your feet in toward your elbows, lifting your hips high.
Shift your shoulders over your elbows.
Kick up one leg at a time, finding balance with both legs up (or scissor the legs if that’s easier).
Maintain a neutral spine and engage your core.
Gaze between your forearms or slightly forward.
Come down one leg at a time.
Handstand (Adho Mukha Vrksasana)
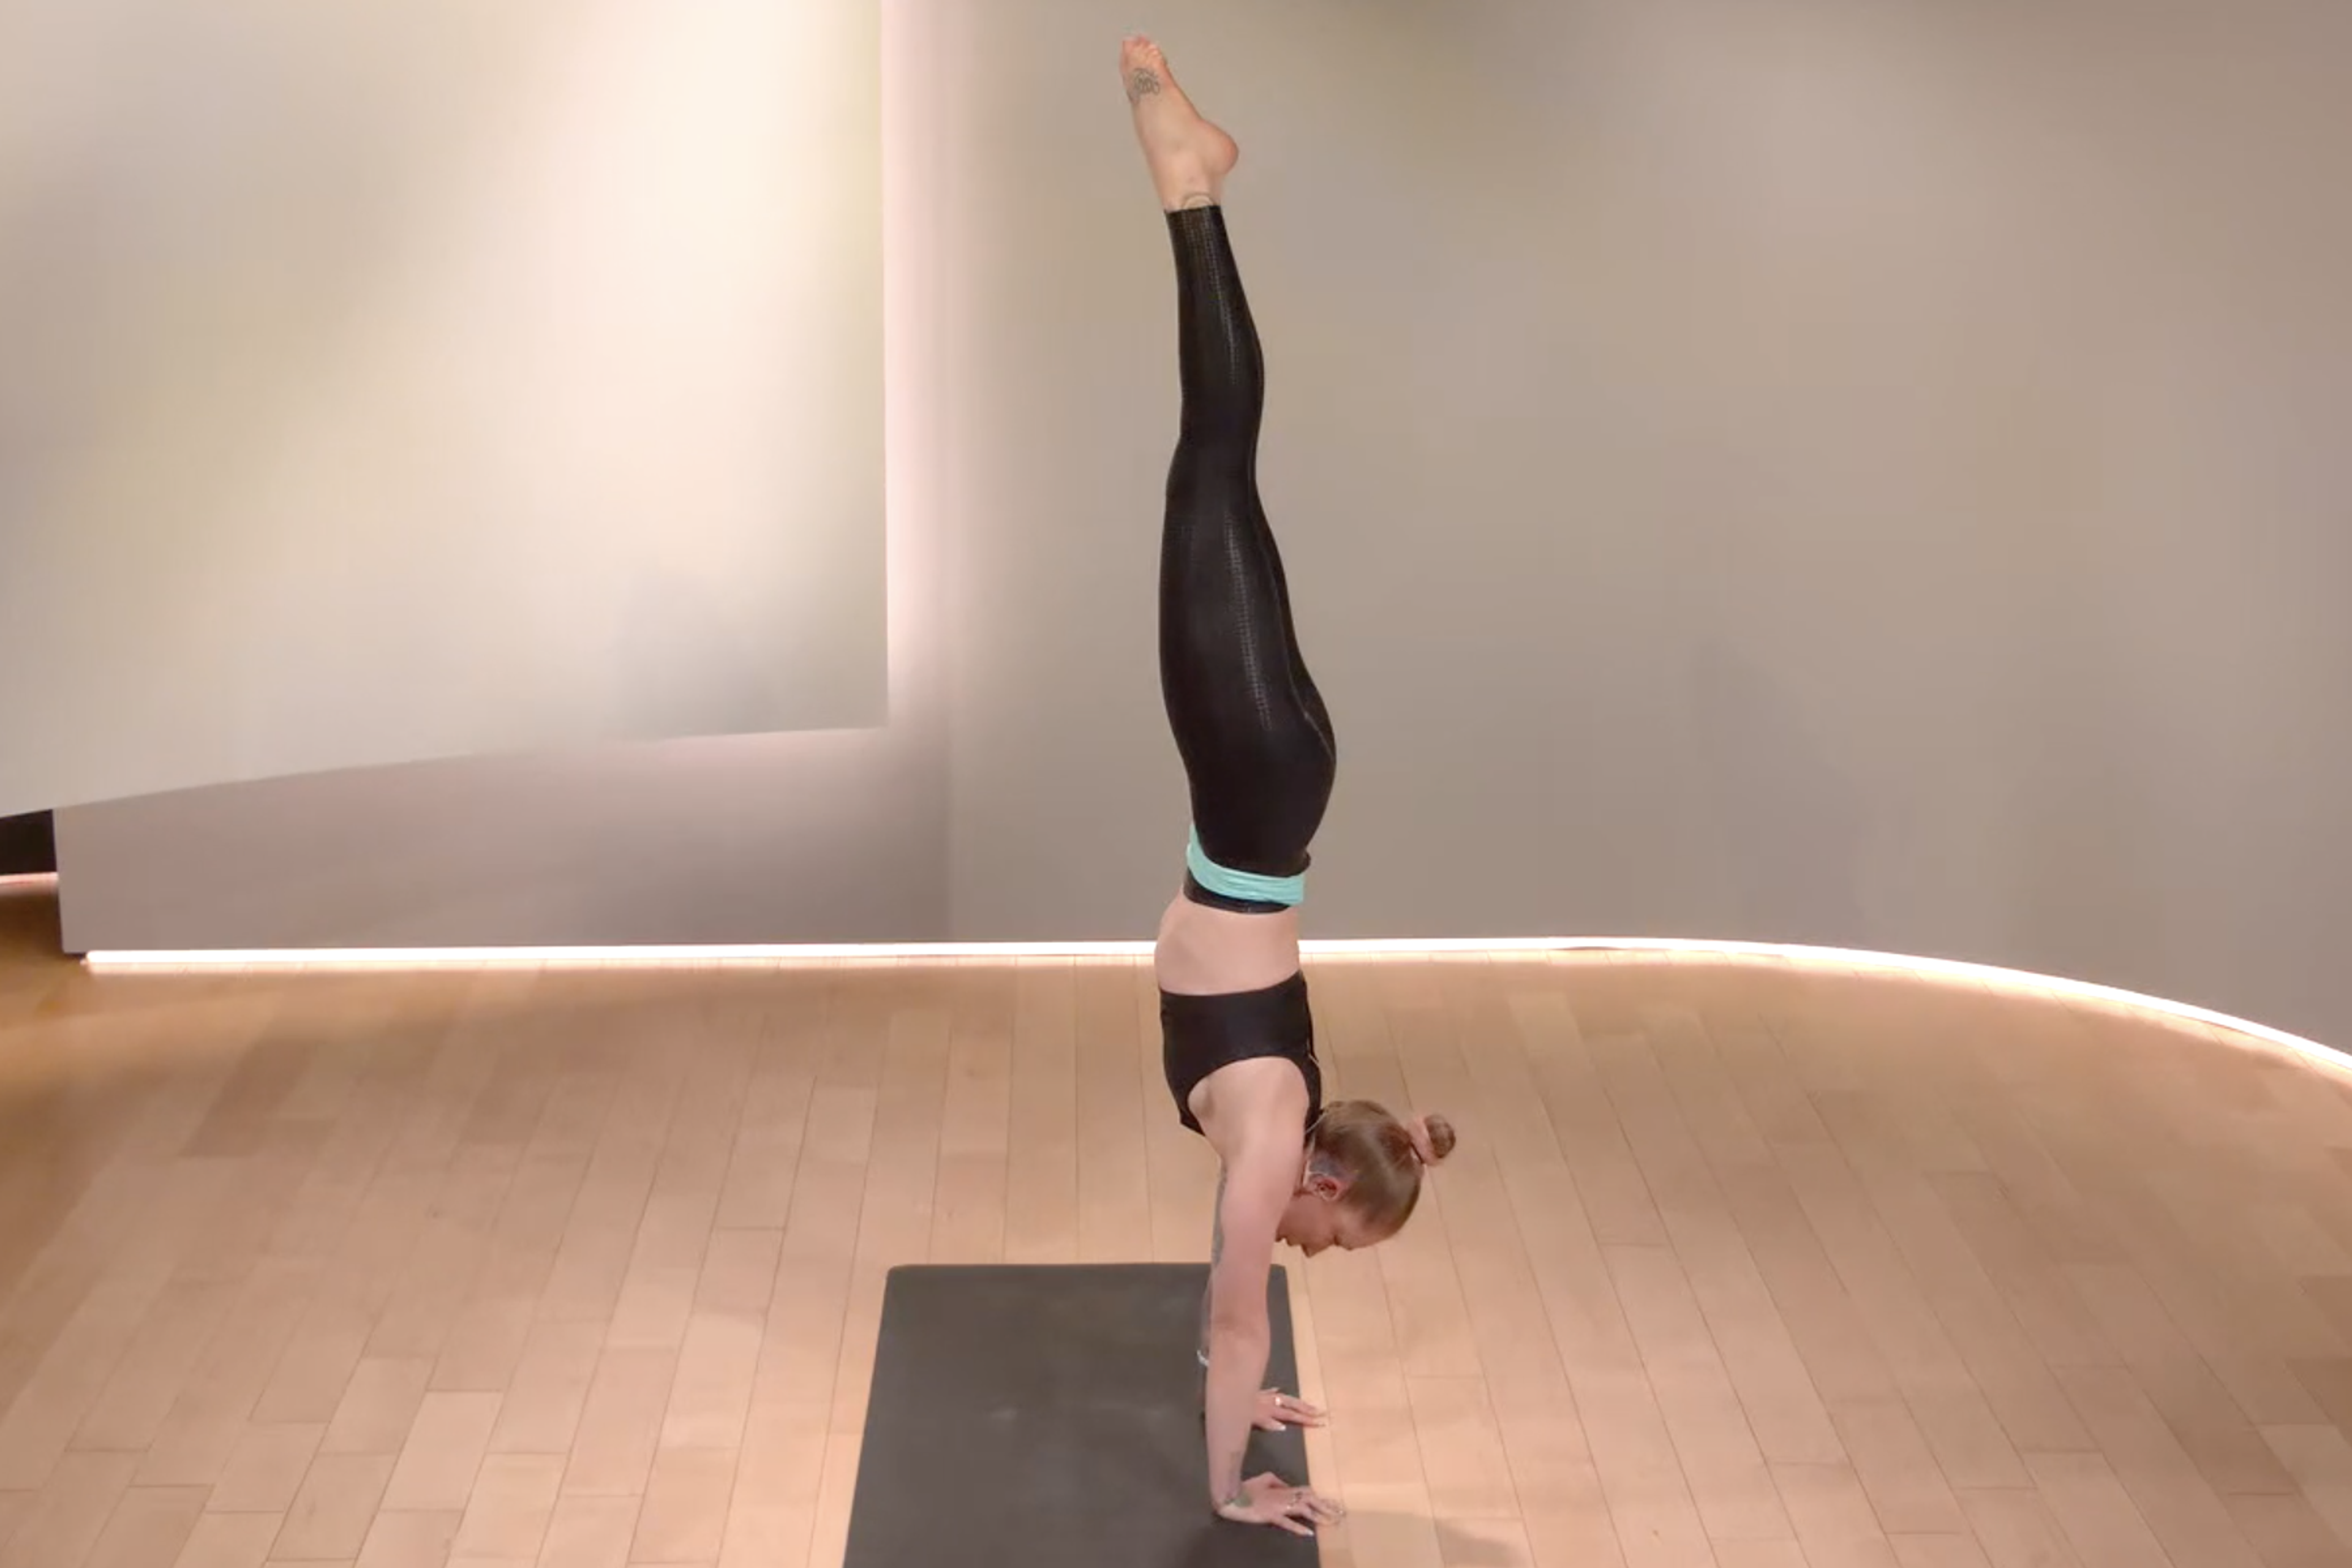
The quintessential showstopper in yoga, Handstand is the ultimate blend of power, alignment, and focus. While it might look intimidating, consistent practice of preparatory poses can get you there safely.
Begin in Downward-Facing Dog, hands shoulder-width apart, fingers spread wide.
Shift your shoulders over your wrists, stacking them in a straight line.
Gently kick up one leg, followed by the other, or hop both legs up together if you have more experience.
Keep your core and glutes engaged to prevent your back from arching.
Press the ground away through your palms.
Gaze between your hands or slightly forward.
Come down one leg at a time and rest to catch your breath.


How to Build Up to Arm Balances in Yoga
As you can see, arm balances require strength, flexibility, technique, and a positive attitude. “Start with a strong foundation,” Kirra says. “Be humble and understand your strengths and weaknesses, and work on your weaknesses whether it’s strength, flexibility, mobility, etc.”
Here are Kirra’s top tips to safely and effectively work toward these advanced postures.
1. Strengthen Your Foundation
Focus on core poses like Plank, Chaturanga, and Downward-Facing Dog to build the strength and stability needed for arm balances. Consistent practice in these foundational shapes helps refine alignment and prepare your body for more advanced moves.
2. Use Props
“Use props—the wall, blocks, a strap, a blanket, or pillow,” Kirra says. Props can build muscle memory and offer support. For example, a bolster can ease you into Crow Pose, while a wall provides stability for Handstand or Forearm Stand as you build confidence.
3. Target Mobility and Flexibility
Many arm balances, like Flying Pigeon and Firefly, require open hips and flexible hamstrings. Incorporate Lizard Lunge, Half Splits, and Garland Pose into your routine, and work on shoulder mobility to protect and support your joints during balancing poses.
4. Record Yourself
Kirra recommends recording your practice. “It helps you see where you can make adjustments,” she says. Watching yourself can reveal alignment issues or habits, such as flaring elbows in Crane Pose or disengaged core muscles in Forearm Stand, allowing you to refine your technique.
5. Work With a Teacher One-on-One
Personal instruction can accelerate progress. Kirra suggests working with a yoga teacher who understands the mechanics of arm balances to address misalignments and build confidence safely.
6. Target Specific Poses In Your Practice
Take classes that focus on the arm balances you want to master. Kirra highlights Peloton’s Discover Yoga collection, the Path to Inversion with Kirra program, and Focus Flow classes that break down poses like Crow, Handstand, and Forearm Stand into step-by-step progressions.
7. Be Realistic About Your Level
“If you consider yourself an intermediate practitioner, start taking advanced classes and modify as much as you need to,” Kirra says. Remember, progress isn’t linear, so honor the small victories and embrace challenges as learning opportunities.
8. Practice, Practice, Practice
Repetition and consistency are key to mastering arm balances, so dedicate time each week to refine your technique. “Become (healthily) obsessed!” Kirra says.

Peloton App
Access thousands of classes with no equipment needed.
The Takeaway
So are you ready to fly? Keep these core principles in mind: Start with strong foundations, cultivate your flexibility, embrace props, seek guidance, and stay consistent. From practicing Crow Pose for the first time to completing Kirra’s Path to Inversion program, each tiny breakthrough will move you one step closer to flight. Remember to celebrate your progress—even if it’s just lifting your toes off the ground—and let yourself feel empowered with what you can achieve on the mat. We can’t wait to see you soar!


This content is for informational and educational purposes only and does not constitute individualized advice. It is not intended to replace professional medical evaluation, diagnosis, or treatment. Seek the advice of your physician for questions you may have regarding your health or a medical condition. If you are having a medical emergency, call your physician or 911 immediately.

Level up your inbox.
Subscribe for a weekly dose of fitness, plus the latest promos, launches, and events.
By providing your email address, you agree to receive marketing communications from Peloton.
For more about how we use your information, see our Privacy Policy.