How to Master the V-Sit for Stronger Abs, Obliques, and Hip Flexors
Want a stronger core? Incorporating this one exercise into your workout routine will help get you there.
By Emily Laurence•
What Is a V-Sit?
What Muscles Are Worked by V-Sits?
The Benefits of Doing V-Sits
How to Do a V-Sit
Common Mistakes to Avoid When Doing a V-Sit
V-Sit Modifications and Variations
V-Sit Progression: Exercises to Master Prior
How to Add V-Sits to Your Workout Routine
If you want to take your workouts to the next level, having a strong core is key. Strengthening your ab muscles helps stabilize your body when you’re cycling, prevents back strain when you’re lifting weights, and can even add speed to your runs.
Discover more ways to reach your goals with Peloton


One particularly popular ab exercise is the v-sit. In one move, the v-sit targets the abdominal muscles, obliques, and hip flexors. It’s effective—which is why you’ll find it in many Peloton classes. In order to get the full benefits of the move, it’s important to know how to do it properly, including modifications to make it easier or harder, depending on your individual ability and needs.
What Is a V-Sit?
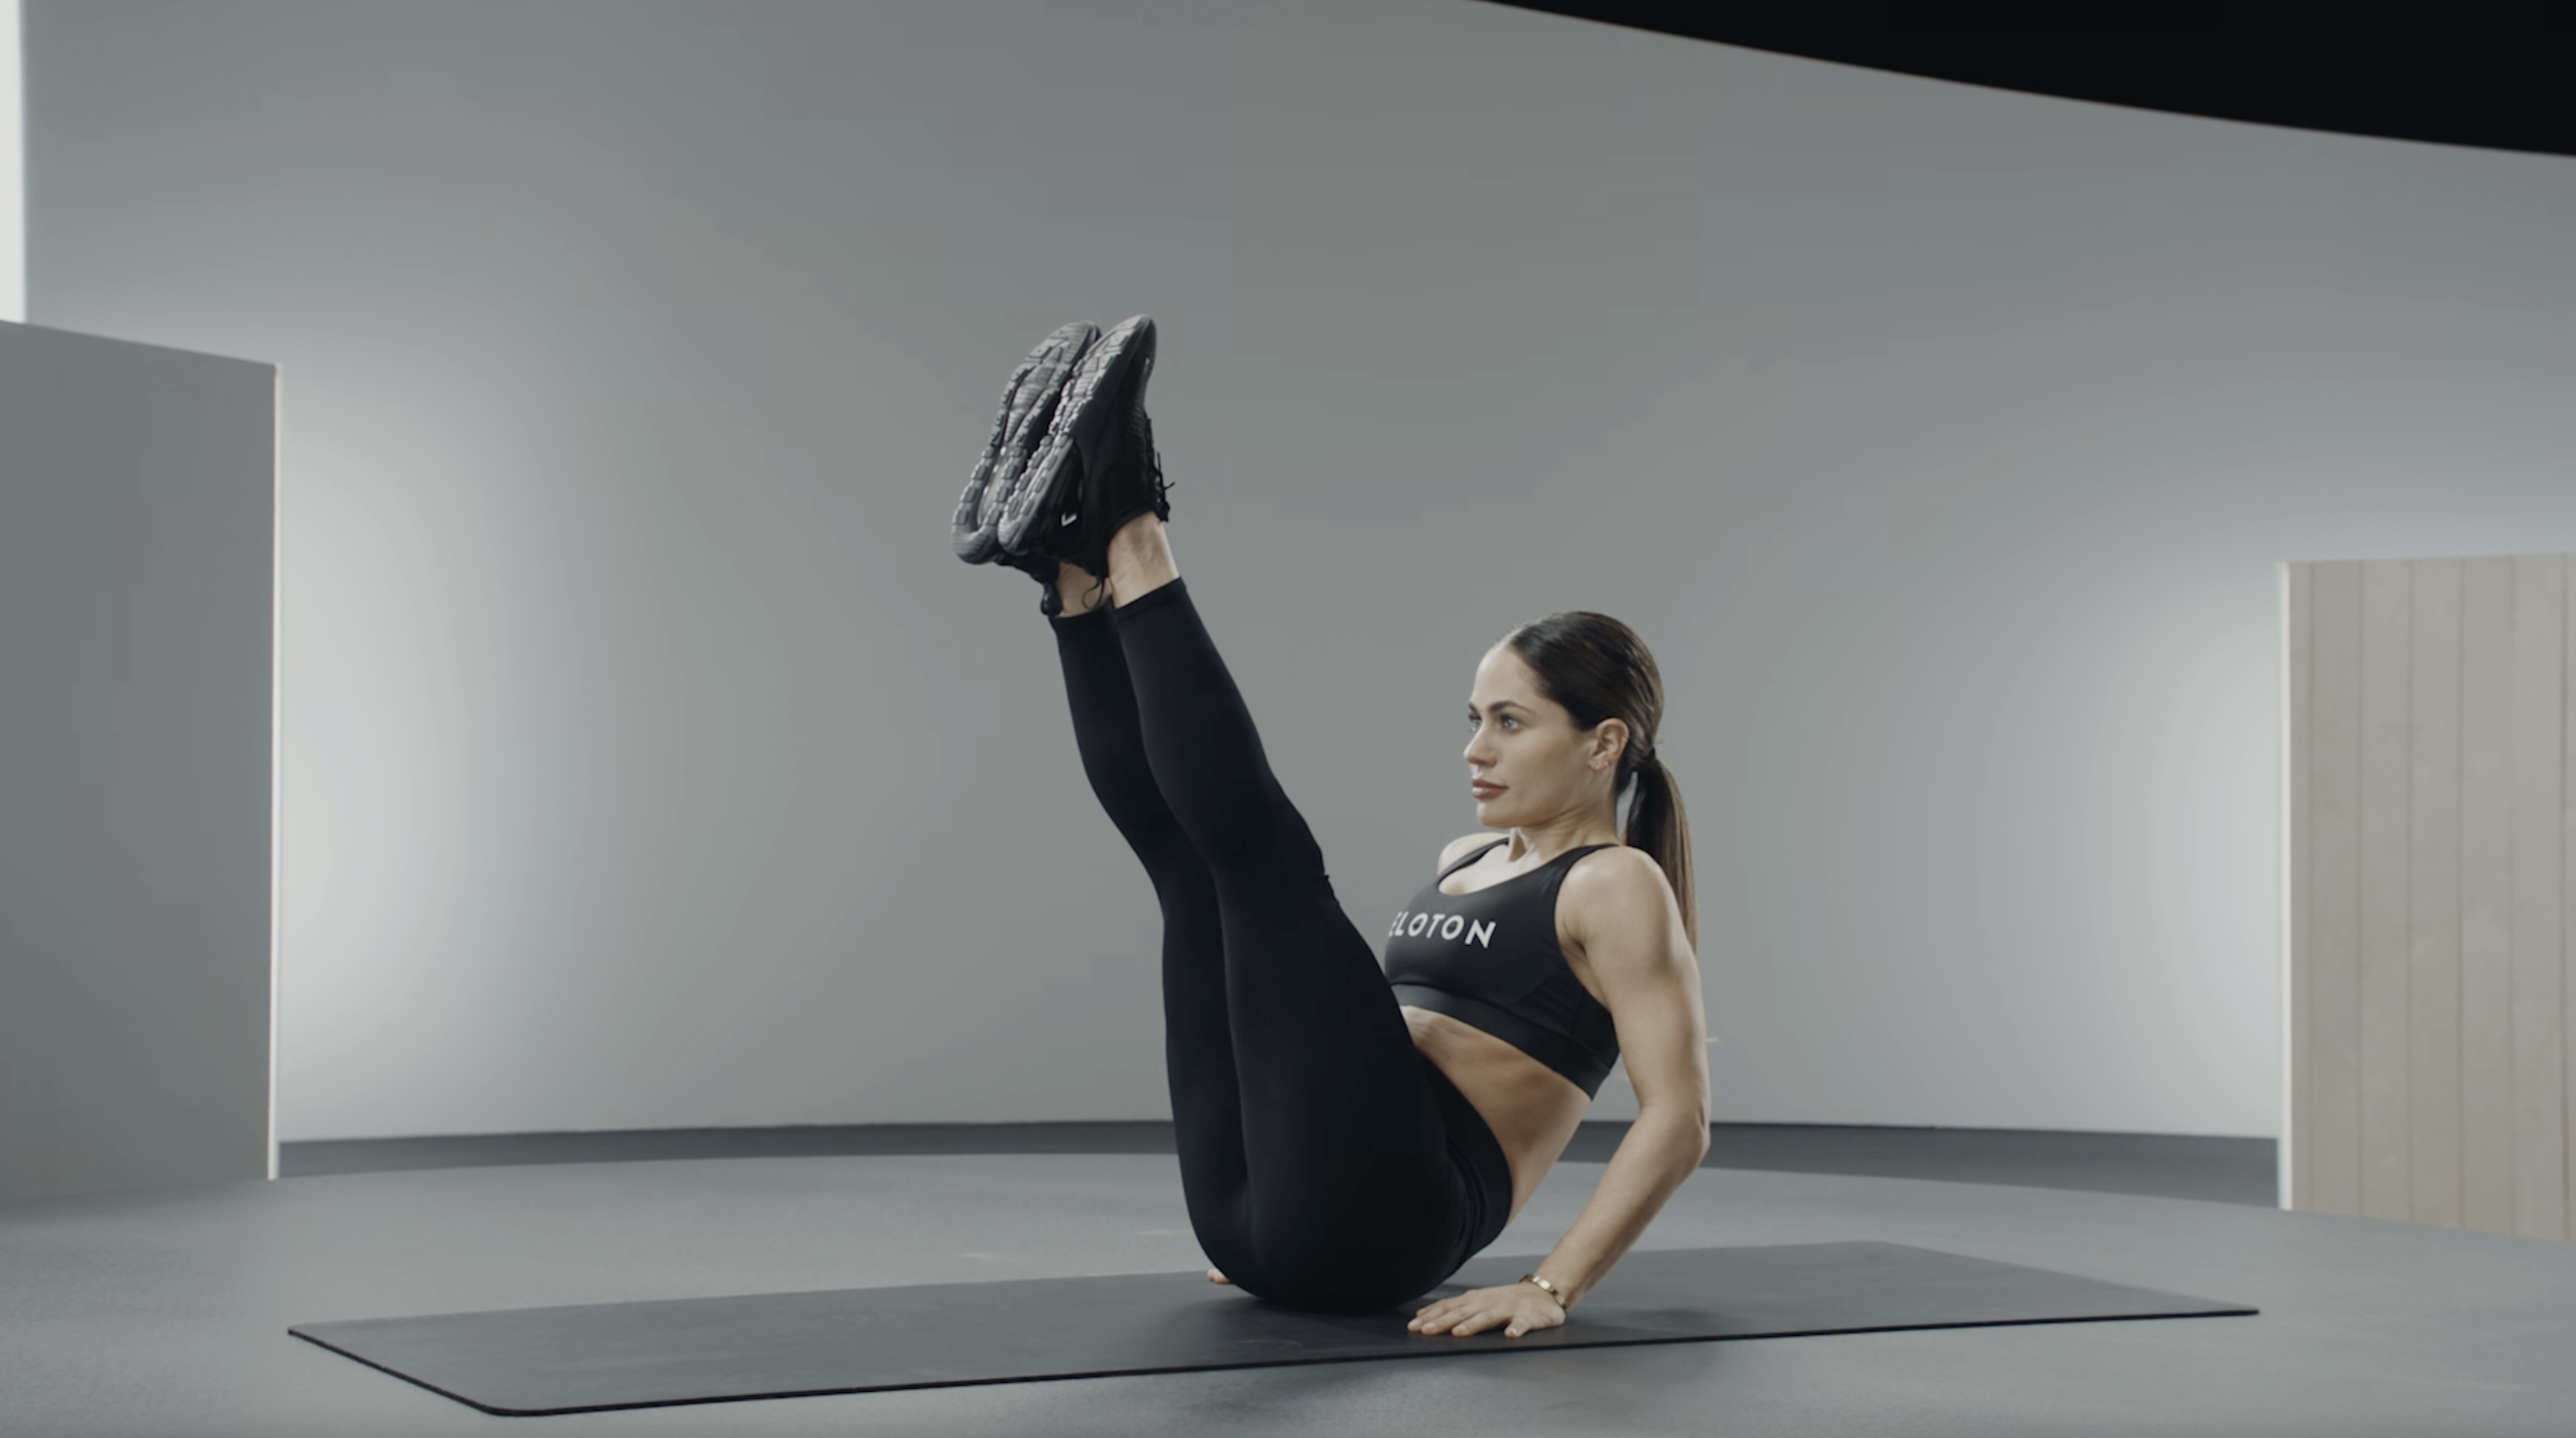
“A v-sit is a core stability and strength move,” says Robin Arzon, Peloton’s VP of Fitness Programming and Head Peloton Instructor. Robin explains that the v-sit gets its name because you’re making your body into a “V” while doing it, by balancing on your tailbone and extending the legs out at a 45 degree angle. “It’s a very challenging move,” she says.
The v-sit requires stillness; you aren’t continuously moving as you would in some other ab exercises, like mountain climbers or flutter kicks. Because of this, Robin explains, another benefit of the v-sit is improving balance.
Is a Hollow Hold the Same Thing as a V-Sit?
If you’re first learning about the v-sit, it may sound similar to another ab exercise, the hollow hold. The two moves are similar, but they do have some differences. “The v-sit is similar to a hollow hold, but with the hollow hold, the body is fully extended whereas with the v-sit, the legs are at a 45 degree angle and the arms are parallel to the floor,” Robin says. Another difference is that while in a v-sit, the tailbone is the point of contact on the floor while in a hollow hold, the low back maintains contact with the floor.
A hollow hold is done by lying flat on your back with the legs in a table-top position. Then you tilt the pelvis slightly up so the small of your back is pressed to the mat. Once in position, extend both legs while keeping your low back on the ground. Extend your arms overhead. Hold for 30 seconds.
The v-sit and hollow hold are both effective ab strengthening exercises, so your core will become stronger regardless of which one you choose. You can also do both!
What Muscles Are Worked by V-Sits?
Robin explains that every time you do a v-sit, you’re targeting several different areas of the core, all of which are listed below:
Rectus abdominis: This is the top layer of ab muscles. When people talk about a “six pack,” these are the muscles they are referring to.
Deep Core: The deep core muscles help support the body and include the multifidus (located in the back and helps stabilize the spine), quadratus lumborum (the deepest back muscle), psoas (located on either side of the vertebral column), and deep fascicles of the erector spinae (the primary muscles used when lifting).
Transverse abdominis: These muscles are located between the ribs and pelvis, wrapping around the trunk from front to back.
Obliques: Two pairs of muscles on either side of the torso.
Hip flexors: A group of muscles at the front of the hips.
The Benefits of Doing V-Sits
As you can see, the v-sit doesn’t just target one core muscle; it hits a whole bunch, which is a major benefit of doing this move. As Robin explained, what makes v-sits so great is that they strengthen ab muscles and improve balance at the same time.
Having a strong core helps maintain posture and balance both in daily life and while you do other workouts, such as lifting weights or cycling. It helps take your workouts to the next level because maintaining proper form requires less exertion, energy you can use to fuel your workout.
Strengthening your ab muscles also helps to protect against back pain. In fact, core strengthening exercises are often recommended to people with chronic low back pain as a way to strengthen their deep trunk muscles and alleviate their pain.
Another benefit of v-sits is that they don’t require any equipment whatsoever. You can do them at home while watching TV, in your hotel room while traveling, or even outside in the park.

How to Do a V-Sit
Are you hyped up and ready to do a v-sit? Here’s how to master it, one step at a time.
1. Start By Sitting Down
The first step to doing a v-sit is sitting down with your legs straight out in front of you. “Engage your core gently by leaning back a couple of inches,” Robin says.
2. Balance On Your Tailbone
Robin emphasizes that this step is key for doing a v-sit correctly. Balance on your tailbone while slowly lifting your legs, extending them up into a 45 degree angle. You can keep your fingertips on the floor on either side of you for stability until you feel steady enough to lift them off the floor.
3. Extend Your Arms
Next, Robin says to extend your arms out so they are parallel to the ground. Hold the move for 30 seconds before bringing your legs back down to the floor and coming out of the move. While holding the move, don’t forget to continue breathing, taking slow, steady breaths.
Common Mistakes to Avoid When Doing a V-Sit
There are a few common mistakes Robin often sees people making when doing a v-sit. After all, this move is tricky! “Since this move requires balance, it’s hard to maintain proper form,” she says.
One common mistake Robin says people make is rounding their back and hunching their shoulders forward. This, she says, can cause lower back pain. To avoid this mistake, make sure your spine is straight the entire time you’re doing the move and your shoulders aren’t creeping up toward your ears or forward. “Keep a straight line from your shoulders to your low back and avoid hunching forward,” Robin says.
While doing the v-sit, Robin says to make sure your core is engaged; this is a core move, after all. “You can really get optimal core engagement by imagining that you’re exhaling through a straw and blowing out 1,000 birthday candles. You want audible exhalations and in those exhalations, you’re going to feel your core contract,” she says.

V-Sit Modifications and Variations
It bears repeating that the v-sit is not an easy move. It’s completely natural to have to work up to it. If the v-sit is inaccessible to you right now, there are ways to make it easier while still getting the benefits.
To make a v-sit easier, Robin says to bend your knees instead of fully extending the legs in step two. Another way to modify it, she says, is to prop yourself up on your forearms. In both of these modifications, you are still targeting your ab muscles; it just takes some of the pressure off. “You can also modify this move by alternating raising the legs to a 45 degree angle, holding that leg for a few seconds and then switching legs,” Robin says.
Want to make the v-sit even harder? Robin says you can do this by lifting your arms higher so that your biceps are next to your ears.
V-Sit Progression: Exercises to Master Prior
If you want to work up to the v-sit, there are other exercises you can do first that will help you get there. Robin says one great place to start is doing leg raises by keeping your head, neck and shoulders on the mat and then lifting and lowering the legs together at the same time.
Another exercise move that can help with progressing toward a v-sit are side lunges. “Side lunges engage and strengthen the inner thighs, which is what you want to activate during a v-sit,” she says.
Another v-sit progression move is the side plank. “This move helps you [target] the obliques, which are really working during a v-sit,” Robin says.
The jackknife exercise move can also help with working toward v-sits. “The jackknife is basically a v-sit in motion. You’re eliminating the balancing component, which can be really challenging for folks,” Robin says. To do a jackknife, lie completely flat on your back. Then, extend the arms and legs out at a 45 degree angle. Come back to the starting position.
How to Add V-Sits to Your Workout Routine
Core strengthening moves like the v-sit are perfect for incorporating into a pre-exercise warm up, two to five times a week. According to Peloton instructor Emma Lovewell, activating the ab muscles before a cycling or strength class makes you more likely to use them, as previously reported in The Output. But if you don't have time for a full workout, that’s okay too. You can do this move when taking a short break from work or even when watching TV. No matter when you do the v-sit, your body will benefit.
Remember, the v-sit isn’t easy, so be patient with yourself if you can’t get it done the first time you do it or can’t hold it for very long. Use the v-sit progression exercises to work up to it and, if necessary, modify the move to make it more accessible to you. Over time, you’ll notice your core becoming stronger, which will increase your performance during your other workouts.

Peloton App
Access thousands of classes with no equipment needed.
This content is for informational and educational purposes only and does not constitute individualized advice. It is not intended to replace professional medical evaluation, diagnosis, or treatment. Seek the advice of your physician for questions you may have regarding your health or a medical condition. If you are having a medical emergency, call your physician or 911 immediately.

Level up your inbox.
Subscribe for a weekly dose of fitness, plus the latest promos, launches, and events.
By providing your email address, you agree to receive marketing communications from Peloton.
For more about how we use your information, see our Privacy Policy.