Release Tight Hip Flexors with These 10 Must-Have Mobility Moves
Tight hip flexors could be why you’re in pain or slowing your progress.
By Eric Arnold, Team Peloton•
Symptoms of Tight Hip Flexors
What Causes Tight Hip Flexors?
10 Hip Mobility Exercises to Try
The Benefits of Improving Your Hip Mobility
How Tight Hip Flexors Affect Your Performance
Is Walking Good for Tight Hip Flexors?
The Takeaway: You Need a Hip Mobility Routine
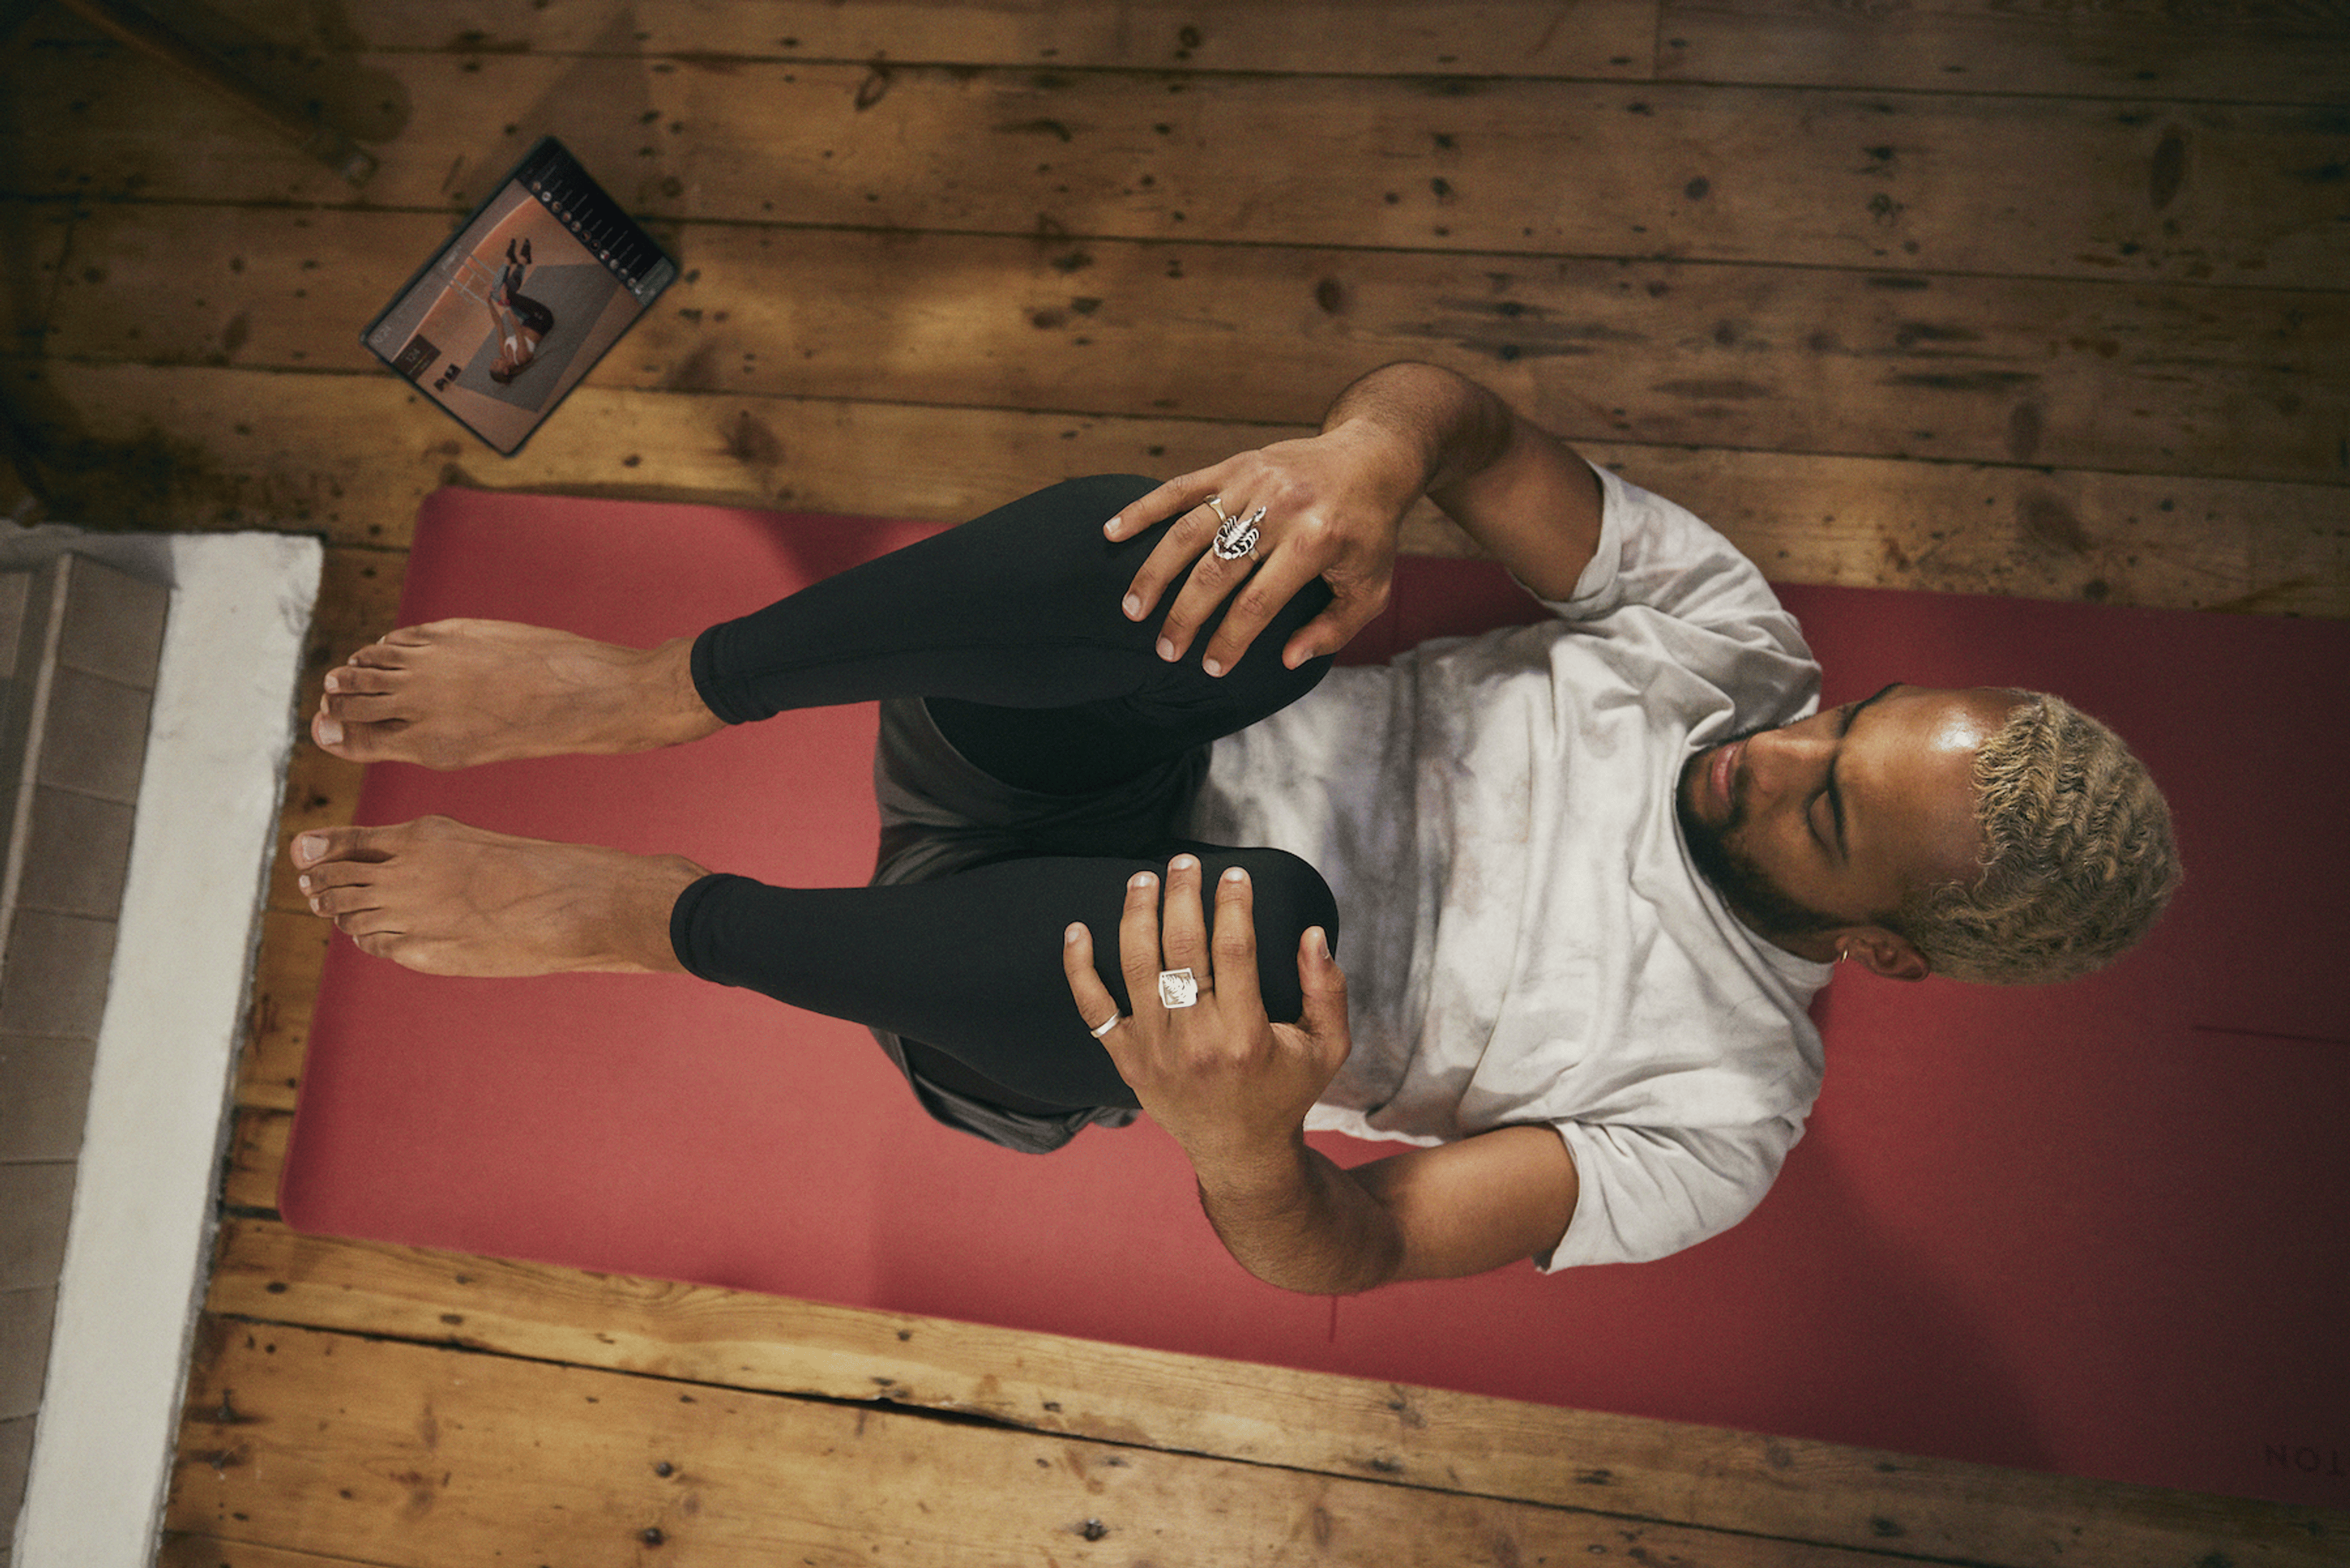
When you spend a lot of time running, cycling, or even just sitting still at your job, your hip flexors—the group of muscles that run down the front of your leg—probably start feeling uncomfortably stiff. If you’re not doing hip mobility exercises, you’ll likely end up with tight hip flexors, which can limit you during certain movements and hold back your overall progression—whether you’re trying to hit a PR, training for a marathon, or just want to put in a good sweat every so often.
The good news is, there are sure signs when they might give you trouble. So if you know the causes of tight hip flexors, you have a better shot of not only loosening them, but preventing them from impeding your progress in the first place.

Peloton App
Access thousands of classes with no equipment needed.
Symptoms of Tight Hip Flexors
Hip flexors are a tricky group of muscles because they can cause several other symptoms that don’t indicate the source of the problem. Peloton instructor Kirra Michel notes that the pain “might show up as an achy back, difficulty standing upright, or pain in your glutes or knees. Keep in mind the tightness and flexibility is relative—and individual for each person.”
Signs of tight hip flexors may include:
Sudden or sharp hip pain
Neck tightness or pain
An ache in your lower back
Pain in the front of your hips while walking
Poor posture or difficulty standing up straight
Pain in the glutes or knees
Inability to extend your legs behind you
Discomfort when lying down
In other words, everyone who’s relatively active is likely to experience some symptom of tight hip flexors—obvious or not. That’s why one of the keys to preventing hip flexor pain is understanding—and always being mindful of—the causes of tight hip flexors.
What Causes Tight Hip Flexors?
Believe it or not, one of the main culprits isn’t pushing yourself too hard for that PR on a day your body wasn’t ready for it. Both Kirra and Peloton instructor Hannah Corbin point to inactivity as one of the primary causes of tight hip flexors, followed by overuse of the muscles.
“It's both comical and obnoxious that the two main reasons are the opposite of one another: sitting too long and overuse or repetitive movement,” says Hannah. Both she and Kirra agree that sitting at a desk for too long, driving, or lolling on the couch will tighten you up.
“Running and cycling can be a cause if you aren’t stretching,” says Kirra. “And honestly, any activity where you’re not being mindful of the movement could cause tightness. Hip tightness is usually the body reacting to poor postural patterns.”
So, yes, we all should have listened to our parents when we were younger about maintaining that proper posture. Calling them now and apologizing, however, will only get you so far. Instead, focus on how to release tight hips.
10 Hip Mobility Exercises to Try
First, Kirra recommends a couple good, spur-of-the-moment remedies you can use at any time, pretty much anywhere.
1. Hip CARs
1. Get on all fours and pull one knee into your chest as you round your spine, then open your knee out to the side, keeping your foot in alignment with the knee.
2. Then, internally rotate (think knee down, foot up) as you pull your knee behind you, then pull your knee back up to your chest.
Do three to five reps per side. (You can also do Hip CARs standing up, and just hold onto something to stabilize yourself as you bring one knee to your chest.)
2. 90/90 Hip Stretches
1. Sit on the floor and place one leg in front of you and the other behind, with both your knees bent at 90-degree angles.
2. Lean forward slightly and hold the position for at least 30 seconds—you will most definitely feel your hips stretching and loosening. Lift your torso back up, switch your legs around, and lean forward again.
Hannah recommends also regularly incorporating five longer hip mobility exercises into your regular routine. You can find all—and variations of them—in her 10-minute hip stretch, 10-minute foam rolling and 20-minute lower-body mobility classes. For all five, you need a specific piece of equipment where indicated, such as a ball, foam roller, or block.
3. Lacrosse Ball Release
For this one, you need any hard ball—lacrosse ball, cue ball, baseball, anything.
1. Lay on your back, lift one leg up, bend that knee, and put your foot on top of your other knee, making a vertical figure-four.
2. Twist your hips slowly toward the side of your outstretched leg, and place the ball under your glute, then roll your body back onto the ball and let your knee flop to the side, so your legs are in a true, horizontal figure-four—with the hard ball under one cheek.
3. Leave it there for a minute or so, then move it up or down about an inch, depending on how you feel, and leave it there for another minute. Then, switch sides.
The pressure of the ball on your glute works wonders for your hip.
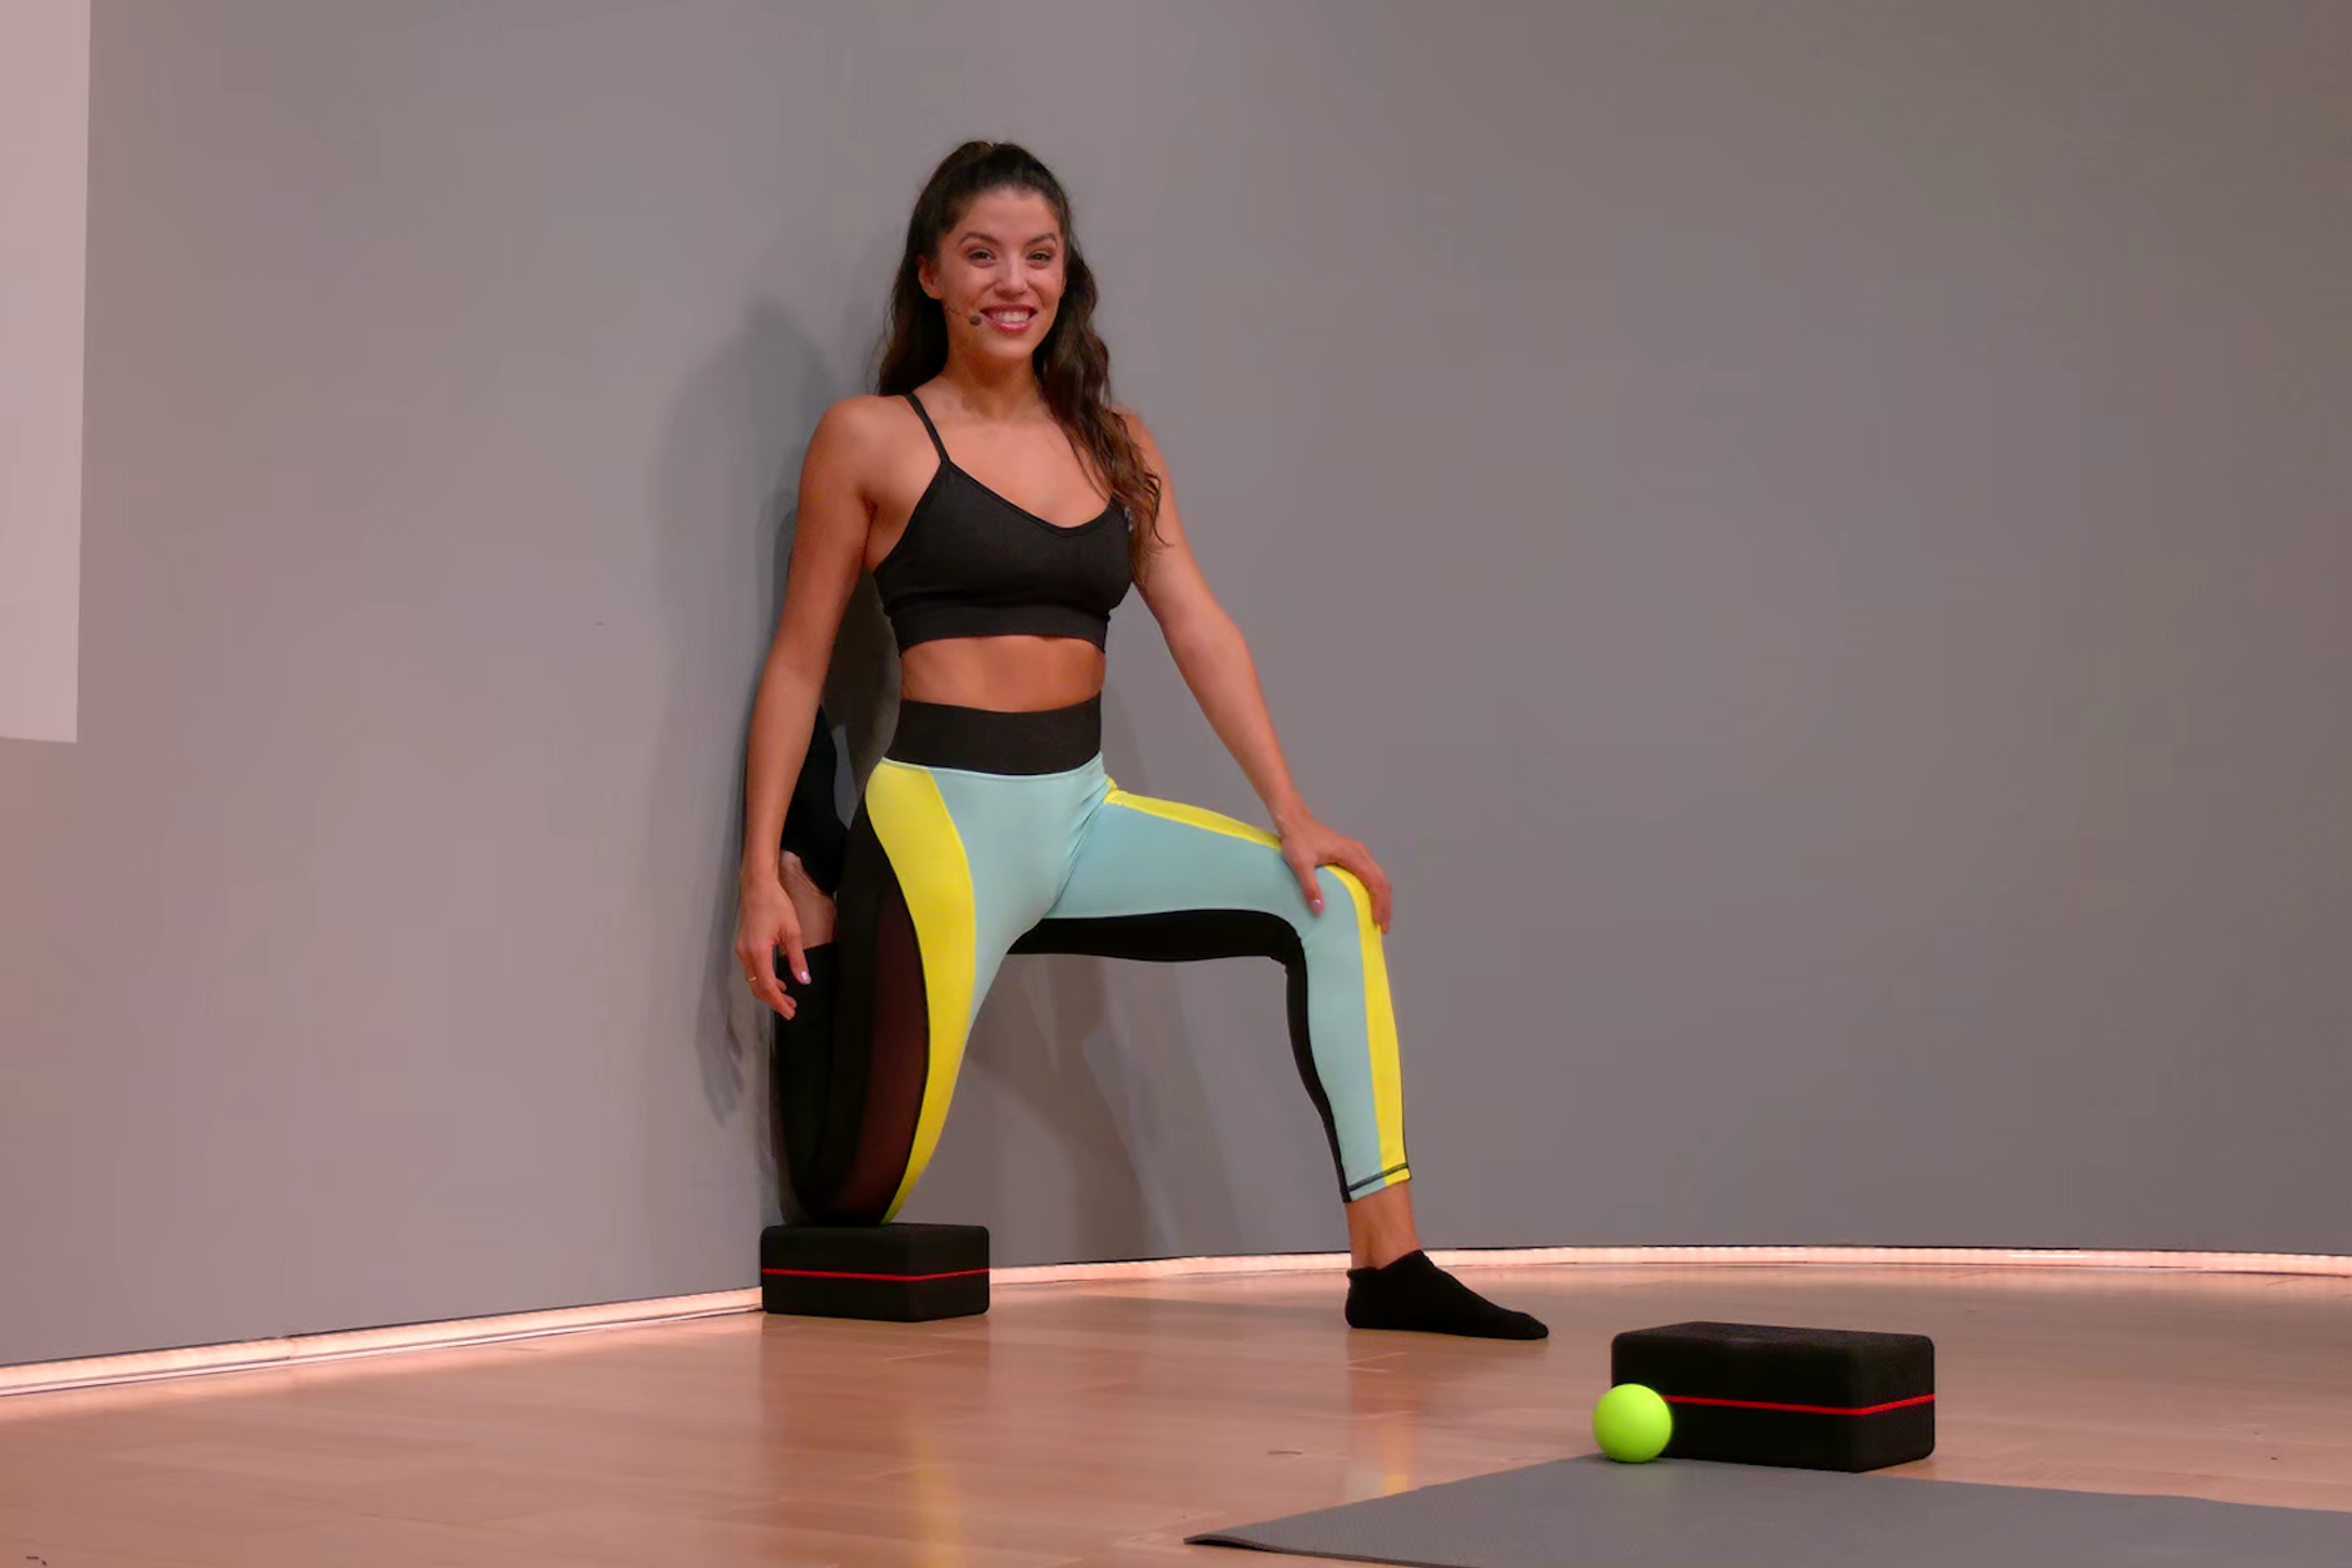
4. Epic Quad Stretch
Now get your foam block or a small towel.
1. Put the block against the wall and your knee on top of it, so your shin and foot are vertical, straight up along the surface of the wall behind you, knee driving into the ground.
2. Your other foot should be on the ground in front of you, knee bent at a 90-degree angle (like a lunge). Make sure your upper body is perfectly straight up—fix that posture!—and hold the stretch for a minute or so. Then switch sides.
5. Passive Release (Hamstrings and Calves)
Now it’s time to get your foam roller and lay on your back.
1. Slide the roller under you, perpendicular to your body, just under the bottom of your butt with your legs extended, so your feet are a few inches off the ground.
2. Spread your legs and then start to close them slowly, with your big toes pointed toward each other. You should feel your hips rotated inward as you bring your feet closer together.
3. Now spread your legs again slowly, this time with your toes and hips pointed outward. Move the roller down a couple inches toward your toes and move in and out again, rolling the hips.
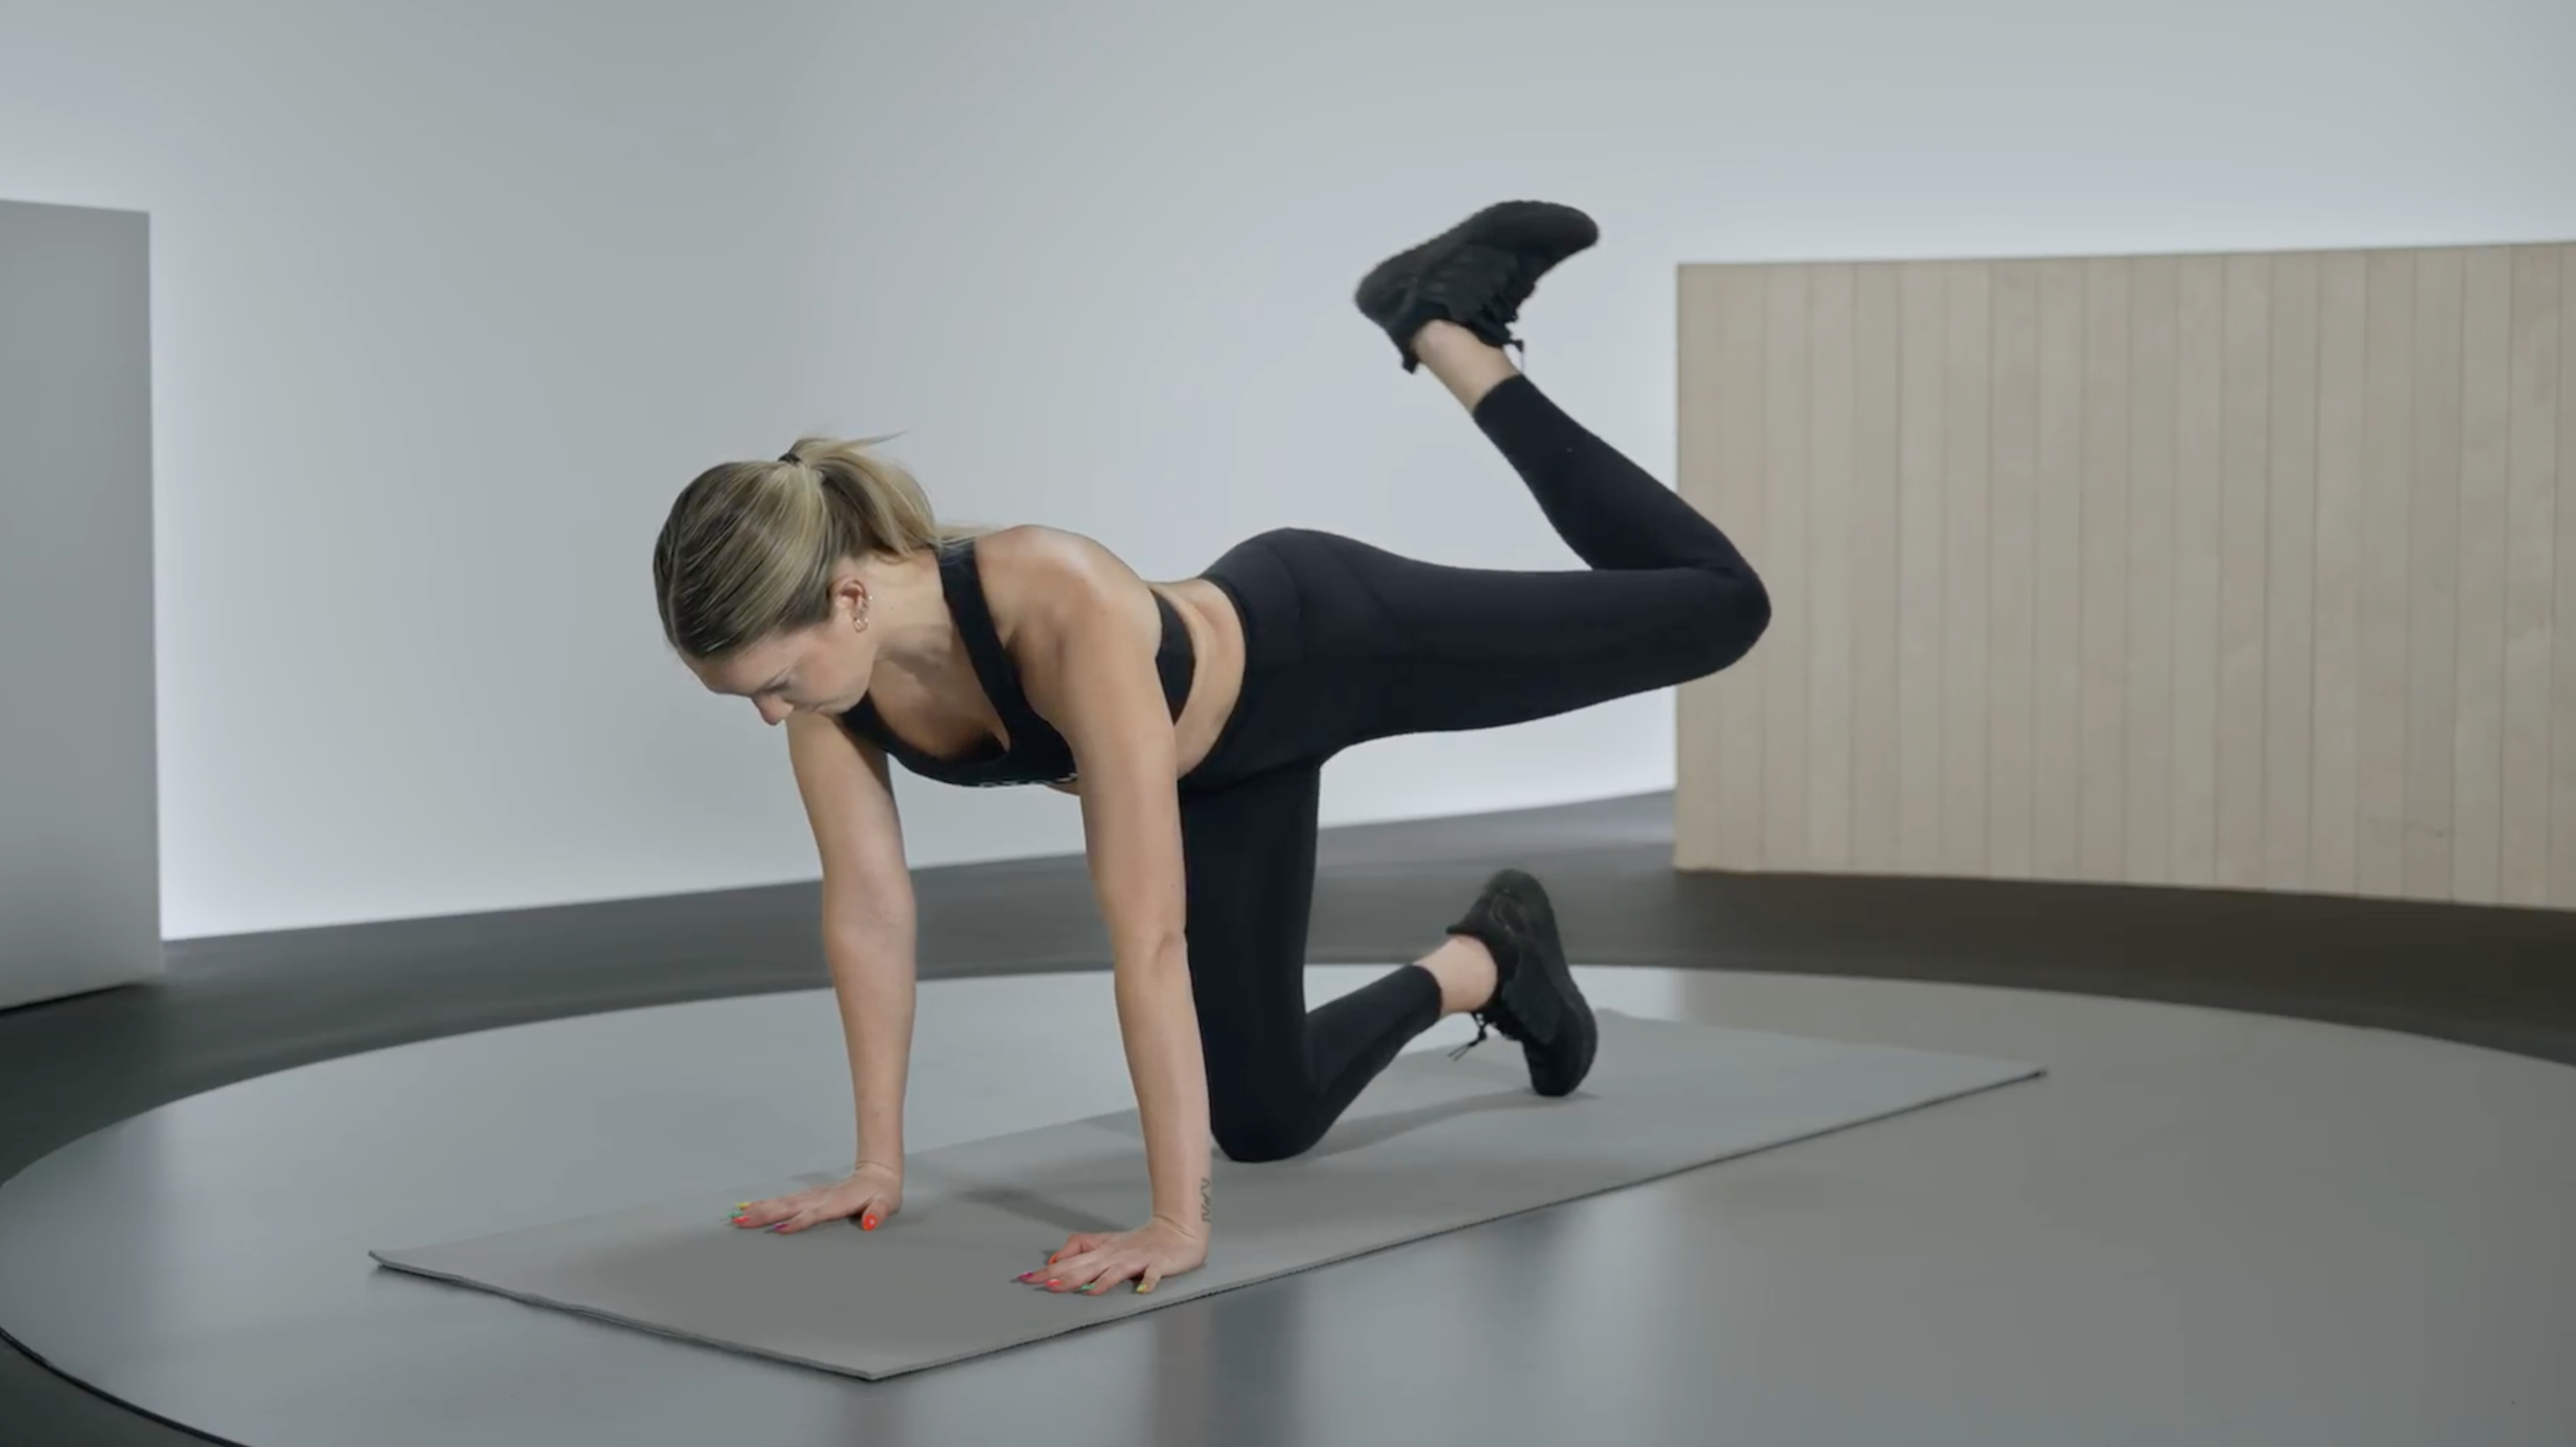
6. Passive Release (Fronts of Your Legs)
1. Place the foam roller directly under your glutes, so your hips are in the air.
2. Then, pull one thigh at a time into your chest, as tightly as you can, and extend the other leg up at a 45-degree angle. It’s almost like a bicycle crunch in slow motion, since one leg at a time comes in and the other is out.
3. Just hold each stretch into your body for about 30 seconds, as many times as you need to.
7. Rolling Your Back
Remember how tight hip flexors can send pain to your lower back? This will be a big help.
1. Put the foam roller under your lower back, bend your knees, and put your hands behind your head—just like you’re about to do crunches.
2. Slowly roll your body up and down the roller, so it goes from your lower back all the way up to your shoulders, and back down again.
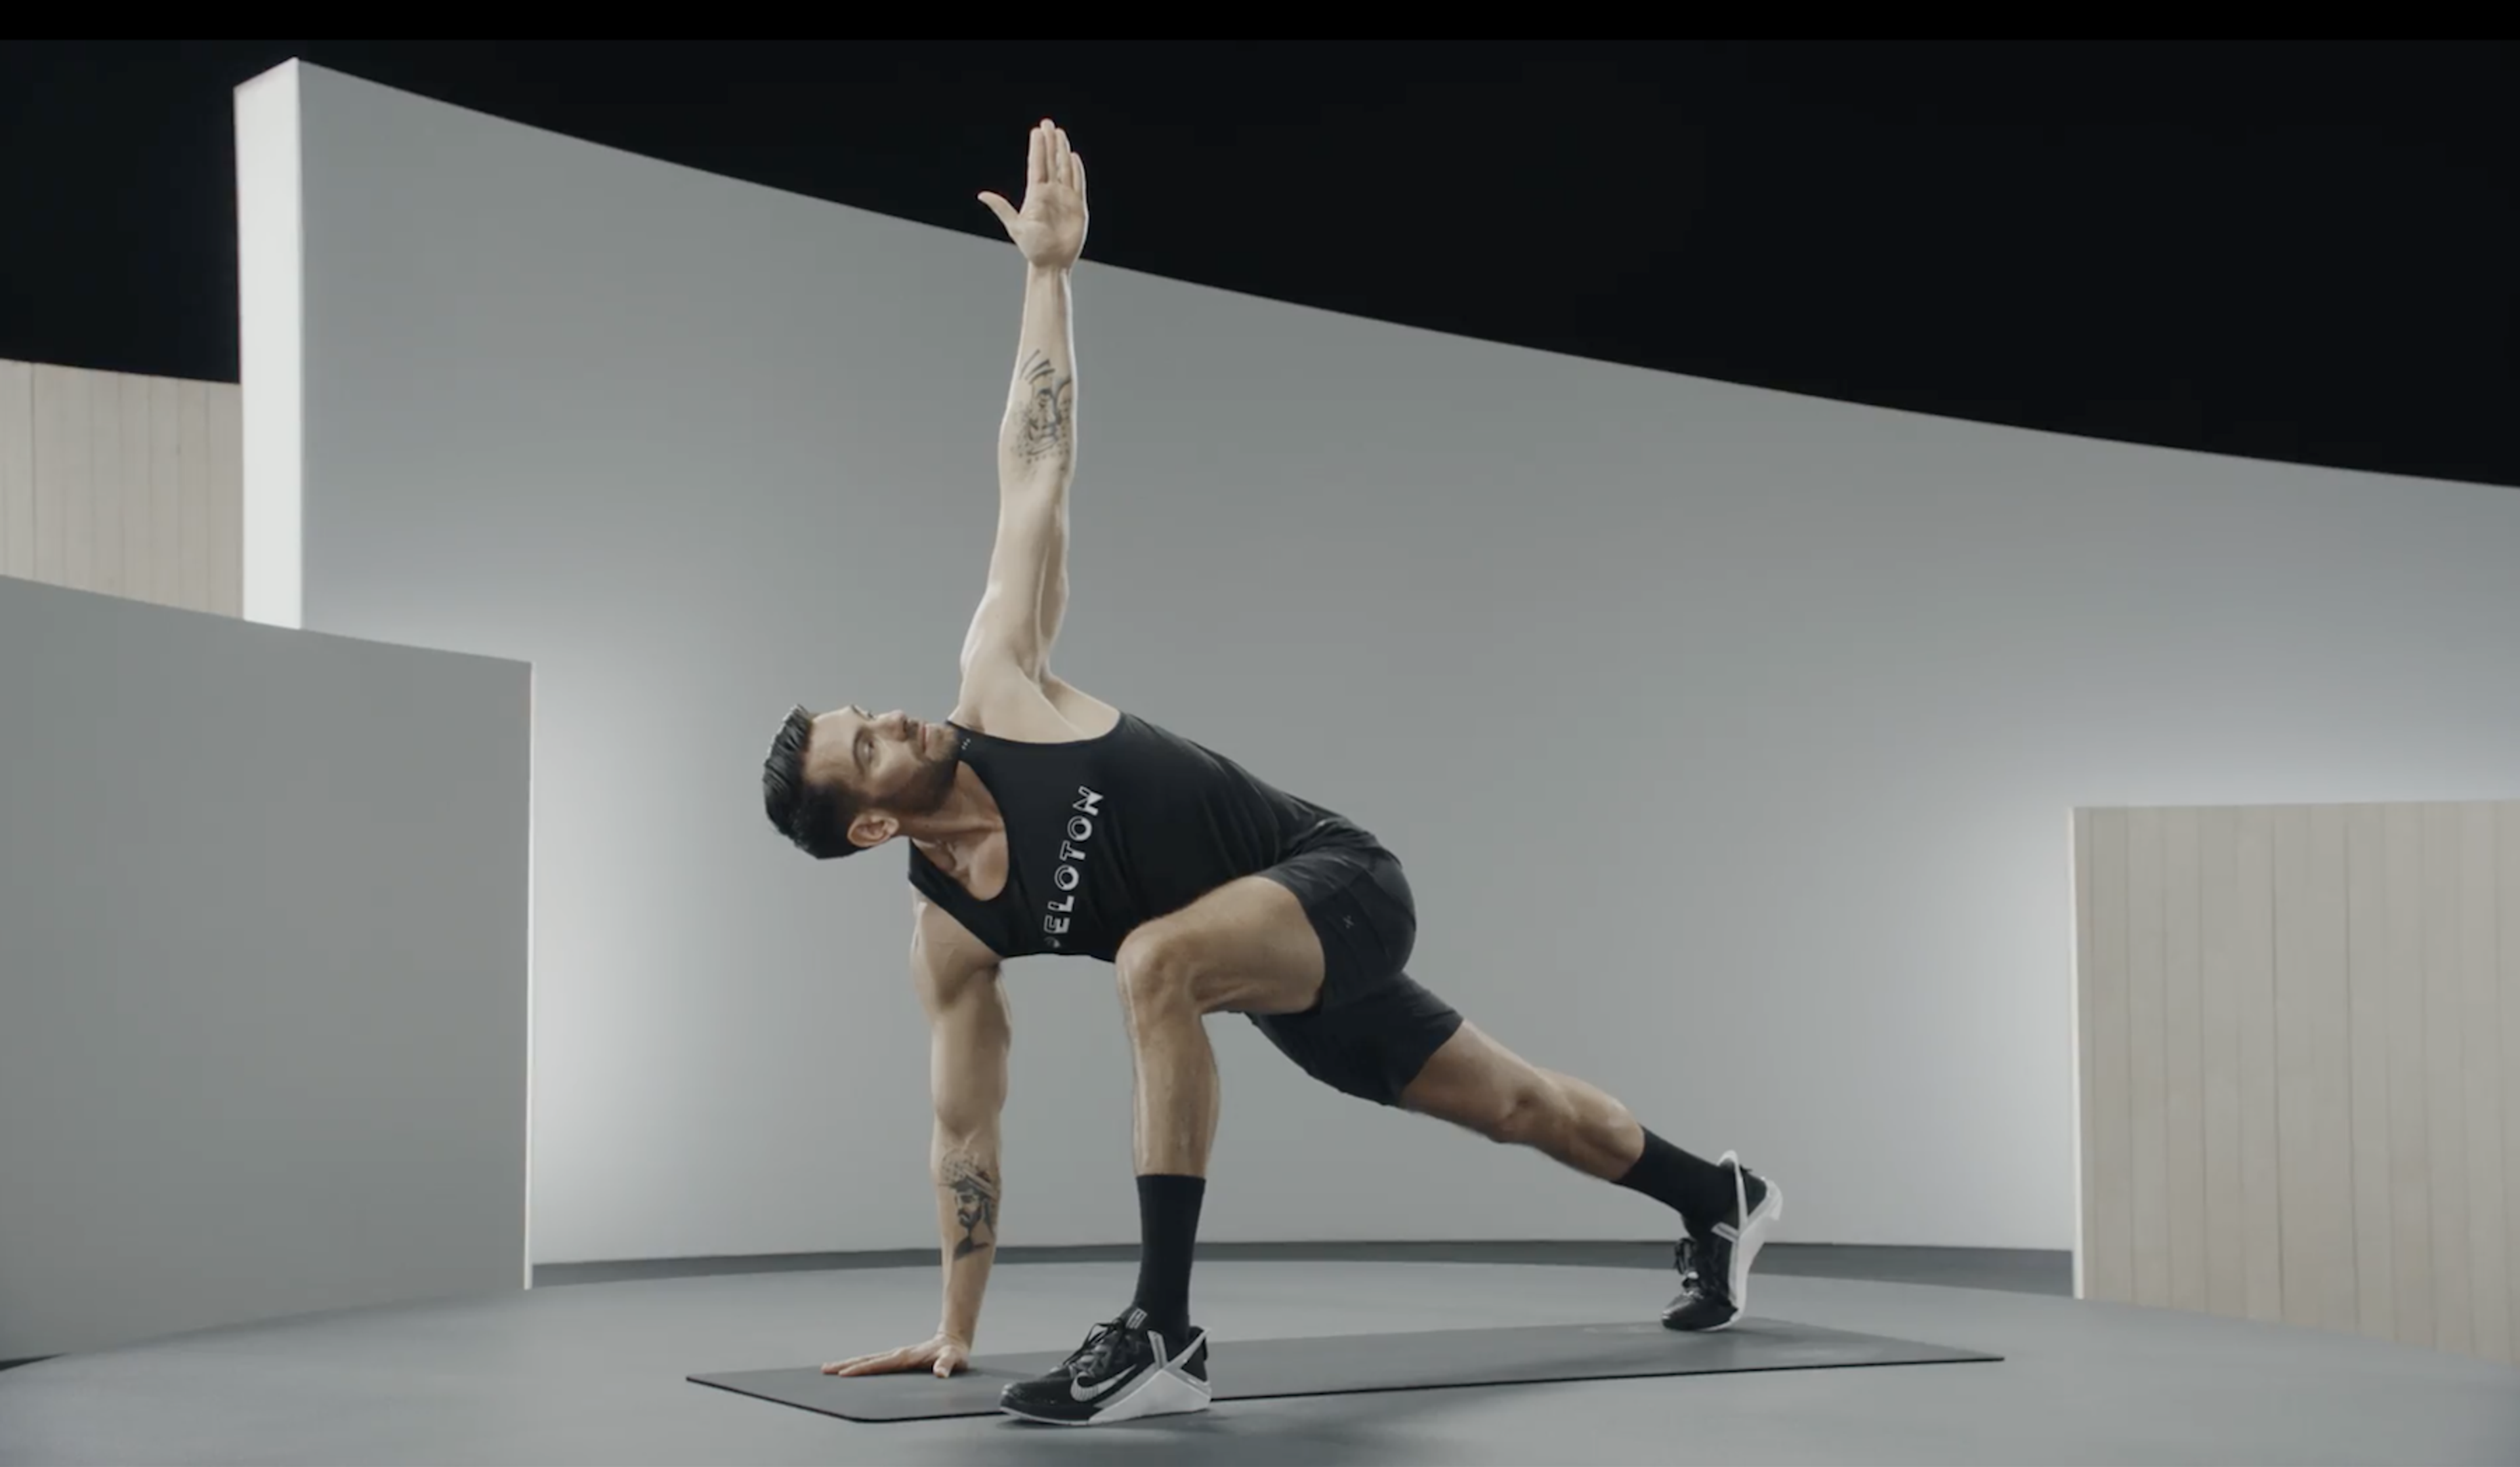
8. World's Greatest Stretch
This dynamic stretch is part lunge, part plank, and part twist and involves the entire body.
1. Start in a plank or modify by dropping your knees to the floor, keeping a straight line from shoulders to knees.
2. Step your right foot forward to the outside of your right hand, bending your knee at a 90-degree angle directly over your right foot. Keep your left leg straight, or, if you’re modifying, with your knee resting on the floor.
3. On an inhale, lift your right hand and spiral your chest open to the right, keeping your left hip in a neutral position.
4. Lower your right hand to the floor. You can hold for 30 seconds for a thorough stretch, or alternate sides to make it more challenging.
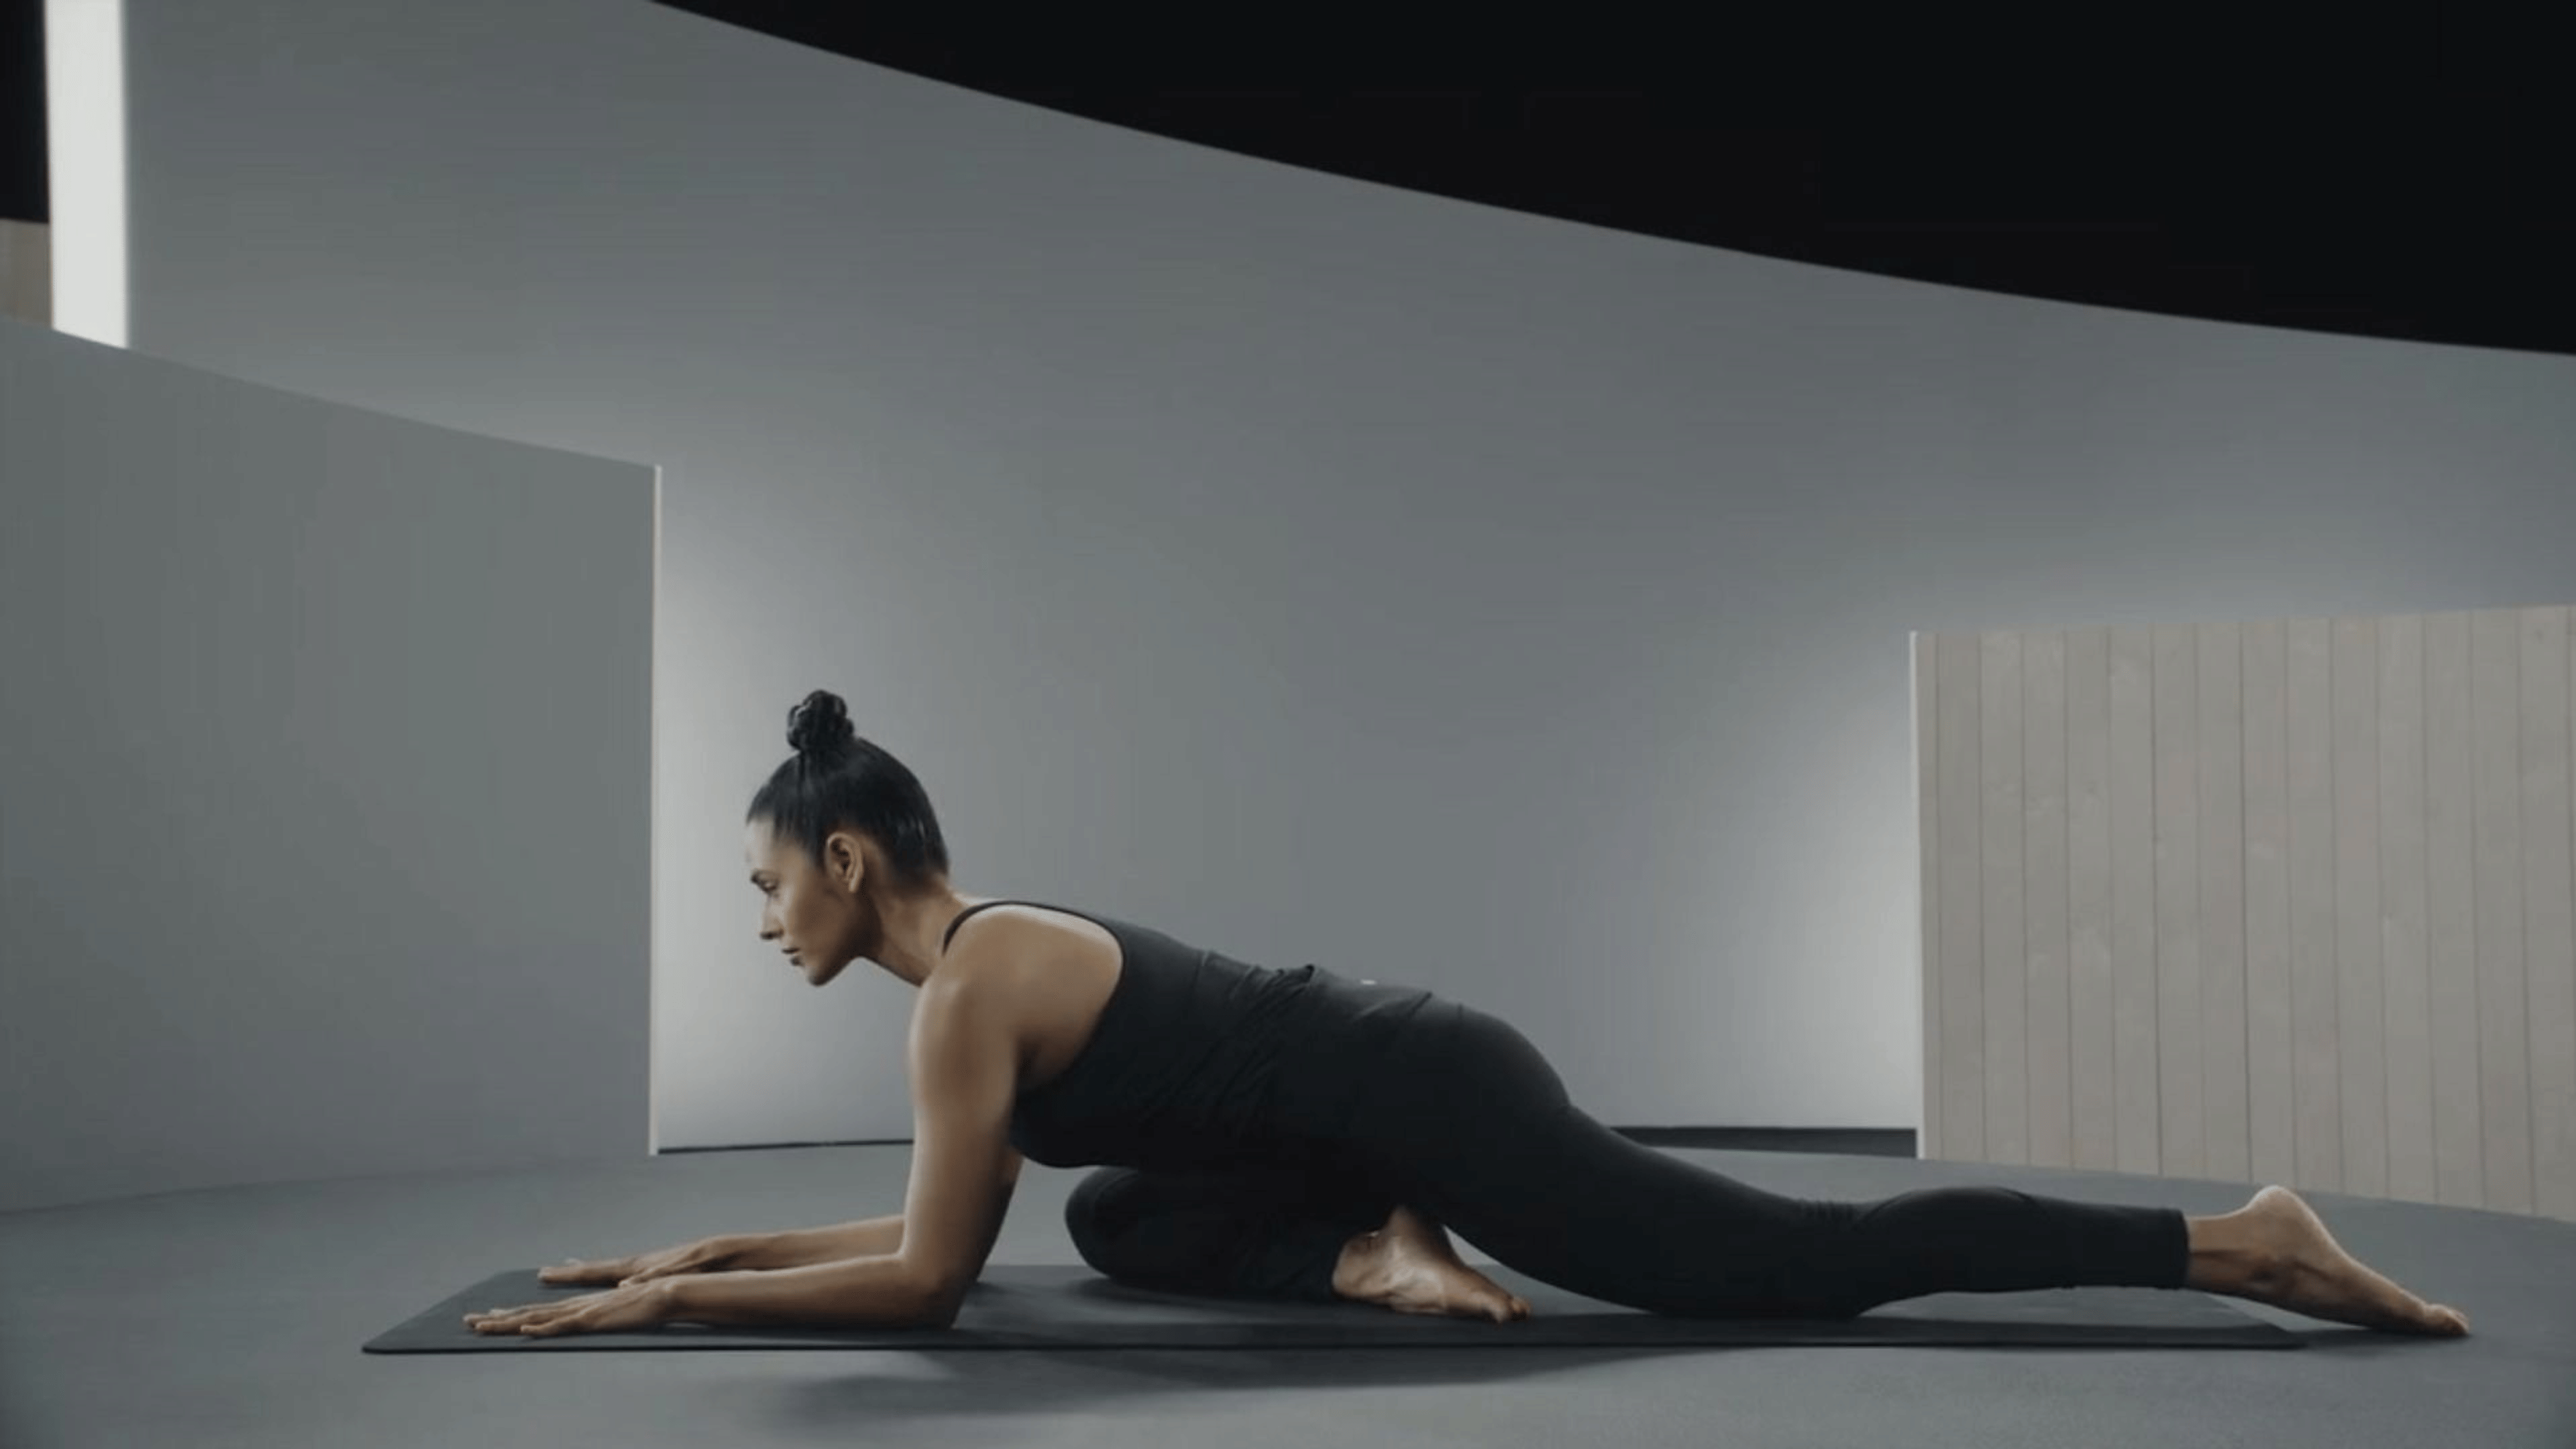
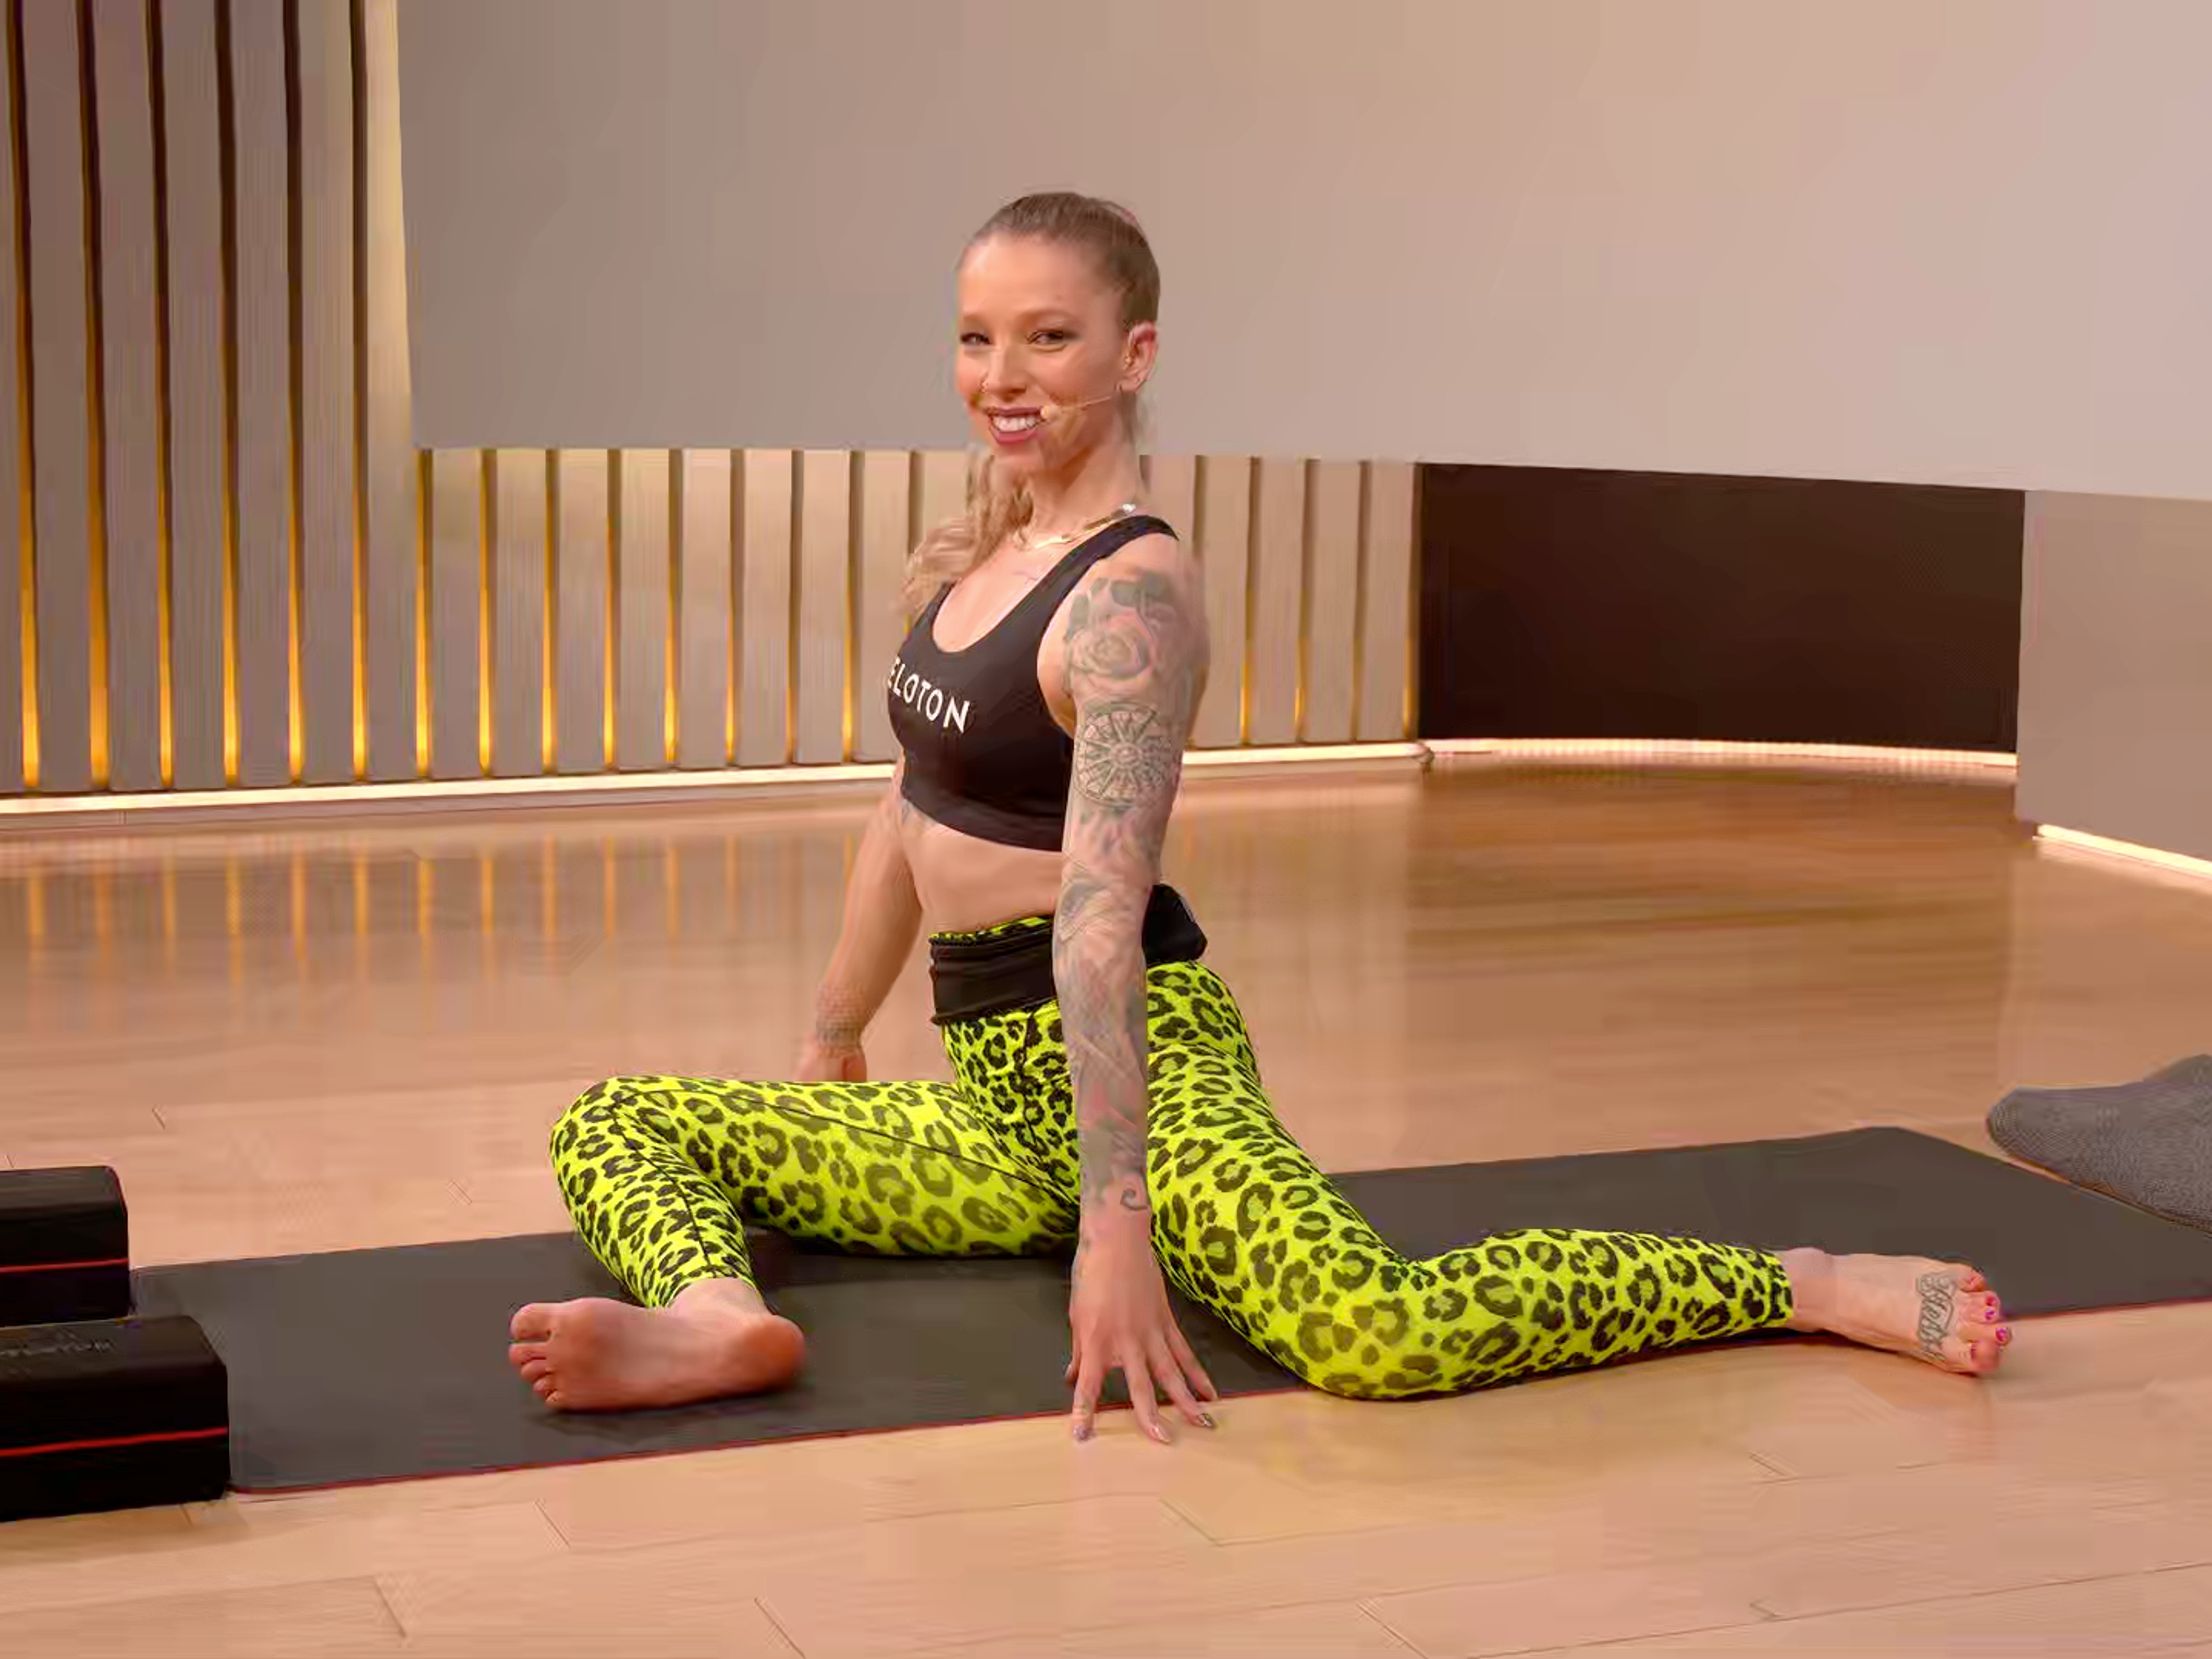
9. Pigeon Pose
1. Start in downward-facing dog, then shift your weight forward, bringing your right knee toward your right wrist. Slide your right foot towards the left edge of your mat.
2. Lower your left leg to the ground and slide your left thigh backward. Make sure your hip bones are parallel and facing forward, with your left leg parallel to the length of the mat.
3. Rest your fingertips on the mat to keep your torso upright (or use two yoga blocks to bring the ground closer to you). Pull your shoulder blades back. (For a deeper stretch, you can also fold forward over your right leg and rest your forearms on the ground.)
4. To come out of the pose, ground through the palms, tuck the left toes, and step back into downward-facing dog.
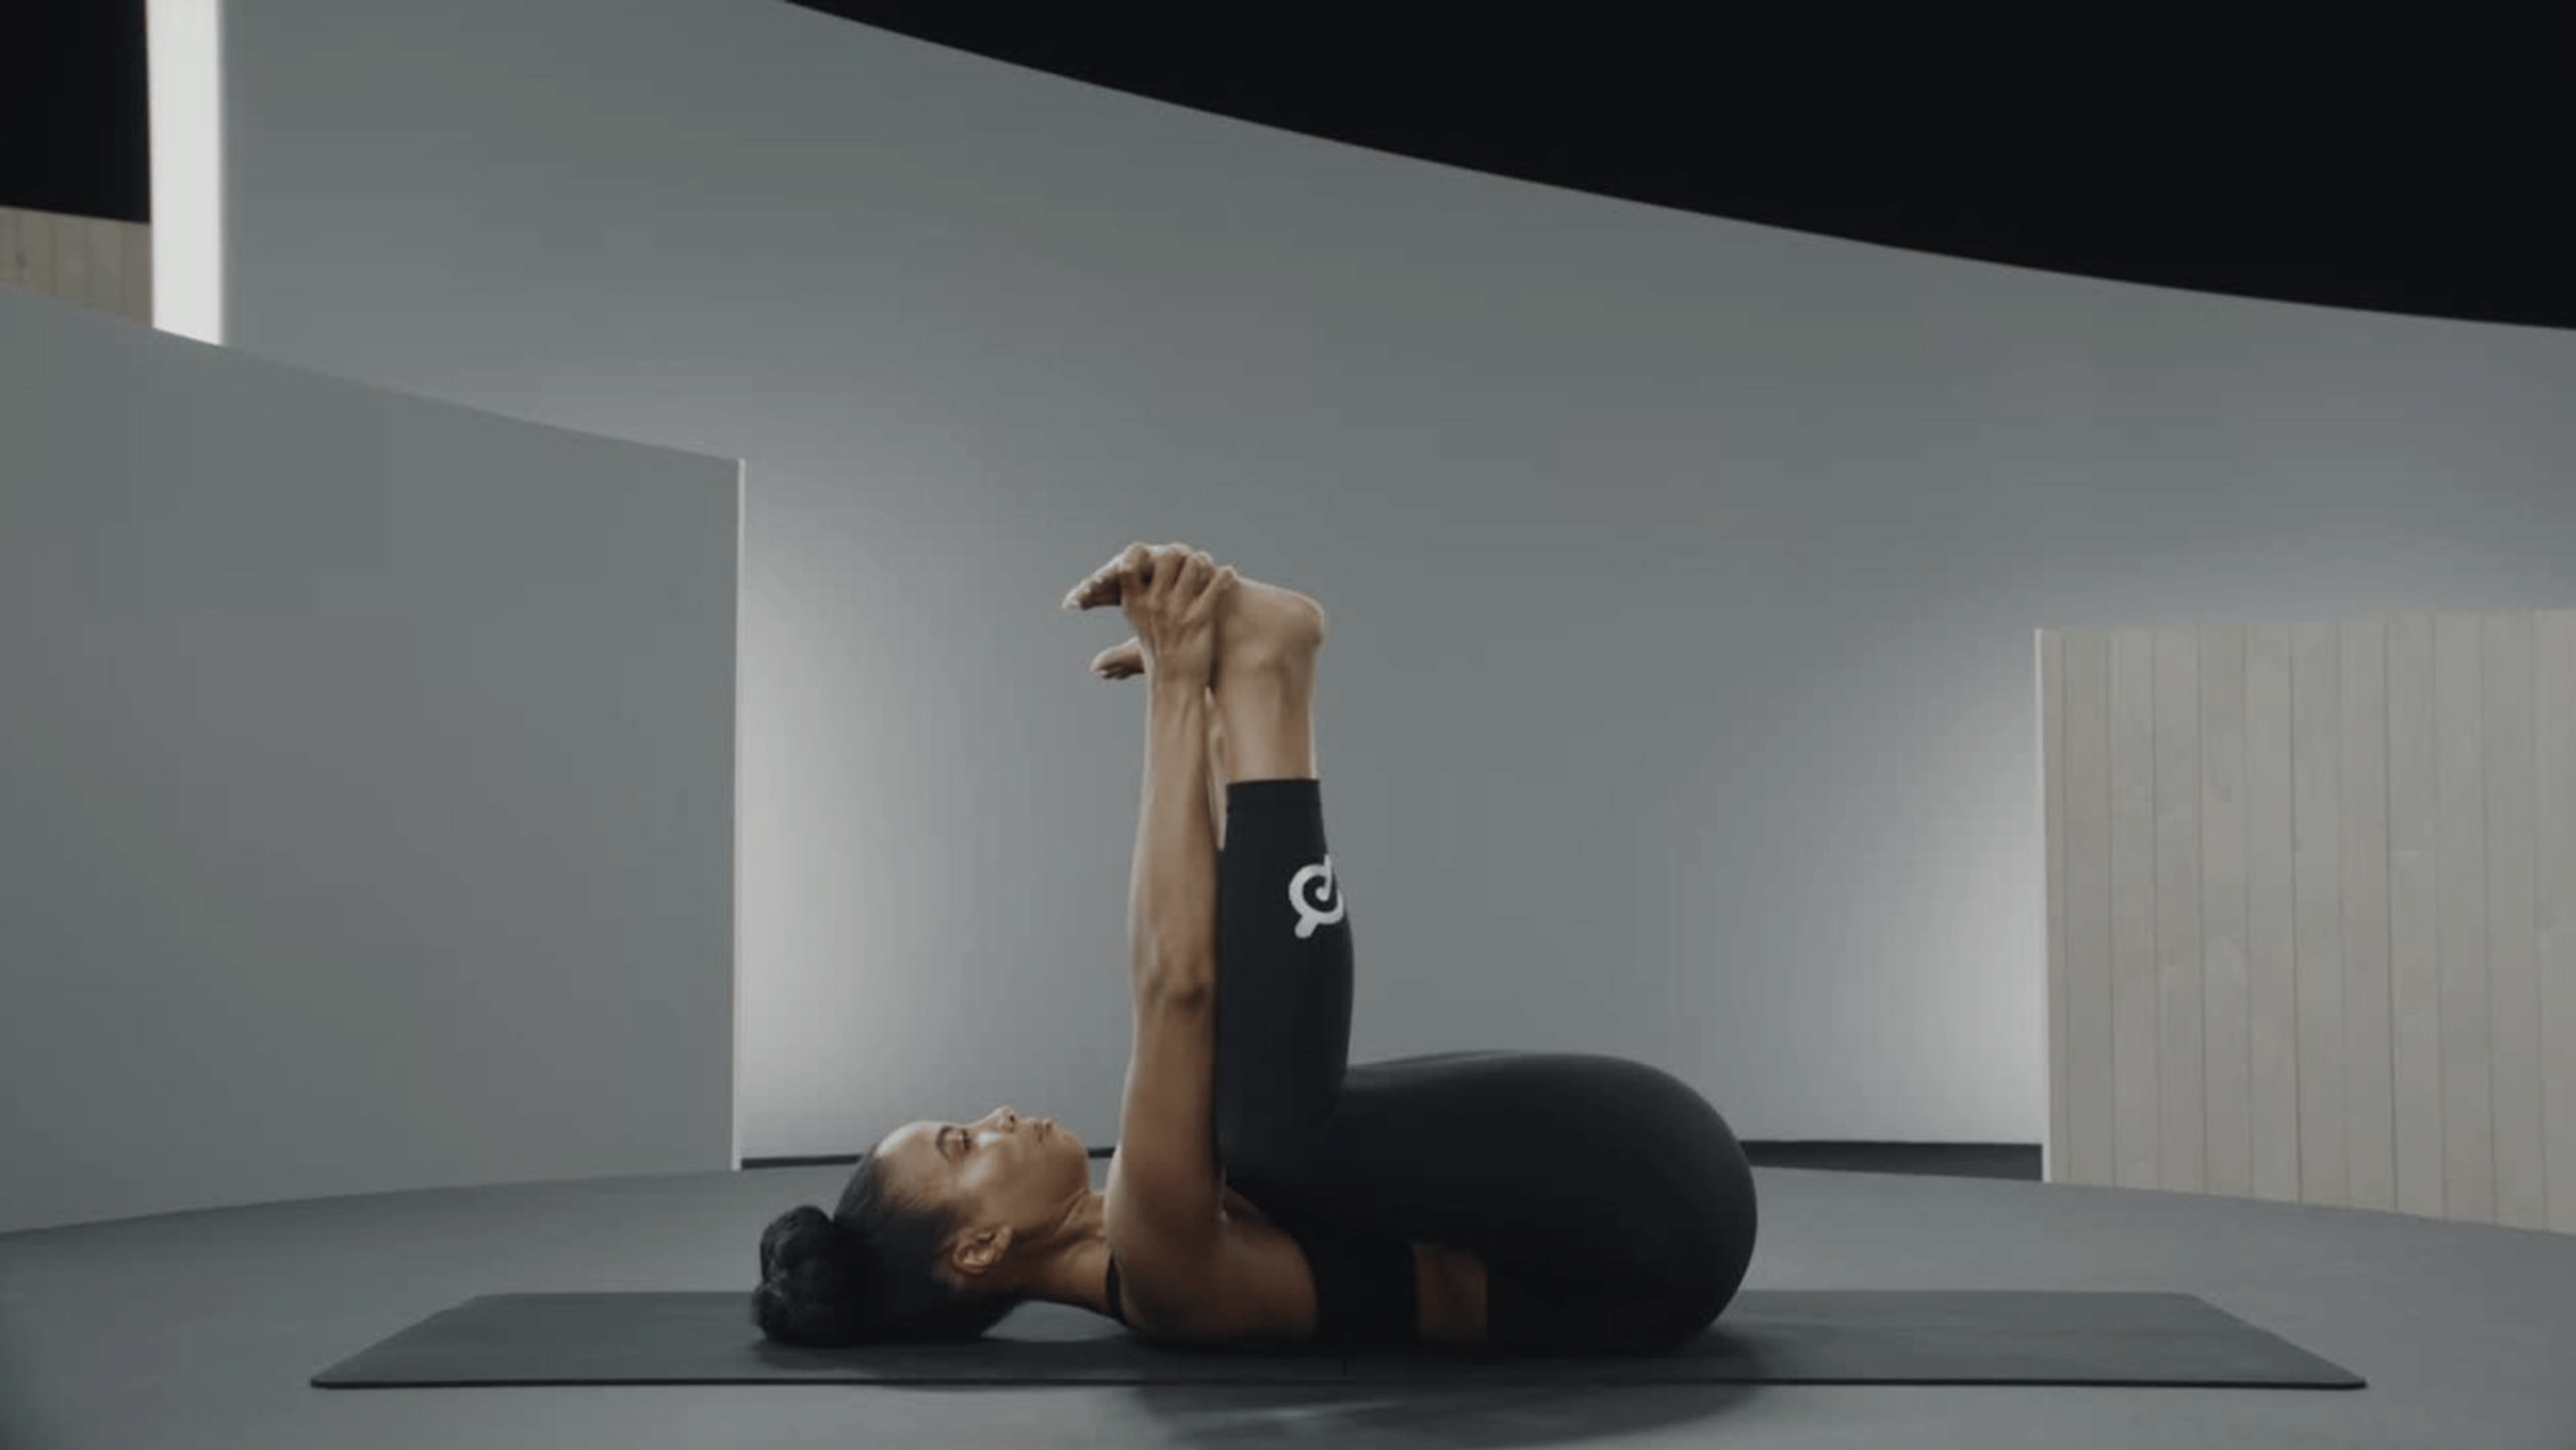
10. Happy Baby
1. Lay on your back and bring your knees toward your chest.
2. Open your knees slightly wider than your torso and bring them up toward your armpits. Position your shins perpendicular to the floor.
3. Extend your arms alongside your inner thighs and grab the outer edges of the feet. (You can also use a yoga strap around each foot, or reach for your big toes with your index and middle fingers.)
4. Bring the soles of your feet up to face the ceiling, keeping your knees bent. Push your feet into your hands and create counterpressure by pushing down with your hands. Keep your tailbone and spine on the mat and neck and shoulders relaxed.
Related Articles


The Benefits of Improving Your Hip Mobility
The hips are one of the most mobile joints, so keeping them loose with these exercises can help you move with more ease, whether that’s powering through a cycling class or just walking around. Lack of hip mobility can also strain other areas of the body, like the low back. Working on your hip mobility may even help you improve your posture.
Every so often, take a break from work or folding laundry and take a couple of minutes to do some simple hip mobility exercises. You’ll also want to work some of the moves into your daily fitness routine.
How Tight Hip Flexors Affect Your Performance
Your hip flexors are a major part of the powerhouse muscles and joints that provide a foundation for walking, running, jumping and other movements. It helps to understand the difference between mobility and flexibility. Hannah points out that mobility is what you get from your joints; flexibility comes from your muscles. But the two work in harmony, so you need to stretch before and after your workouts—and even if and when you notice the symptoms associated with tight hip flexors. “Stretching the hip flexors can help alleviate that pull and the pain that comes with it,” Hannah explains. “The hip flexors are responsible for stabilizing the hip and bringing the knee/thigh up. Both actions are dominant when running, cycling, or walking, so releasing them often is key.” So it makes sense that keeping your hip flexors mobile can really level up your performance.
Is Walking Good for Tight Hip Flexors?
Your hips need movement in the same way that a car needs to be driven; leave it sitting still for a while, and things stop working correctly.
While a daily walk will help—anything’s better than remaining sedentary—consider trying yoga or stretches for tight hips in lieu of walking. The lotus position—lying flat on your back with the bottoms of your feet together so your knees flop open to your sides—is one of the best poses you can do to loosen your hip flexors. Same goes for lunge poses and a simple glute bridge—just laying on the ground and holding your hips high in the air, for at least a minute. Take a break, then hold it for another minute.
But whether you’re walking, stretching, or doing yoga, the key is to be mindful and not over-exert yourself. The goal is to loosen your hip flexors so you can come back stronger when it’s time to truly work out, whether you’re running, biking, or rowing.
The Takeaway: You Need a Hip Mobility Routine
We’ve all had that workout where we just feel too sore to push through to the end. It’s only natural to get frustrated, but the more important thing is to think about why your body is holding you back.
Don’t just push through the pain—find ways to make sure it never impedes your progress in the first place. Or, if you don’t think your hip flexors have been a problem for you until now, don’t be so sure. Try this hip mobility routine and explore hip flexor stretching classes on the Peloton App to see results.
Try a Hip Flexor Stretching Class on the Peloton App


“You might not realize how tight your hip flexors are until you release them and discover lost length,” Hannah says. “Stretching, foam rolling, and mobility are not a one-and-done situation. Add them as a part of your regular workout routine and watch your outputs soar!”
This content is for informational and educational purposes only and does not constitute individualized advice. It is not intended to replace professional medical evaluation, diagnosis, or treatment. Seek the advice of your physician for questions you may have regarding your health or a medical condition. If you are having a medical emergency, call your physician or 911 immediately.


Level up your inbox.
Subscribe for a weekly dose of fitness, plus the latest promos, launches, and events.
By providing your email address, you agree to receive marketing communications from Peloton.
For more about how we use your information, see our Privacy Policy.