Adding Glute Bridges Into Your Workout? Here's How to Do One with Top-Notch Form
And four common mistakes to avoid.
By Karla Walsh•
What Is a Glute Bridge?
What Muscles Does a Glute Bridge Work?
The Benefits of Glute Bridges
How to Properly Do a Glute Bridge
Glute Bridge Variations and Alternatives
Glute Bridge vs. Hip Thrust
4 Mistakes to Avoid When Doing a Glute Bridge
How to Include Glute Bridges In Your Workout
Let’s face it: It’s easy to glaze over your core strength when you’re a dedicated indoor cyclist, runner, or rower. But a strong and supportive trunk is the key to unlocking that personal record, as well as better posture, balance, and overall well-being.
Discover more ways to reach your goals with Peloton


Sure, sit-ups and planks can help, but your core is about more than just your abs. Your hips and glutes, known as your posterior chain, are also a big part of the picture. And to build a stronger core, Peloton instructor Marcel Maurer often turns to glute bridges. In fact, he deems it a “must-have” in your training program.
To help you safely and effectively master this move, we asked Marcel and Kelcie Wittman, PT, DPT, a Colorado-based board-certified clinical specialist in sports physical therapy to share their secrets.
What Is a Glute Bridge?
A glute bridge is a simple strength exercise that activates your core, glutes, and hamstrings. You’ll often find s sprinkled into strength training classes or programs. It’s also a staple in certain yoga flows.
“The exercise is easy to learn, functional, healthy for your body, and makes you feel the burn,” Marcel says. “Lots of experts in yoga, mobility, and strength are fans of this move.”
What Muscles Does a Glute Bridge Work?
In short: a lot. “A bridge places your body in hip extension and knee flexion, which are movements primarily performed by your glutes and hamstring muscles,” Wittman says. Translation: Lying on the floor with your knees bent and hips lifted works your glutes and the backs of your legs.
This move also engages your core, specifically your transversus abdominis, which helps lift and stabilize your hips as they move up and down. The calves also get a baby boost from this exercise, Marcel says.
The Benefits of Glute Bridges
Challenging core-centric moves, such as glute bridges, do more than just give you a good workout. Some of the benefits of glute bridges include:
Supporting your posture
Improving your core, glute, leg, and hip strength
Enhancing your balance and mobility, which is especially critical as you age and become more prone to falls
Making many everyday tasks feel easier, such as getting out of bed, climbing the stairs, and lifting objects off of the ground
Will Glute Bridges Help Reduce Lower Back Pain?
Glute bridges can also offer support to your lower back. A 2018 study published in the Brazilian Journal of Physical Therapy found that bridges bolster core and spinal stabilization, which can refine your posture and help remove tension from your lower back. This exercise may also be beneficial if you have chronic lower back pain. A 2022 study published in the International Journal of Sports Physical Therapy found that core stability exercises may help treat those with non-specific low back pain (NSLBP).
The key to scoring all of these benefits for your back is to perform the move properly, Wittman says. “When lifting up into a bridge, it’s important to keep your core engaged and squeeze your glutes while thinking about driving the motion from your legs and hips,” she says. “This will help you maintain a neutral spinal posture and prevent your low back from arching. A common mistake is lifting into a bridge with your lower back, which causes your back to arch and may actually increase low back pain.”
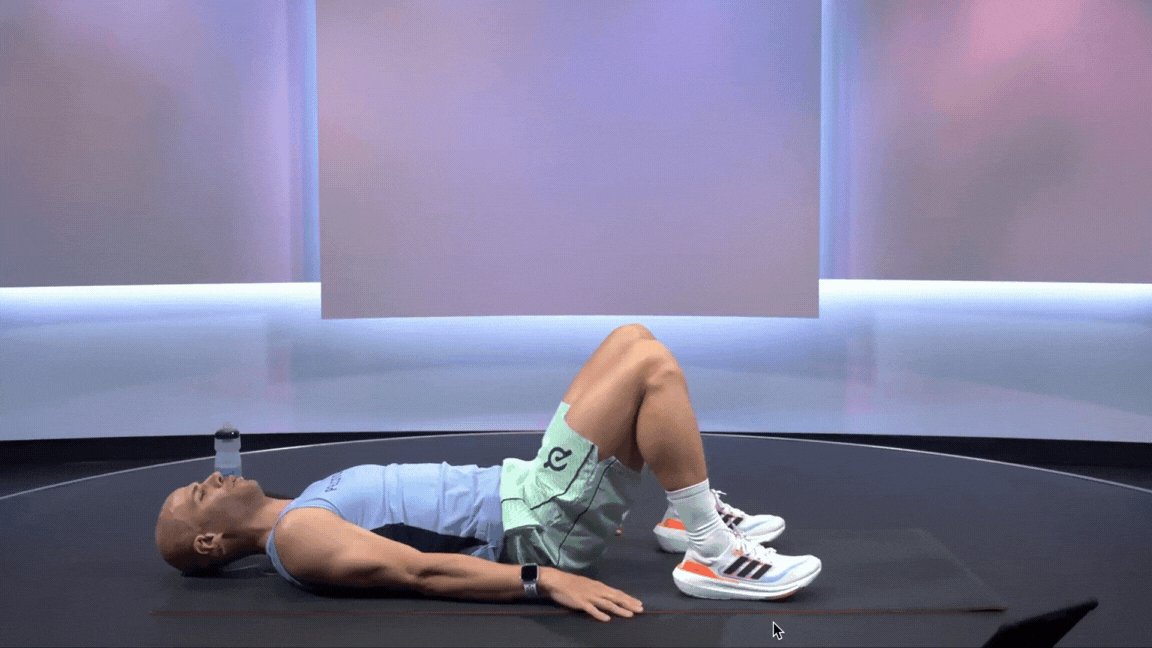
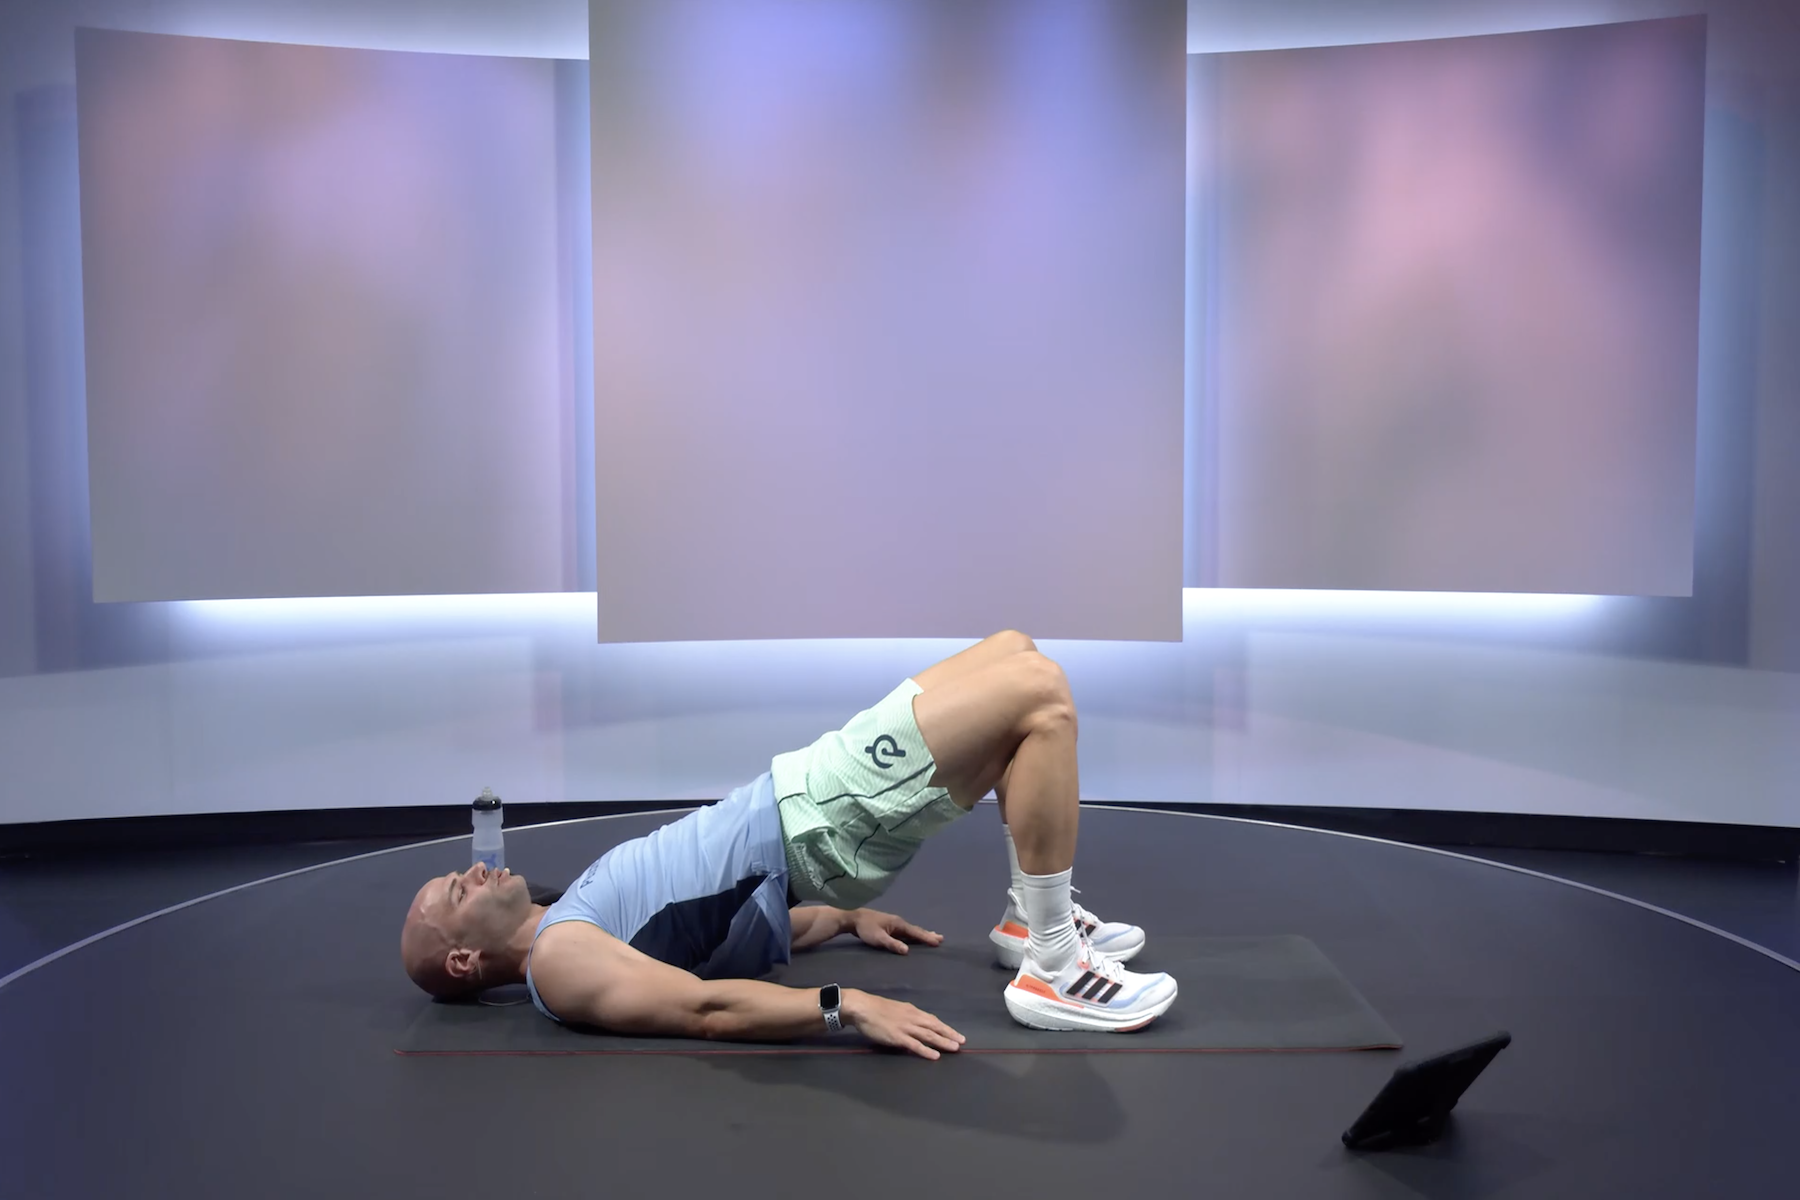
How to Properly Do a Glute Bridge
Proper technique is vital when doing a glute bridge. Marcel walks us through how to perform a glute bridge with good form:
Lie on your back. Place your arms next to your body. Bend your knees and place your feet flat on the ground, about 6 inches apart and 1 foot away from your glutes.
Squeeze your glutes and engage your core. Lift your hips up into a straight diagonal line from your shoulders to your knees.
Hold at the top of the bridge for a breath. Slowly return to the starting position.
How Long Should You Hold a Glute Bridge for?
It depends. The ideal sets and reps vary based on your goals, your personal health history, and your experience level with core and glute exercises, Wittman says
As a foundation, Marcel says that most active individuals can safely aim for three sets of 15 to 20 reps using just their body weight. (More on adding weights later.)
Can I Do Glute Bridges at Home Without Equipment?
You bet. In fact, glute bridges are one of our picks for the eight best glute workouts to try at home for just that reason. All you need is your body and a comfortable floor. (A carpet, rug, or yoga mat may be helpful to cushion your lower back.)
Glute Bridge Variations and Alternatives
Remember: It’s OK to modify this exercise to make it work for you. Until you feel comfortable forming a straight line from your shoulders to your knees without pain or discomfort, Wittman suggests only lifting your hips partially off the ground into a half bridge.
You can use your arms for leverage, pressing them gently into the floor while bridging to give your core and glutes a boost, or bring your heels an inch or two closer to your trunk. “Having more bend in your knees typically makes the bridge a little easier to perform,” Wittman says. And if you still feel out of sorts, seek out the help of a physical therapist or trainer.
If the equipment-free bodyweight bridge feels too easy, consider these options to make your glute bridge even more effective.
March: Keep your hips steady at the top of the bridge. Lift one foot a few inches off of the ground. Hold it in the air for a second before returning it to the ground. Repeat with the other foot.
Single-leg: Keep your hips lifted at the top of your glute bridge. Lift one leg off of the ground, extending it straight into the air. Hold it for a second before lowering it down. Repeat with the other foot.
Weighted: Add a dumbbell (or two) on top of your hips to increase the resistance.
Banded: Place a loop resistance band just above your knees. With each rep, press your knees away—and against the band— to activate your hips and glutes.
Lifted arms: Press your palms together and point your fingers at the sky. Leave your hands lifted for the duration of the rep.
Heels away: Increase the distance between your glutes and feet. Move your feet about 15 to 18 inches away from your glutes to decrease the amount of bend in your knees with each rep.
On a ball: Place your heels on top of a large stability ball. Lift and lower your hips to complete each glute bridge.
Glute Bridge vs. Hip Thrust
These two exercises are fairly similar, since you work the same muscle groups. However, the key difference between the two is that with a hip thrust, your body is usually elevated on a bench or step. With a classic glute bridge, your shoulders and back are on the floor.
4 Mistakes to Avoid When Doing a Glute Bridge
Make sure to steer clear of these common glute bridge mistakes to avoid injuries—and ensure you’re getting the most out of every rep.
1. You’re Moving Too Quickly.
Take your time to activate your core, glutes, and legs. Hustling and swinging through your sets is a recipe for injuries—and a waste of your time.
2. You’re Overextending.
Avoid bringing your hips too high, as this may lead to lower back pain. Instead, try to maintain a straight line from your shoulders to your knees.
3. You’re Not Engaging Your Glutes.
To protect your lower back—and make this an effective exercise—squeeze your glute muscles with each rep to ensure they stay engaged.
4. Your Feet Aren’t Rooted.
Be careful not to neglect your feet. Focus on firmly pressing your heels down into the floor or pulling them in toward your glutes to engage your hamstrings and hips, Wittman says.
How to Include Glute Bridges In Your Workout
You can integrate this move into your warmup, yoga flow, or even the resistance portion of your workout. Unsure of where to start? Try adding three sets of 15 to 20 reps to your routine three times per week—or try a workout on the Peloton App, many of which will include this popular exercise.
This content is for informational and educational purposes only and does not constitute individualized advice. It is not intended to replace professional medical evaluation, diagnosis, or treatment. Seek the advice of your physician for questions you may have regarding your health or a medical condition. If you are having a medical emergency, call your physician or 911 immediately.