AzmanL/Getty Images
How to Do Warrior 1 Pose, a Foundational Yoga Posture
This standing yoga pose can simultaneously stretch and strengthen your body.
By K. Aleisha Fetters•
What Is Warrior 1 Pose (Virabhadrasana 1)?
What Muscles Does Warrior 1 Pose Work?
What Are the Benefits of Warrior 1 Pose?
How to Properly Do Warrior 1 Pose
Warrior 1 Variations and Adjustments
Is Warrior 1 Pose the Same as a High Lunge?
Where Should I Gaze During Warrior 1 Pose?
What's the Difference Between Warrior 1 and Warrior 2?
Practice: Try a Yoga Sequence with Warrior 1 Pose
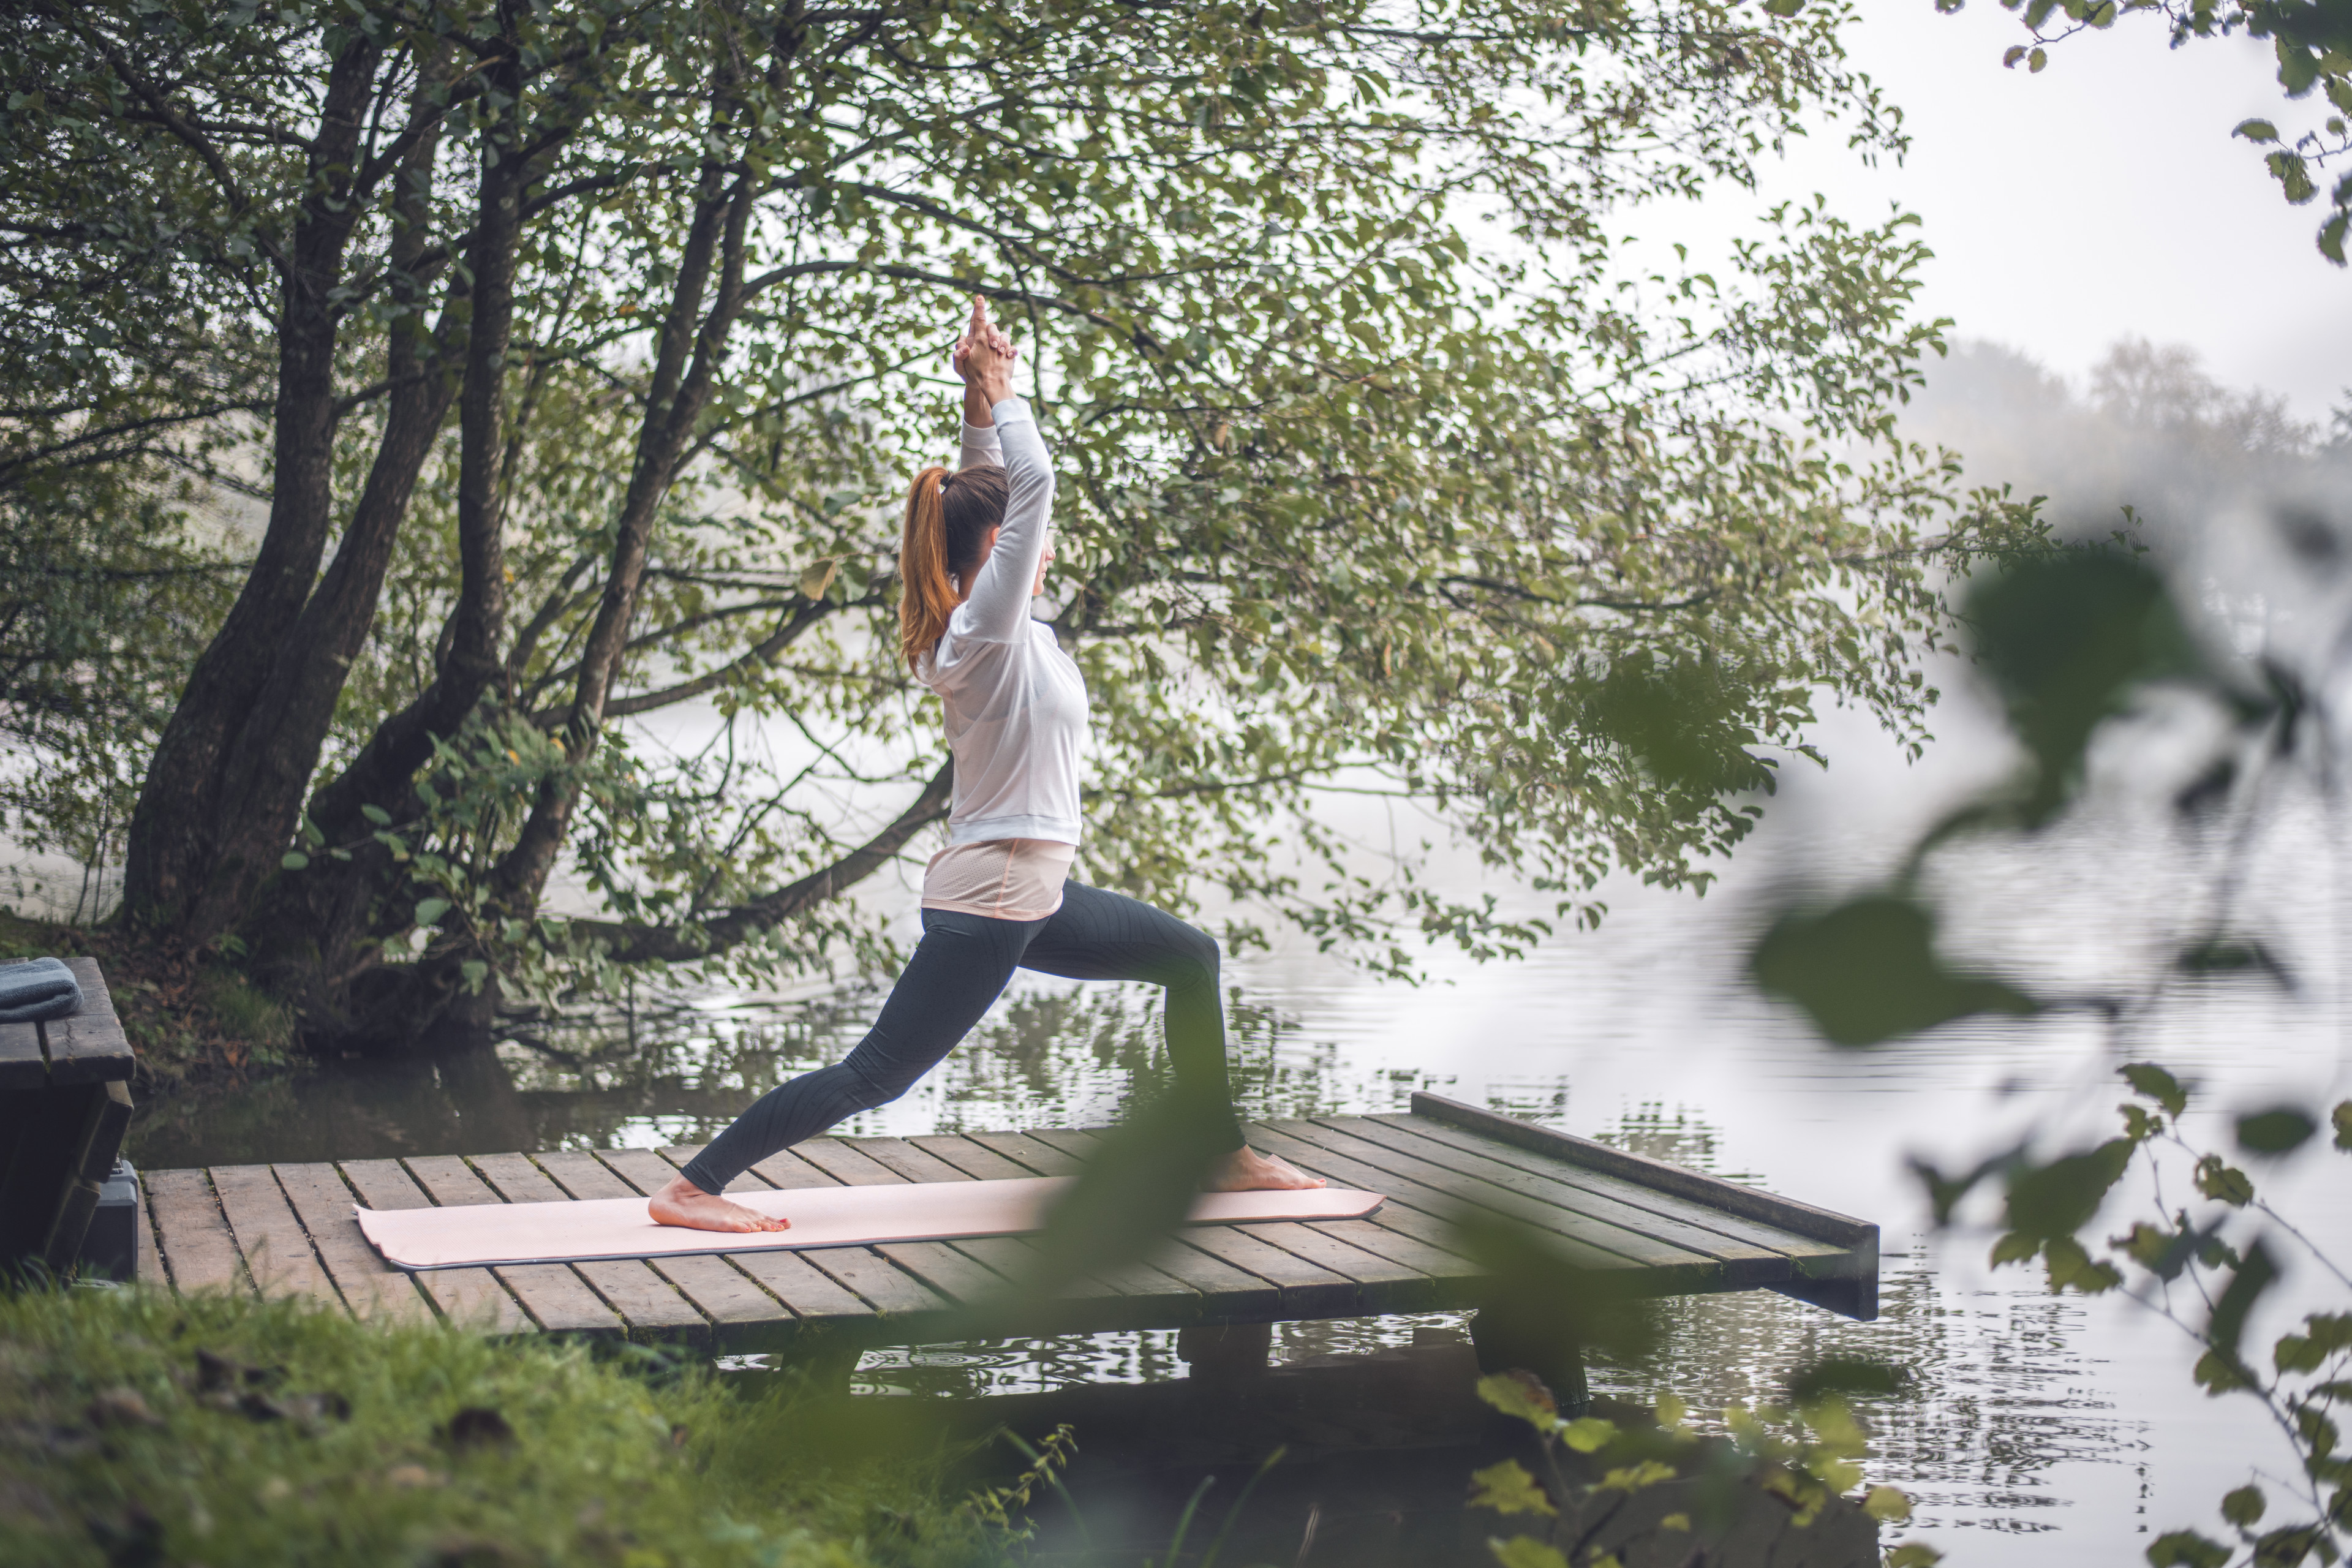
Some yoga poses engage your body from head to toe, and Warrior 1, known as Virabhadrasana 1 in Sanskrit, is one of them.
Discover more ways to reach your goals with Peloton
This posture is common in many types of yoga, so you might've come across it as part of a Vinyasa flow or in a restorative yoga class. What's more, Warrior 1 often links postures together in a Sun Salutation (Surya Namaskar), a flowing sequence of poses usually included at the beginning of class to warm up your body and calm your mind.
According to Peloton instructor Kristin McGee, Warrior 1 pose offers many benefits, such as opening your hip flexors and chest and strengthening your lower body. So, it’s worth learning how to practice this pose safely and effectively.
Here, Kristin and Tara Salay, a New York-based physical therapist and yoga instructor, explain how to do Warrior 1 and discuss the pose’s benefits, helpful modifications, and more.
What Is Warrior 1 Pose (Virabhadrasana 1)?
Warrior 1 is a powerful standing posture that engages your entire body. In order to properly practice this pose, you have to use strength and control in your legs, core, and upper body.
It also stretches your hips and chest, making it ideal for those who want to practice yoga poses with backbends, such as Bow (Dhanurasana) and Camel (Ustrasana). “It's one of the first backbends that we can work on, which I think people don’t realize,” Kristin says. “It's such a strong posture and really helps us feel stable and open at the same time."
You can do Warrior 1 on its own, but this posture really shines as part of a sequence. For example, in a Sun Salutation, it typically links Downward-Facing Dog (Adho Mukha Svanasana) and Warrior 2 (Virabhadrasana 2).
What Muscles Does Warrior 1 Pose Work?
While doing Warrior 1, you’ll strengthen or stretch:
Quads and hamstrings, which you use to keep your front leg bent.
Glutes, which stabilize your pelvis and help you return to a standing position.
Lower back, which keeps your spine in a tall, neutral position.
Core muscles, including your transverse abdominis (the deepest layer of your abdominal muscles).
Upper body muscles, which stabilize your torso and help you raise your arms overhead.
Calves and ankles, both of which help you maintain balance.
Hip flexors, the muscles at the front, top part of your thighs that help you bend your knees toward your hips.
What Are the Benefits of Warrior 1 Pose?
Whether you do Warrior 1 on its own or as part of a sequence, it benefits your whole body. This pose is great for:
Opening your chest, your hip flexors, and the entire front side of your body.
Strengthening your glutes, thighs, core, and shoulders.
Increasing stability and balance.
Improving spinal flexibility and mobility in all areas of your body.
How to Properly Do Warrior 1 Pose

Follow these step-by-step instructions on how to do Warrior 1:
Stand at the front of your mat with your feet hip-width distance apart. Lift your chest and roll your shoulders back.
Step back with your left leg, aligning your left heel with your right heel.
Rotate your left toes away from you at about a 45-degree angle.
Square your hip points to the front of the mat by bringing your left hip forward and your right hip back. Your weight should be evenly distributed between your legs.
Bend your right knee and lower to a 90-degree angle (or as far as you comfortably can). Your front knee should be directly over your ankle.
Inhale as you lift your arms overhead, keeping them straight with your palms facing each other.
Drop your shoulder blades down and away from your ears. Keep your core engaged.
Direct your gaze forward. Your hips and torso should still be facing forward.
Hold this pose for three to five slow breaths, inhaling through your nose and exhaling through your mouth.
To do Warrior 1 on the other side, bring your hands down to the mat. Then, step your left foot forward and your right foot back and repeat the instructions above.
Warrior 1 Variations and Adjustments
You can modify Warrior 1 pose to be easier or more challenging. “As you advance, you can go into a deeper backbend in your upper body, hold the posture for longer, and take variations," Kristin says.
Try these Warrior 1 variations to practice the basics, work on your balance, or challenge your flexibility.
Beginner Modification: Warrior 1 Pose with Hands On Hips
Lifting your arms overhead in Warrior 1 can change your center of gravity and throw you off balance. So if you don’t feel stable in this pose, try placing your hands on your waist to help you feel more grounded. Hold the position for three to five breaths before switching sides.
Use Props: Warrior 1 Pose with a Chair
A chair can help lighten the load on your legs in Warrior 1 pose. “You can do [Warrior 1] pose in chair yoga, where you have the same leg alignment but your pelvis is supported by the chair,” Salay says. “Just make sure the chair is sturdy, and don’t use a chair with wheels.”
Here’s how to do this variation:
Sit on a stool or chair with your legs in front of you. Your knees should be bent to 90 degrees with your feet flat on the floor. If your chair has a back, it should be on your right side.
Extend your left leg straight behind you, turning your toes at about 45 degrees. The chair should support most of your weight.
Hold this position for three to five breaths before switching sides, always keeping the back of the chair on the side of your front leg.
Advanced: Warrior 1 Pose with Eagle Arms
This variation adds a stretch for your upper back and shoulders.
Rather than lifting your arms overhead, extend them in front of you and cross your left arm over your right arm.
Keeping your elbows at shoulder height, raise your right hand toward your face and then bring your left hand to meet it, pressing your palms together. If you can’t reach, press the back of your hands together.
Hold for three to five breaths. Then, repeat on the other side.
Is Warrior 1 Pose the Same as a High Lunge?
Close, but not quite. Both poses are common in Vinyasa yoga and are sometimes used interchangeably in Sun Salutations, but there are some key differences.
In Warrior 1, your back heel is placed down on the floor and your toes are angled away from your body. In a high lunge, your back heel is lifted, and your toes face forward.
The position of your back foot in Warrior 1 stretches your calves and hips more deeply and works your inner thighs more than a lunge does. It also provides your body with a more stable base, meaning Warrior 1 isn’t nearly as much of a stability challenge as a high lunge.
Where Should I Gaze During Warrior 1 Pose?
Keep your gaze straight ahead; It'll help you maintain balance and focus. Pro tip: Find something directly in your line of vision, such as a spot on the wall or your face in the mirror, and don’t look away.
What's the Difference Between Warrior 1 and Warrior 2?
Warrior 1 often flows right into Warrior 2 in Sun Salutations, creating a powerful combination. These two poses are very similar, however there are three key differences between them:
Hips and torso: Your entire body faces the front edge of the mat in Warrior 1. In Warrior 2, your hips and torso rotate to face the side of the mat.
Feet: In Warrior 1, your back foot is angled away from your body. In Warrior 2, it forms a right angle with the body, with your toes facing the side of the mat.
Arms: In Warrior 1, your arms are straight overhead. In Warrior 2, they drop to be parallel to the floor.
Practice: Try a Yoga Sequence with Warrior 1 Pose
For more guidance on Warrior 1 pose, Peloton App users can take Kristin’s 5 Minute Basics: Warrior 1 class. Another great option is this 20-Minute Slow Flow. In this class, you have an opportunity to hold the poses for a longer duration, allowing for more instruction and a deeper expression.
Wherever you practice Warrior 1, focus on breathing deeply and listening to your body. If you have trouble keeping your hips facing the front of the mat (which, according to Kristin, is the hardest part of the pose) or balancing with your arms overhead, give yourself grace. With continued practice, you’ll feel stronger and more confident over time.

Peloton App
Access thousands of classes with no equipment needed.
This content is for informational and educational purposes only and does not constitute individualized advice. It is not intended to replace professional medical evaluation, diagnosis, or treatment. Seek the advice of your physician for questions you may have regarding your health or a medical condition. If you are having a medical emergency, call your physician or 911 immediately.
Level up your inbox.
Subscribe for a weekly dose of fitness, plus the latest promos, launches, and events.
By providing your email address, you agree to receive marketing communications from Peloton.
For more about how we use your information, see our Privacy Policy.


