
charnsitr/iStock/Getty Images Plus via Getty Images
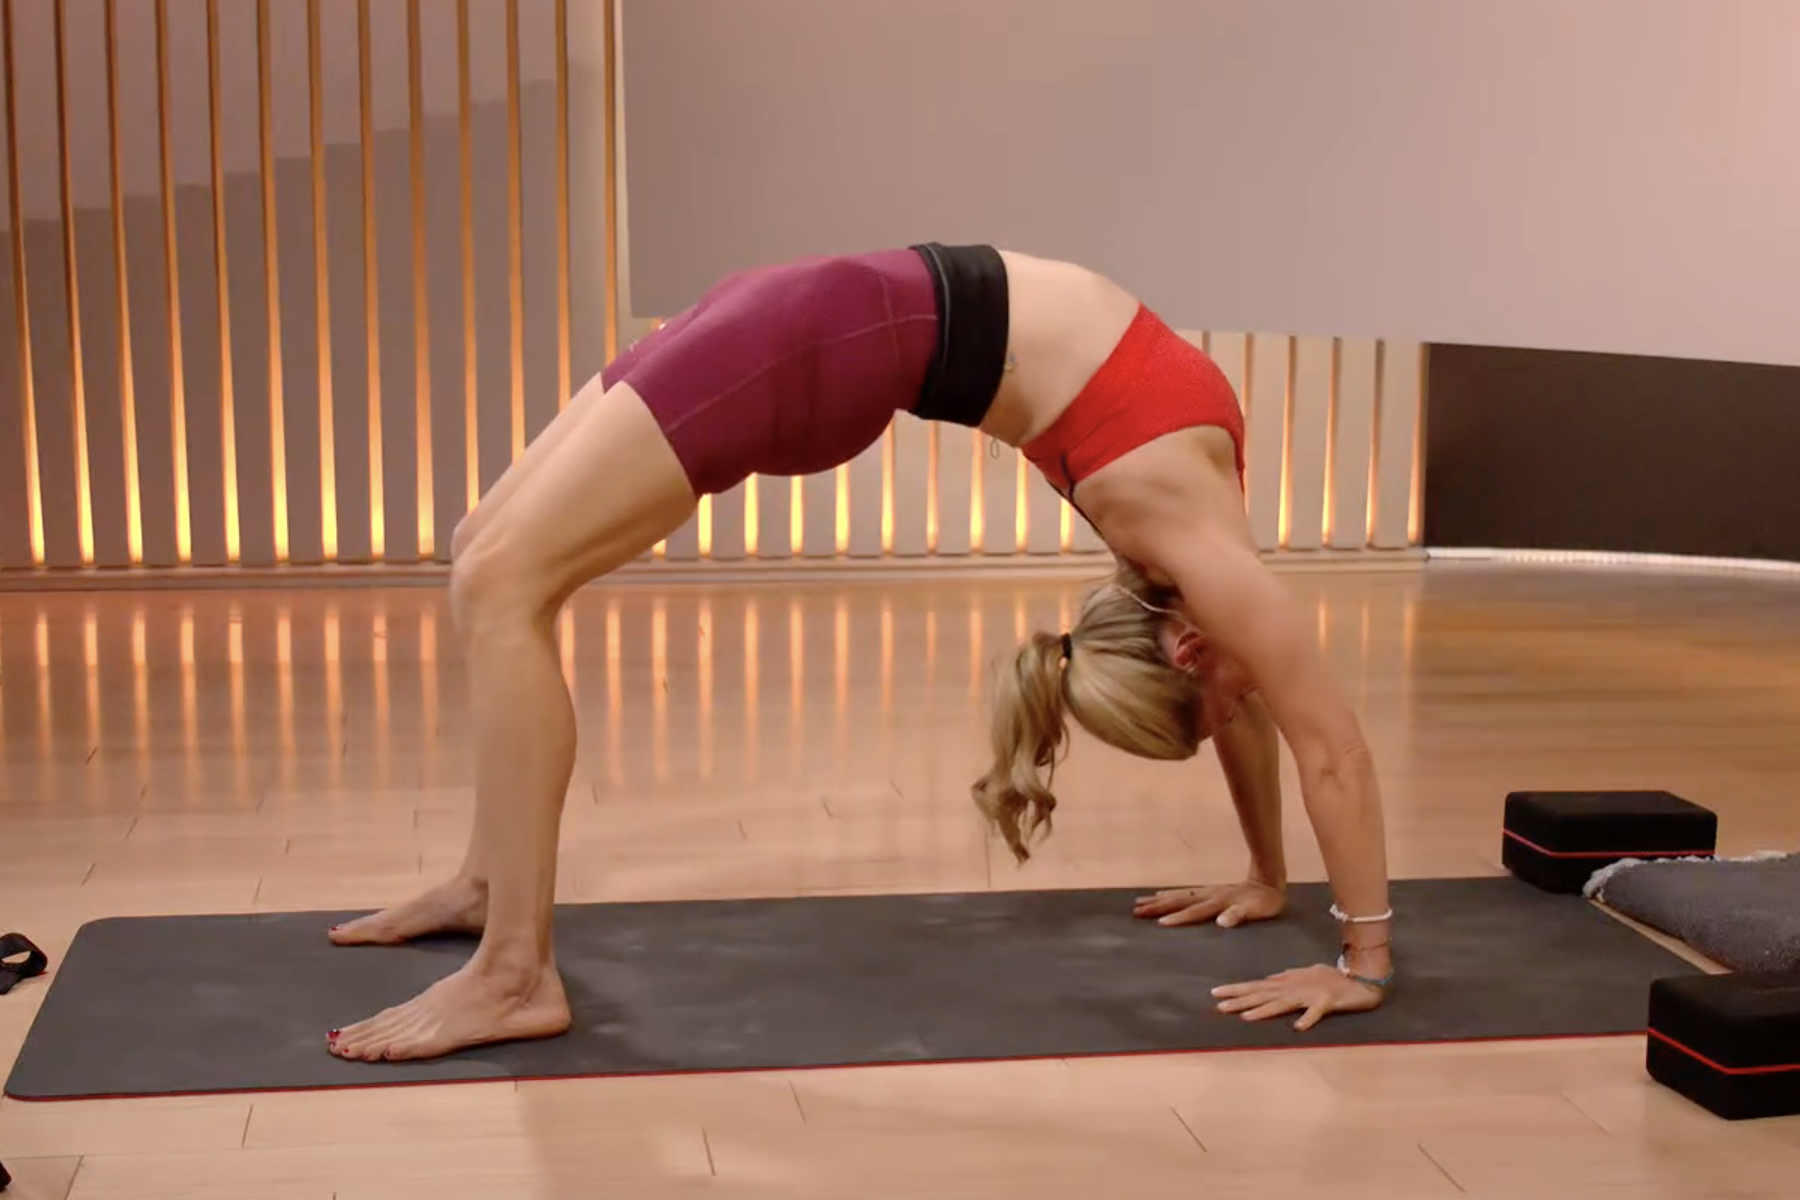
How to Practice Wheel Pose
This backbend will help you build strength and stability in your yoga practice.
By Ingrid Yang•
What Is Wheel Pose in Yoga?
The Benefits of Wheel Pose
How to Do Wheel Pose: Step-by-Step Instructions
How to Work Toward Wheel Pose
Common Mistakes to Avoid in Wheel Pose
You Can Do It
Your yoga practice is more than just an exercise routine. It's a holistic journey of self-discovery, strength, and flexibility. Within its myriad of poses, or asanas, one in particular often stands out for its combination of challenge and reward: Wheel Pose. Here, we’ll dive into how to understand, practice, and master Wheel Pose, providing detailed step-by-step instructions, potential modifications, and common mistakes to avoid.
What Is Wheel Pose in Yoga?
Known as Urdhva Dhanurasana in Sanskrit, Wheel Pose is a backbend that mirrors the shape of an upside-down U. This pose is a hallmark of Vinyasa and Ashtanga yoga practices and is typically performed toward the end of a session, when your body is sufficiently warmed-up.
Wheel Pose engages an array of muscle groups, including your glutes, hamstrings, quads, shoulders, chest, and arms. As a result, it requires a harmonious blend of strength, flexibility, and balance.
The Benefits of Wheel Pose
This inversion strengthens your spine, arms, and wrists, while also stretching your chest and lungs. Additionally, Wheel Pose not only opens your heart and shoulders, but also builds muscle in your back, arms, and legs, says Kristin McGee, a Peloton instructor.
Beyond its physical advantages, this posture can boost your energy levels as a result of the invigorating act of going upside down. It provides a fresh perspective, stimulating both your mind and body. Additionally, the strength and stamina needed to maintain this pose builds and enhances your energy, contributing to your overall mental wellness. Wheel Pose can also serve as a stepping stone to other challenging asanas, such as Handstand (Adho Mukha Vrksasana), Forearm Stand (Pincha Mayurasana), and Camel Pose (Ustrasana).
How to Do Wheel Pose: Step-by-Step Instructions
Mastering Wheel Pose requires patience, mindfulness, and an acute awareness of your body's limits. Here's a detailed, step-by-step guide to practicing this pose:
Starting position: Begin by lying flat on your back on a yoga mat. Bend your knees and place your feet flat on the ground, roughly hip-width distance apart. Ensure your heels are as close to your glutes as comfortably possible. You should be able to barely touch your heels with your fingertips.
Hand placement: Curl your arms in toward your body, bending at the elbows. Place your palms flat on the ground beside your ears. Your fingers should point towards your feet, and your elbows should point upward. If you’re practicing near a wall, Kristin suggests putting blocks under your hands for support. (Make sure to brace the blocks against the wall to anchor them.)
Lifting up: Inhale deeply. As you exhale, push your feet and hands firmly into the ground, lifting your hips and chest toward the ceiling. If you're a beginner or not yet comfortable with the full pose, this might be your stopping point. Hold here for three breaths, then gently come down to rest.
Wheel Pose: If continuing, press upward until your arms and legs are as straight as possible, forming an upside-down U or arch shape with your body. (Avoid hyperextending your joints.)
Holding the pose: Maintain the pose for a few breaths, or as long as you feel comfortable. Remember: It's crucial to listen to your body and not push beyond your limits.
Exiting the pose: To exit the posture, slowly bend your elbows and knees, gently lowering your body back to the mat.
Ready to dive into this posture? Try a Wheel Pose- or backbend-focused yoga class on the Peloton App.


Why Is Wheel Pose So Challenging?
As a deep backbend, Wheel Pose necessitates a considerable level of openness in your chest, shoulders, and hip flexors, as well as strength in your arms and legs. Achieving the correct balance between this level of strength and flexibility can be demanding, especially if you’re new to this pose or have limited flexibility in certain areas, such as your hips or chest.
Mentally, this posture can be intimidating because it’s an inversion. Going upside down can be a daunting prospect, potentially stirring up fears and a sense of vulnerability. A common misconception in this pose is that it’s scary, Kristin says. “Remember when you were a kid?,” she says. “It wasn’t so frightening.” Channel that childlike fearlessness to help you try a modification or even the full expression of the posture.
This pose demands not only physical strength and flexibility, but also the ability to trust yourself. Overcoming the apprehension of being inverted is a crucial step toward mastering Wheel Pose, and it requires patience, practice, and a gradual build-up of confidence.
How to Work Toward Wheel Pose
If you still find Wheel Pose a little daunting, that’s OK. Focus on a variation or more accessible version of the pose instead of the full expression. It’s about doing what feels right for you and your body.
For a gentler version of this posture, Kristin suggests lifting only your hips and back off of the ground, while keeping your head and shoulders down, similar to a Bridge Pose. For another modification, she says to place your hands behind your head and just roll onto the top of your head, instead of pressing up into full Wheel right way to get comfortable with the movement.
Take your warm-up and Wheel Pose prep seriously. “I would recommend lying back on a block in Supported Fish Pose (Matsyasana) to open the shoulders,” Kristin says. “I also love using a strap between my hands and going up and back with the arms (shoulder flossing).”
She also stresses the importance of opening your hip flexors, and warming up your wrists. Additionally, exercises that strengthen your core can be beneficial, as strong abdominal muscles help support your spine in this pose.
When working toward Wheel Pose, start by practicing less intense backbends, such as Cobra Pose (Bhujangasana), Bow Pose (Dhanurasana), and Bridge Pose (Setu Bandha Sarvangasana). Incorporating these postures into your practice will help strengthen your back, arms, and shoulders, as well as increase your flexibility—essential prerequisites for Wheel Pose.
Common Mistakes to Avoid in Wheel Pose
Be aware of common mistakes in Wheel Pose to avoid potential injuries. These include straining your neck by trying to look around, hyperextending your elbows instead of keeping them slightly bent, and allowing your knees to flare out to the sides rather than keeping them aligned with your feet.
To avoid these injuries, maintain a neutral neck by keeping your gaze fixed on one point. Avoid locking out your elbows. Consciously squeeze your inner thighs to prevent your knees from splaying outward.
It's important to engage your core and lengthen out of your lower back to prevent any strain or pain, Kristin says. This engagement helps maintain proper alignment and support for your lower back. Keep your toes turned slightly inward, as turning the toes outward can affect the alignment and stability of the entire pose.
You Can Do It
Wheel Pose is a fusion of openness and strength, Kristin says, reflecting the broader objectives of yoga and life. With regular practice (and these expert tips), mastering this asana is achievable. But remember: Yoga isn’t about forcing your body into a pose, but rather about finding a balance between strength and flexibility, effort and ease. Embrace this journey with patience and respect for your body's limitations.


Level up your inbox.
Subscribe for a weekly dose of fitness, plus the latest promos, launches, and events.