Ivan Gener/Stocksy United
How to Do Triangle Pose, According to Yoga Experts
Here's what you need to know about the standing posture, which strengthens and stretches your body.
By Lauren Bedosky•
What Is Triangle Pose (Trikonasana)?
What Muscles Does Triangle Pose Work?
What Are the Benefits of Triangle Pose?
How to Do Triangle Pose
Triangle Pose Variations and Adjustments
Triangle Pose Mistakes to Avoid
Does Triangle Pose Work Your Neck?
Practice: Try a Yoga Sequence with Triangle Pose
Like many foundational yoga postures, Triangle Pose (Trikonasana) looks deceptively straightforward. But this standing presents a serious balance challenge, and in order to practice it with correct form, you have to simultaneously engage your legs, hips, low back, and upper body. It’s worth the effort though, because regularly doing Triangle Pose can help you build strength and stability that serves you on and off your yoga mat.
Whether you’ve never attempted Triangle Pose or just want to revisit the basics to make sure you’re doing it properly, we’ve got you covered. Here, yoga experts, including Peloton instructors Kirra Michel and Mariana Fernández, break down everything you need to know about this key posture.
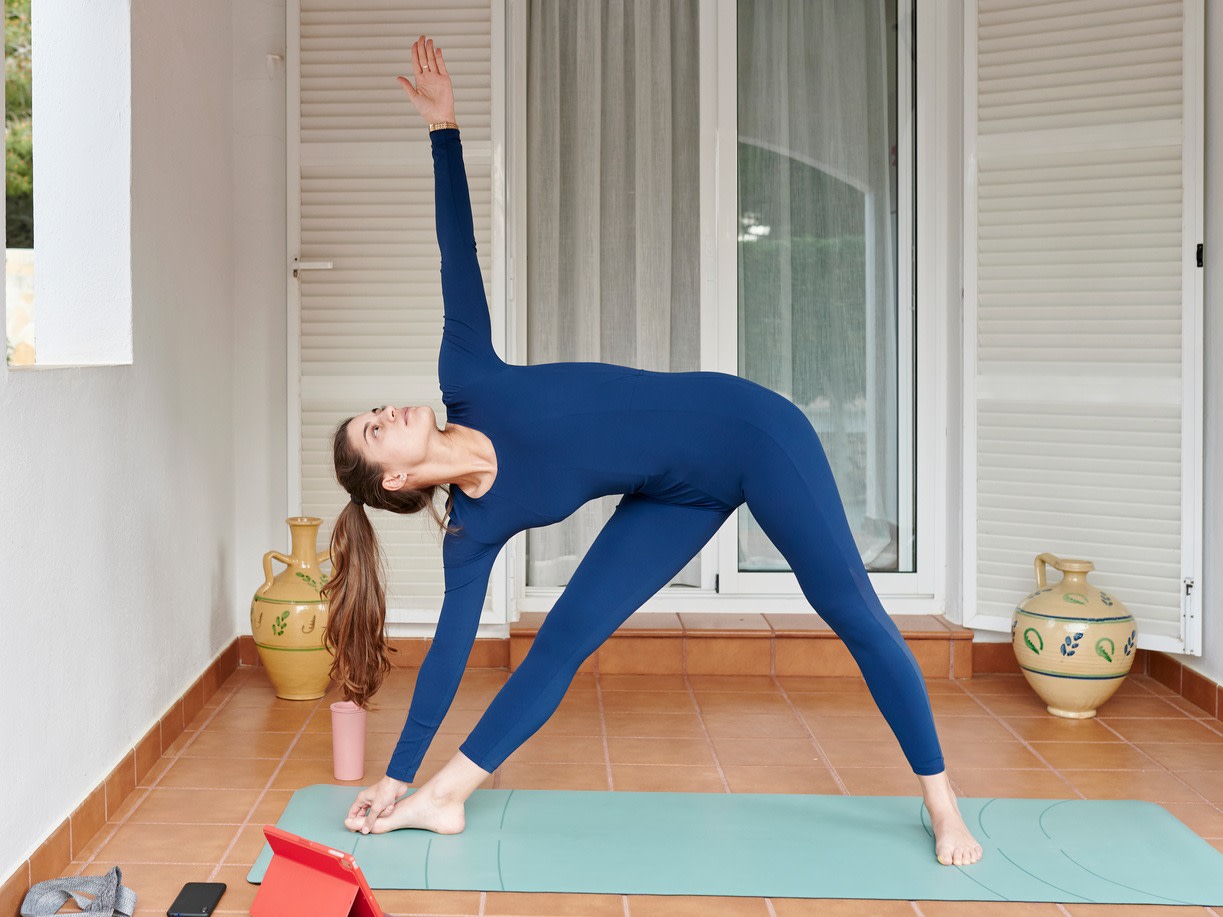
What Is Triangle Pose (Trikonasana)?
Triangle Pose is a standing yoga posture that (surprise, surprise) looks exactly what it sounds like. While you’re holding the pose, your legs form a triangle shape with the floor.
The posture also engages other areas of your body as you lean your torso forward and extend your arms outward. "Triangle Pose is a balance challenge along with a hip and heart opener,” Mariana says. “It helps lengthen your arms, legs, and spine.” And because it’s a core yoga posture, you can expect to see instructors cue it in a wide variety of yoga styles, such as fast-paced power yoga and vinyasa flows.
What Muscles Does Triangle Pose Work?
Triangle Pose works muscles throughout your body, including:
Ankles and feet, which help stabilize the rest of your body
Quads, which contract as you straighten your knees
Hamstrings, which lengthen as your quads contract
Hips and glutes, the gluteus maximus muscle in your back leg and the hip flexor muscle in your front leg work together to stabilize your pelvis as you tilt forward
Deep core muscles, including your rectus abdominis, psoas, and obliques—all of which help hold your trunk over your front leg
Upper back muscles, mainly the serratus anterior, a muscle you engage to help open your chest as you extend your arms
Triceps and shoulders, which you use to extend and raise your arms


What Are the Benefits of Triangle Pose?
Regularly practicing this standing yoga posture can positively impact your mind and body. Some of the main benefits of doing Triangle Pose include the following:
Improves balance and focus. Triangle Pose combines a narrow stance with a deep spinal twist, making it a great way to work on your balance. You may have to put in extra effort to stay upright at first, but with practice, it gets easier (plus, you can always take a modification).
Strengthens various body parts. As Kirra says, regularly practicing Triangle can build strength in your ankles, knees, legs, inner thighs, abdomen, chest, and back.
Stretches different areas throughout your body. While holding Triangle, you stretch your hamstrings, groins, hips, chest, and spine.
Opens hips and shoulders. This posture involves opening your chest as you extend your arms away from your body, Catherine Shandler, a licensed physical therapist assistant and certified yoga instructor, explains. This motion creates space around your heart, which can combat tech neck and strengthen your stabilizer muscles.
How to Do Triangle Pose
You can practice Triangle Pose as part of a yoga flow or do it in isolation to focus on form. If you only have a couple of minutes in the middle of your work day (or whenever you spend an extended period of time sitting), you can use the posture to boost your focus and get a quick stretch. Follow this step-by-step guide from our experts:
Start in Mountain Pose (Tadasana), meaning you’re standing with your feet about hip-width distance apart, your legs straight, and your arms by your sides.
Extend your arms so they’re parallel to the floor with your palms facing down. Step your feet three to four feet apart. It might feel better for your body to shorten or lengthen your stance, so play around and do what feels best.
If you start on the right side, point your right toes toward the front of the mat and angle your left foot, which is in the back, outward at a 45-degree angle.
Keep your torso facing the long edge of the mat as you take a deep inhale. As you exhale, bend at the hip joint to lower your torso over your right leg, touching your right hand to the floor (if possible) and reaching your top hand toward the ceiling. If you can’t bring your bottom hand to the floor, let it rest on your shin or a yoga block. Your front and back leg should both be straight, with your weight pressing evenly through both feet.
Think about lengthening (not scrunching) at your waist and sending your tailbone toward your back heel, which should remain firmly grounded on the mat.
Gently turn your head to gaze at your top hand. Hold this position for three to five long, slow breaths.
Return to the starting position and repeat the above movements on the opposite side.
Triangle Pose Variations and Adjustments
Getting comfortable practicing Triangle Pose can require exploration and patience as you figure out what feels right for your body. If you have tight hamstrings or feel unstable in Triangle, try these tips to make the pose more accessible:
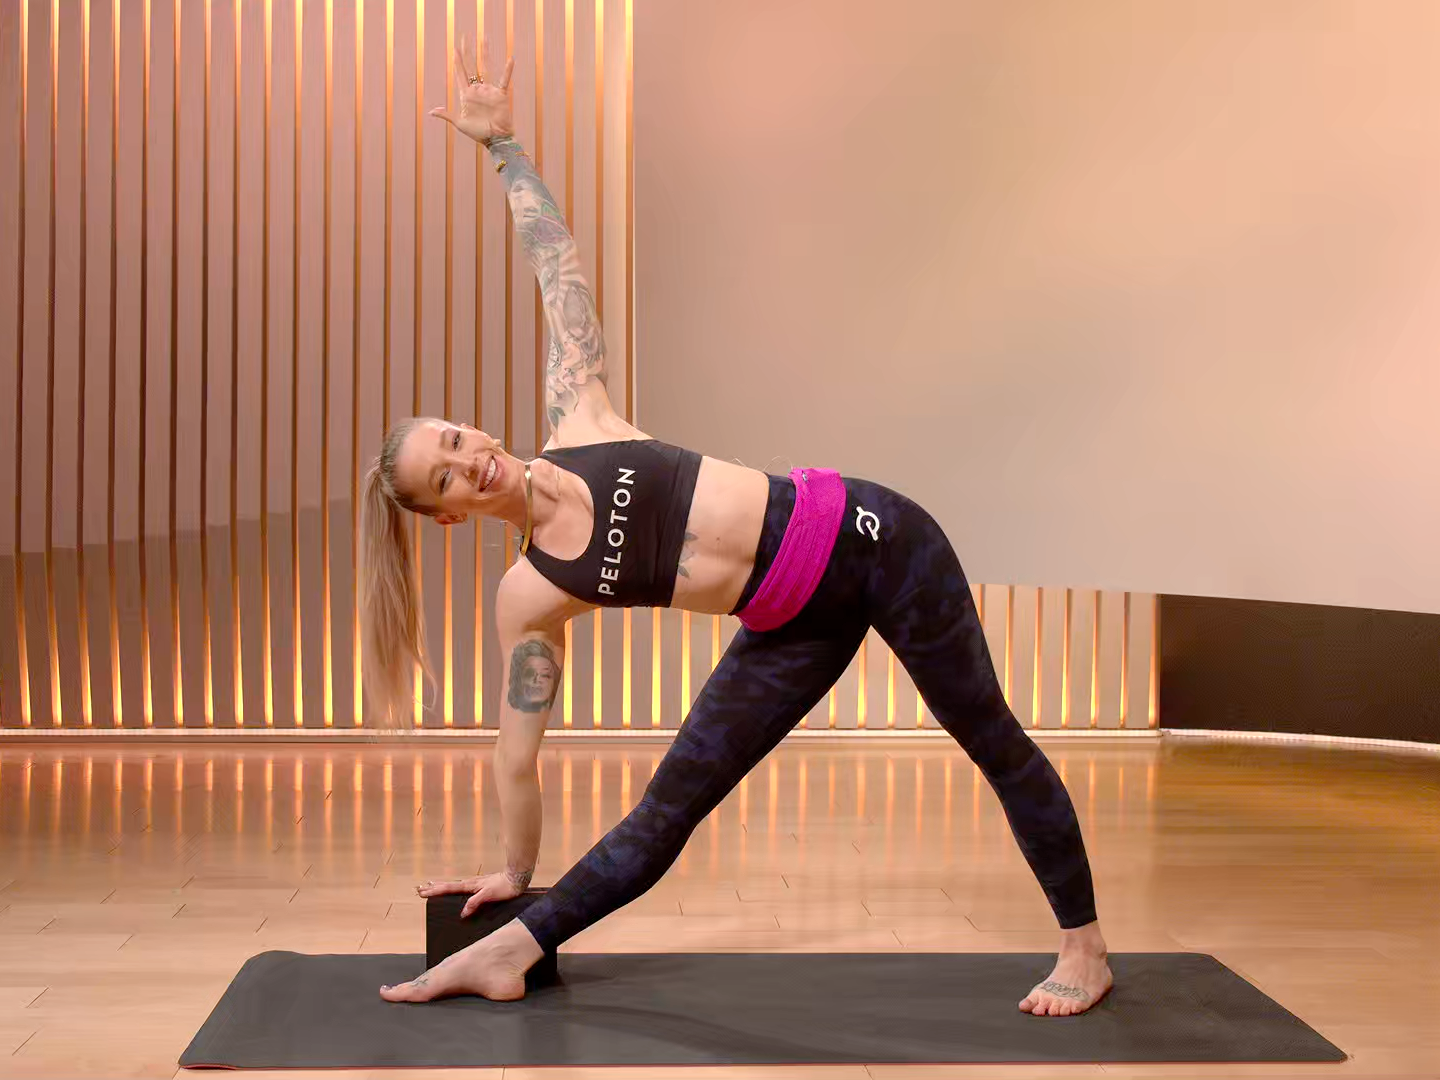
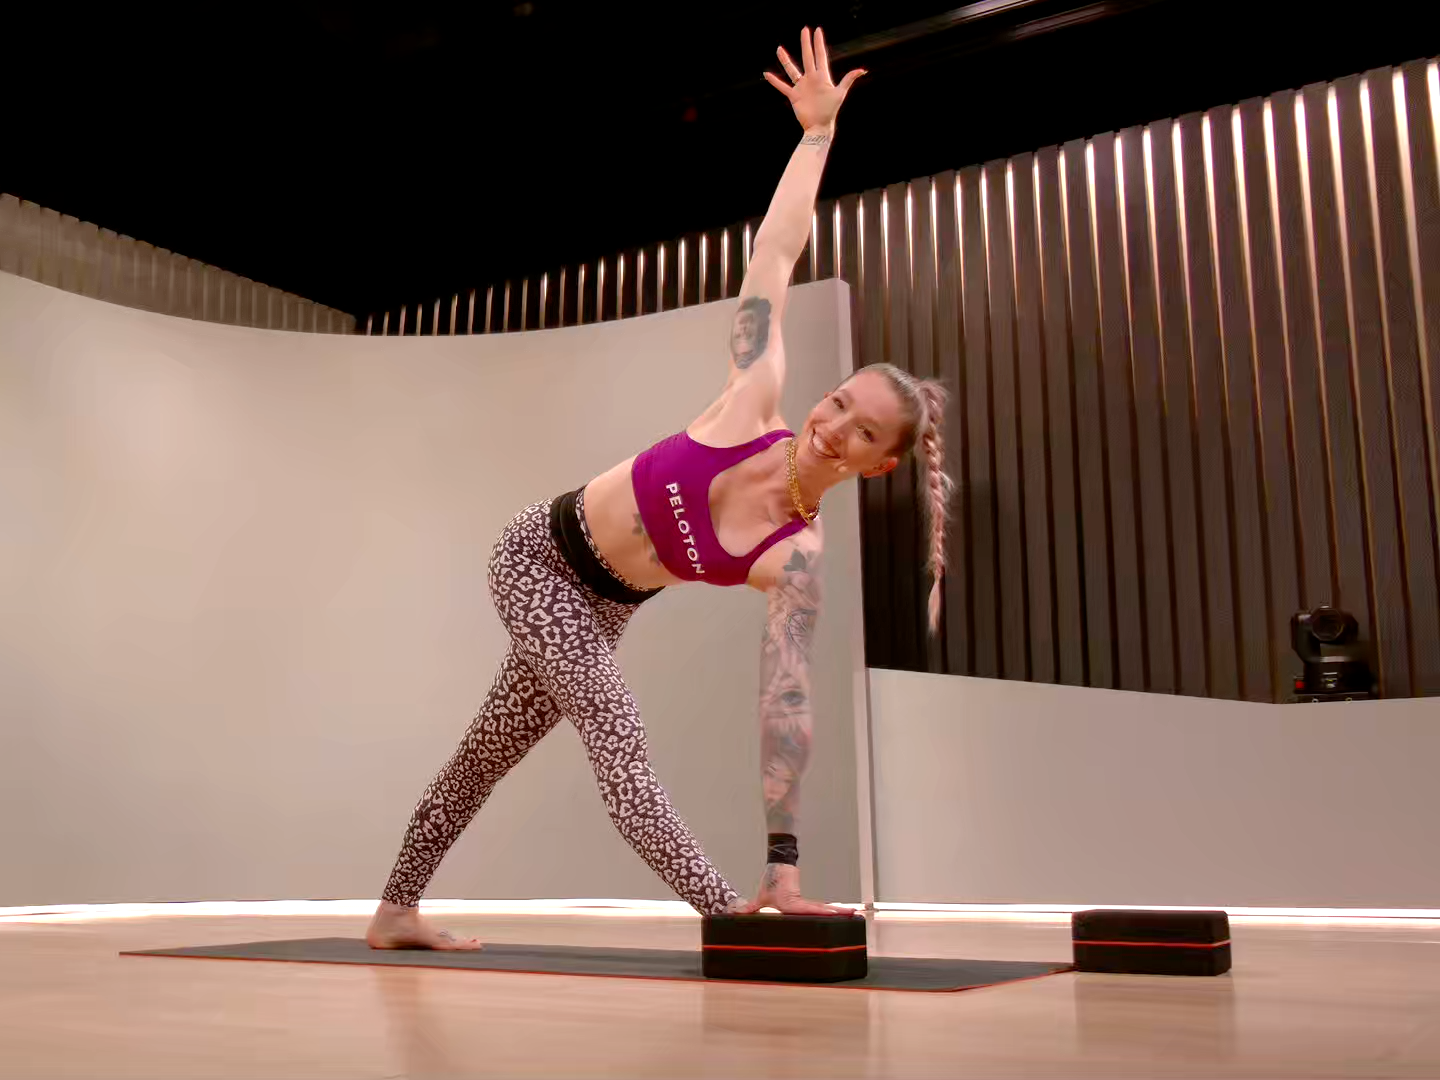
Elevate your bottom hand. If you have to round your back to touch your bottom hand to the floor, don’t force it. "Rather than having your front hand on the ground, lightly place it on your shin or thigh, or use a yoga block beneath the bottom hand to bring the floor up to you,” Kirra says. Mariana adds that you can place the block in front of or behind your shin, positioning it at your preferred height to “feel the length of your legs, arms, and spine.” That advice doesn’t only stand for newcomers. She says, "Whether you have a beginner or advanced practice, props are always a good idea to use for alignment in Triangle Pose.”
Place your top hand on your hip. Another one of Kirra’s recommendations, this modification is a helpful adjustment for anyone who struggles to stay balanced while reaching their top hand toward the ceiling. Start by letting your top hand rest on your hip and gradually work up to straightening your arm.
Look toward the floor instead of the ceiling. In standard Triangle Pose, the practitioner looks toward their top hand, but that might not be in your practice (which is completely OK). "If gazing towards the top hand causes pain in your neck, look at the floor or have your neck in a natural position,” Kirra says.
You can also try one of the following Triangle Pose variations to make the posture more challenging:
Bound Triangle Pose (Baddha Trikonasana)
You can add a bind to take a variation called Bound Triangle (Baddha Trikonasana). Instead of reaching one hand toward the floor, slide the back of your leading hand down your inner thigh. Then, thread that hand under your thigh and reach the other hand behind your back to clasp your hands together. Keep your spine and shoulder blades back, Kirra says. If you’re taking this variation, it helps to think about lifting and opening your chest.
Triangle Pose with Your Top Arm Extended Forward
This variation adds one additional step to the standard posture. From full Triangle Pose, allow your top arm to drop over your ear as you reach your hand forward. Relax your shoulders, keeping them down away from your eyes, and gaze toward the floor. This slight change intensifies the stretch along your hamstrings, your inner thighs, and the top side of your torso.
Revolved Triangle Pose (Parivrtta Trikonasana)
Revolved Triangle Pose (Parivrtta Trikonasana) is a counter movement for Triangle. According to Kirra, it “requires a different position for the feet, closed hips, and a rotation of your spine.”
To take Revolved Triangle, follow the same steps you would take to get into Triangle Pose. Instead of reaching your bottom arm toward the floor, twist from your upper and mid back to reach your left (top) arm down to your right foot (or your right arm down to your left foot, if you have your left foot forward). Gently hold your shin, ankle, or big toe with the hand reaching to the ground, and place your other hand on your top hip or reach toward the ceiling. Turn your head to gaze toward the ceiling. Hold this pose for three to five slow breaths before returning to a standing position and repeating the movements on the other side.
Reverse Triangle Pose (Viparita Trikonasana)
As Reverse Triangle Pose’s name suggests, this variation involves moving in the opposite direction of Triangle Pose. You can enter the pose from standard Triangle Pose by positioning your arms parallel to the floor. Then, arch your upper body up and back as you reach your front arm toward the ceiling and slide your back arm down your rear leg. By reversing the pose, you’ll stretch and strengthen the muscles on the opposite side of your body.
Triangle Pose Mistakes to Avoid
As we mentioned earlier, Triangle Pose is more complex than it looks upon first glance. Here are some of the most common mistakes our experts see people make—plus tips on how to fix them.
Taking too short or too long of a stance. The width of your stance in Triangle Pose impacts the amount of stress you place on your joints and limbs, so positioning your feet too close together or too far apart can trigger hip or knee pain. A good rule of thumb is to place your feet about three to four feet apart. If you have especially long legs, a slightly wider stance will likely feel best. And don’t forget to check the position of your back foot. “Have the back foot turned to a 45-degree angle and press down through the pinky toe edge of the foot,” Kirra says.
Dumping weight into your front hand. Your weight should be evenly distributed between your front hand (if it’s on the floor) and both of your feet, Kirra says. Placing too much weight in your front hand can put pressure on your wrist and shoulder. Instead, press firmly through both feet to more evenly distribute the load.
Rounding your back to reach the floor. This error often happens when someone isn’t quite flexible enough (yet) to get into full Triangle, or the pose just doesn’t work well for their body proportions. If you run into either of these scenarios, don’t force the pose by rounding your back. “Keep your spine long as you reach your torso toward the front of the mat,” Kirra says. If you can’t reach your hand to the floor, elevate it on a yoga block or place it on your shin. “The integrity and length of your spine is much more important than touching the ground,” she says.
Over-expanding your hips. Although Triangle Pose is a hip opener, some people actually over-expand their hips in this position. To avoid making this error, “make sure the ball mound of your big toe is grounded in the front foot,” Mariana says. “Then, check in with the back leg and try to close the hip so you don’t over-expand.” Proper alignment is crucial in Triangle, so Mariana recommends practicing with a wall behind you so you can play with the alignment while having some support.
Does Triangle Pose Work Your Neck?
You turn your neck to look upward in Triangle Pose, so it’s completely normal to feel a minor stretch in it. But if you feel much more than that, it may mean you’re straining your neck muscles, which can lead to pain down the road. This mistake often happens when people tilt their head toward the floor in Triangle Pose, Shandler says.
To avoid this form error, position your head parallel to the floor, keeping your ears in line with your shoulders. It can help to slightly tuck your chin while focusing your gaze straight up. “The chin tuck is a subtle yet very effective adjustment that will stabilize your neck and help you avoid rounded shoulders,” Shandler says.
Practice: Try a Yoga Sequence with Triangle Pose
Triangle Pose shows up in a wide variety of yoga styles, so it’s great to practice on its own so you can perfect your form. Guided sessions, like this 10-Minute Basics: Triangle Pose class with Kirra, can help you explore modifications and learn helpful form cues.
Once you’re comfortable, try Triangle Pose as part of a longer sequence. In this 45-Minute Yoga Flow, Mariana leads you through a more active session that links movements with your breath.


Want to strengthen your yoga practice?
We can help. Enter your email to get articles, instructor tips, and updates from Peloton sent to your inbox.