LumiNola/E+ via Getty Images
How to Do a Handstand (and 3 Variations to Try)
Love inversions but afraid to kick all the way up? Here's how to progress to the full expression of this peak posture.
By Michele Ross•
It’s one of the most well-known peak poses in yoga. However, in addition to being an impressive display of strength and balance, it also presents benefits for your practice and overall well-being. Yes, we’re talking about Handstand (Adho Mukha Vrksasana).
Handstands can seem intimidating—or even downright scary—but it’s possible to work toward them in a methodical way by tackling the fundamentals, maintaining patience, and practicing consistently. Here, Peloton instructor Kirra Michel shares her expertise on the benefits of Handstands and how to practice them, quite literally, from the ground up.
The Benefits of Handstands
It bears repeating that the perks of Handstand go beyond the “wow” factor. Here’s why.
Physical Health Benefits
Handstands can improve your flexibility, mobility, stability, and upper body strength—especially in your arms and wrists, Kirra says.
In a 2011 review published in the International Journal of Yoga, researchers stated that inverted poses, such as Handstand, “encourage venous blood flow from the legs and pelvis back to the heart,” where it’s then pumped through the lungs and becomes freshly oxygenated. (Maintaining healthy circulation is vital to protecting your organs, tissue, and cells.)
Mental Health Benefits
Physical benefits aside, this peak pose also develops your mental resilience. “The journey to Handstands is a very humbling one, and one that requires dedication, consistency, and discipline,” Kirra says.
You’ll likely fall along the way—and that’s OK. “Realistically, we learn that the only ‘failing’ is not trying,” she says. Instead, try to let falling facilitate “self-awareness, learning, and refining the skill over and over and over again.”
Remember that good things are worth the wait. “Once you finally can hold a Handstand for a few seconds, [your] confidence begins to kick in,” she says. “You know how much effort and work went into attaining the skill, and you realize if you can learn how to Handstand—with that same discipline and dedication—you’ll be able to achieve other things you set your mind to.” Kirra also suggests tapping into the joy and experimentation of Handstands. “They’re fun, and we all need a little more play in our lives,” she says.
How to Warm Up
Before you do a Handstand, it’s crucial to warm up. Since this pose engages your entire body, there are many ways to prepare your joints and muscles. You’ll want to pay extra attention to your wrists, arms, shoulders, and core.
A few of Kirra’s favorite warm-ups and preparatory movements include:
Wrist and shoulder warm-ups
Shoulder rolls
Shoulder flossing
Arm circles
Puppy Pose
Scapula push-ups
Lateral (side) bends
Shoulder shrugs in Downward-Facing Dog
You can pick and choose a few movements to do, build them into a yoga flow, or try a class on the Peloton App that focuses on preparing for Handstand. (Psst: Kirra’s Path to Inversion program may be a good place to start.)
And pay special attention to an often-forgotten body part: your fingers. “A big part of balancing in a Handstand is your fingers; they are your brakes and accelerators in the pose,” Kirra says.
Kirra also recommends targeting your hamstrings in your warm-up. “Handstand kick-up entrances and the L-shape box work require the hamstrings to be warm and open,” she says. “The more flexible [they are], the easier this will be.”
Don’t forget to focus on your alignment before going upside down. For this, Kirra suggests holding a plank, doing straight body holds (without piking), or trying dynamic sliding planks to standing pikes.
How to Do a Handstand
Your journey to Handstand won’t look like anyone else’s. You may nail it on your first try, or you may take a bit longer to build the necessary strength and skills. “There’s no umbrella step-by-step guide,” Kirra says. “It’s a very hyper-individual skill, and it all depends on what the physical starting point is.”
Here, we break down Handstand into a few preliminary components. Once you’re comfortable with each, move onto the next.
Get Comfortable with Inversions
Before moving into Handstand, you need to be physically and mentally prepared to be upside down. Start by practicing more accessible inversions. At their core, inversions entail having your head below your heart. Think: Child’s Pose, forward folds, Plow Pose, and Dolphin Pose.
If you’re comfortable with cartwheels, Kirra suggests doing them as a way to practice the skill of safely “falling out” out of a Handstand. “When we ‘fall out’ of a handstand, rather than flopping into a backbend or any other exit, we want to learn how to gracefully cartwheel out,” Kirra says. “This will help you mentally feel safe enough to play, fall, and ‘fail.’ And the more you play, fall, and fail, the faster you will get your handstand.”
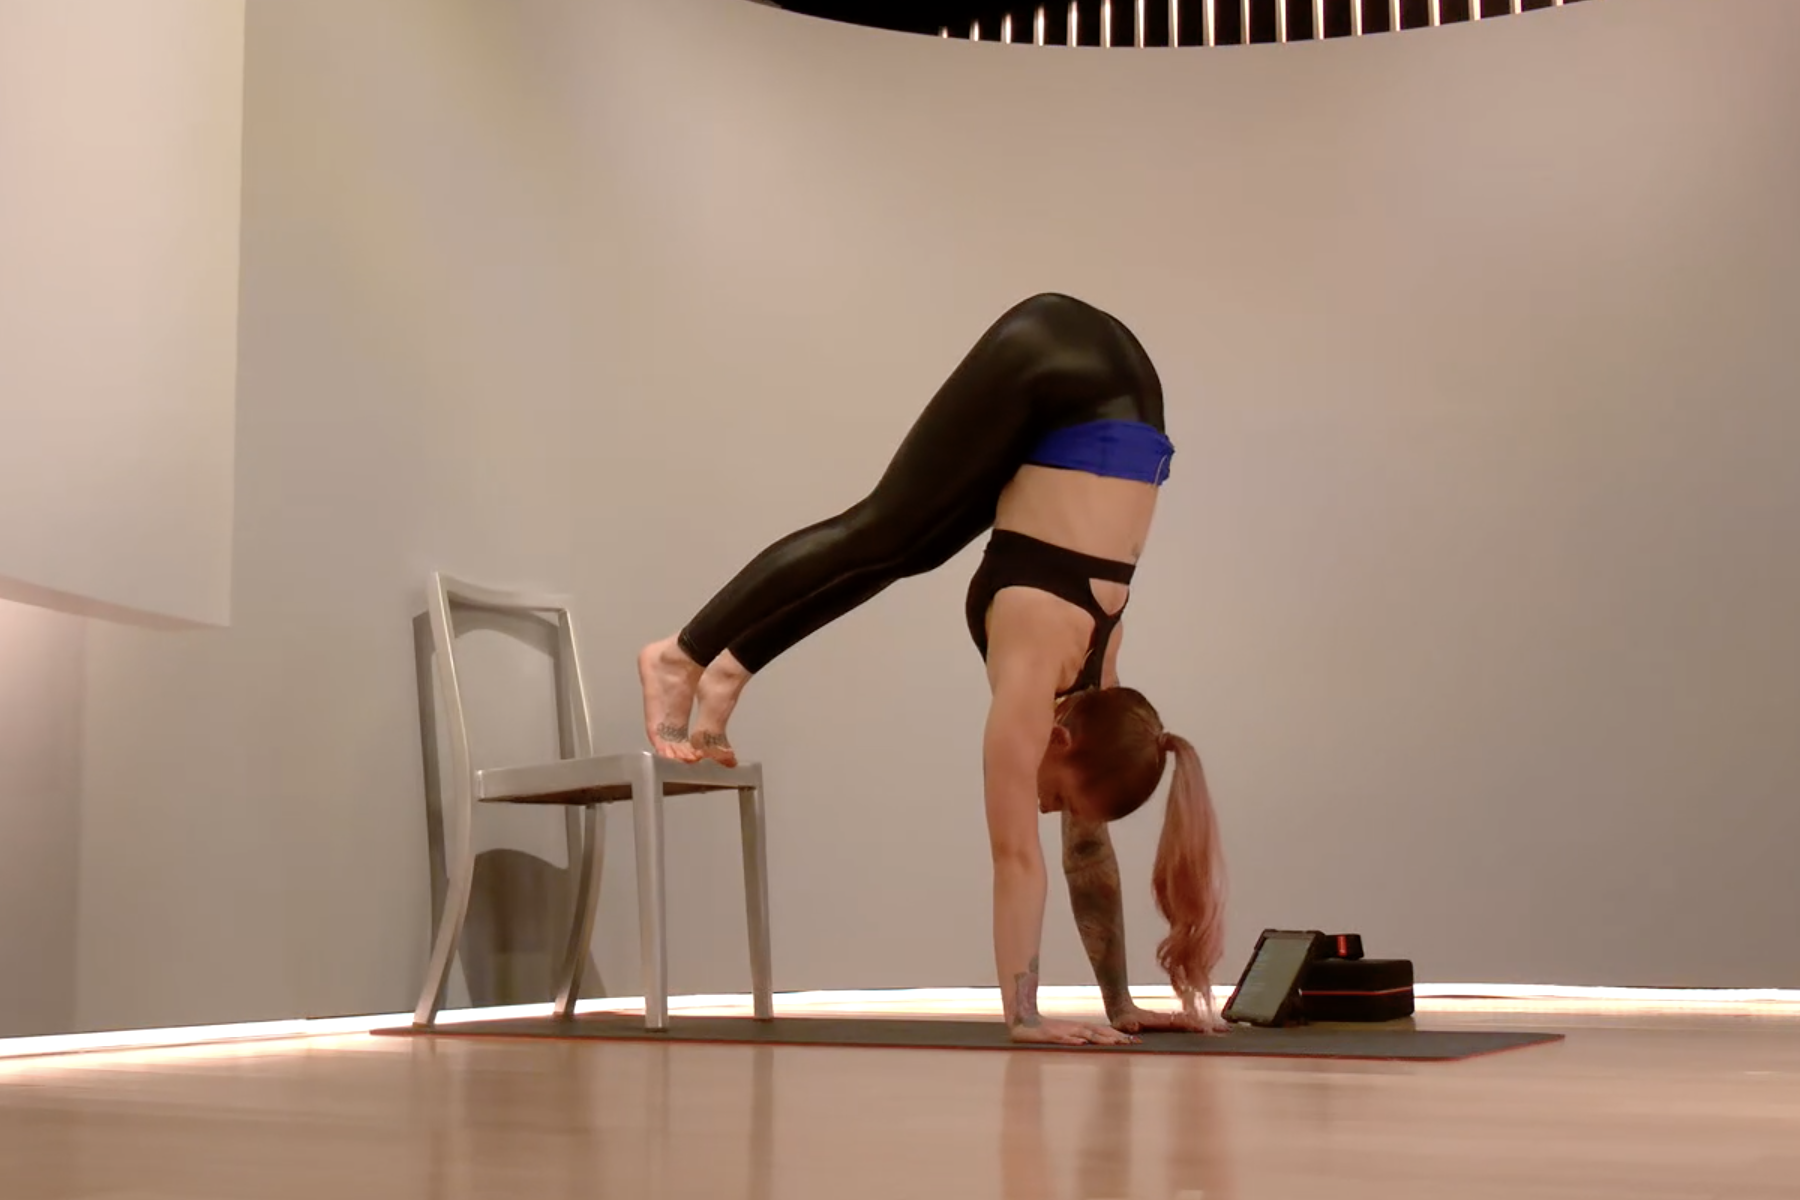
L-Shaped Handstand
L-shaped Handstands allow you to work on your upper body strength, endurance, and alignment—while having the security and grounding of a chair, box, bench, or wall behind you.
Place your hands on the floor and your feet on a chair.
Stack your hips over your shoulders and wrists as you push the floor away with the strength of your arms and shoulders. Activate your core and glutes. Your body will resemble an upside-down L-shape.
Aim to hold this pose for up to a minute without lifting your feet. Try to build comfort being upside down and supporting the majority of your weight with your hands and shoulders.

Toes-and-Nose-to-Wall Hold
This build-up to Handstand will work on your strength, alignment, and endurance. In this position, you’ll build on the previous variation, with both of your feet against a wall in a Handstand.
Bring your hands to the ground and place them approximately shoulder-width distance apart. Start to walk your feet up the wall.
Wrap your ribs in and tuck your tailbone. Your body should resemble the shape of a hollow-body hold.
Push the floor away as you engage your shoulders. Don’t let them sink or collapse.
For more of a challenge, walk your hands closer to the wall. Aim to hold this pose for up to a minute while keeping your feet on the wall the entire time.
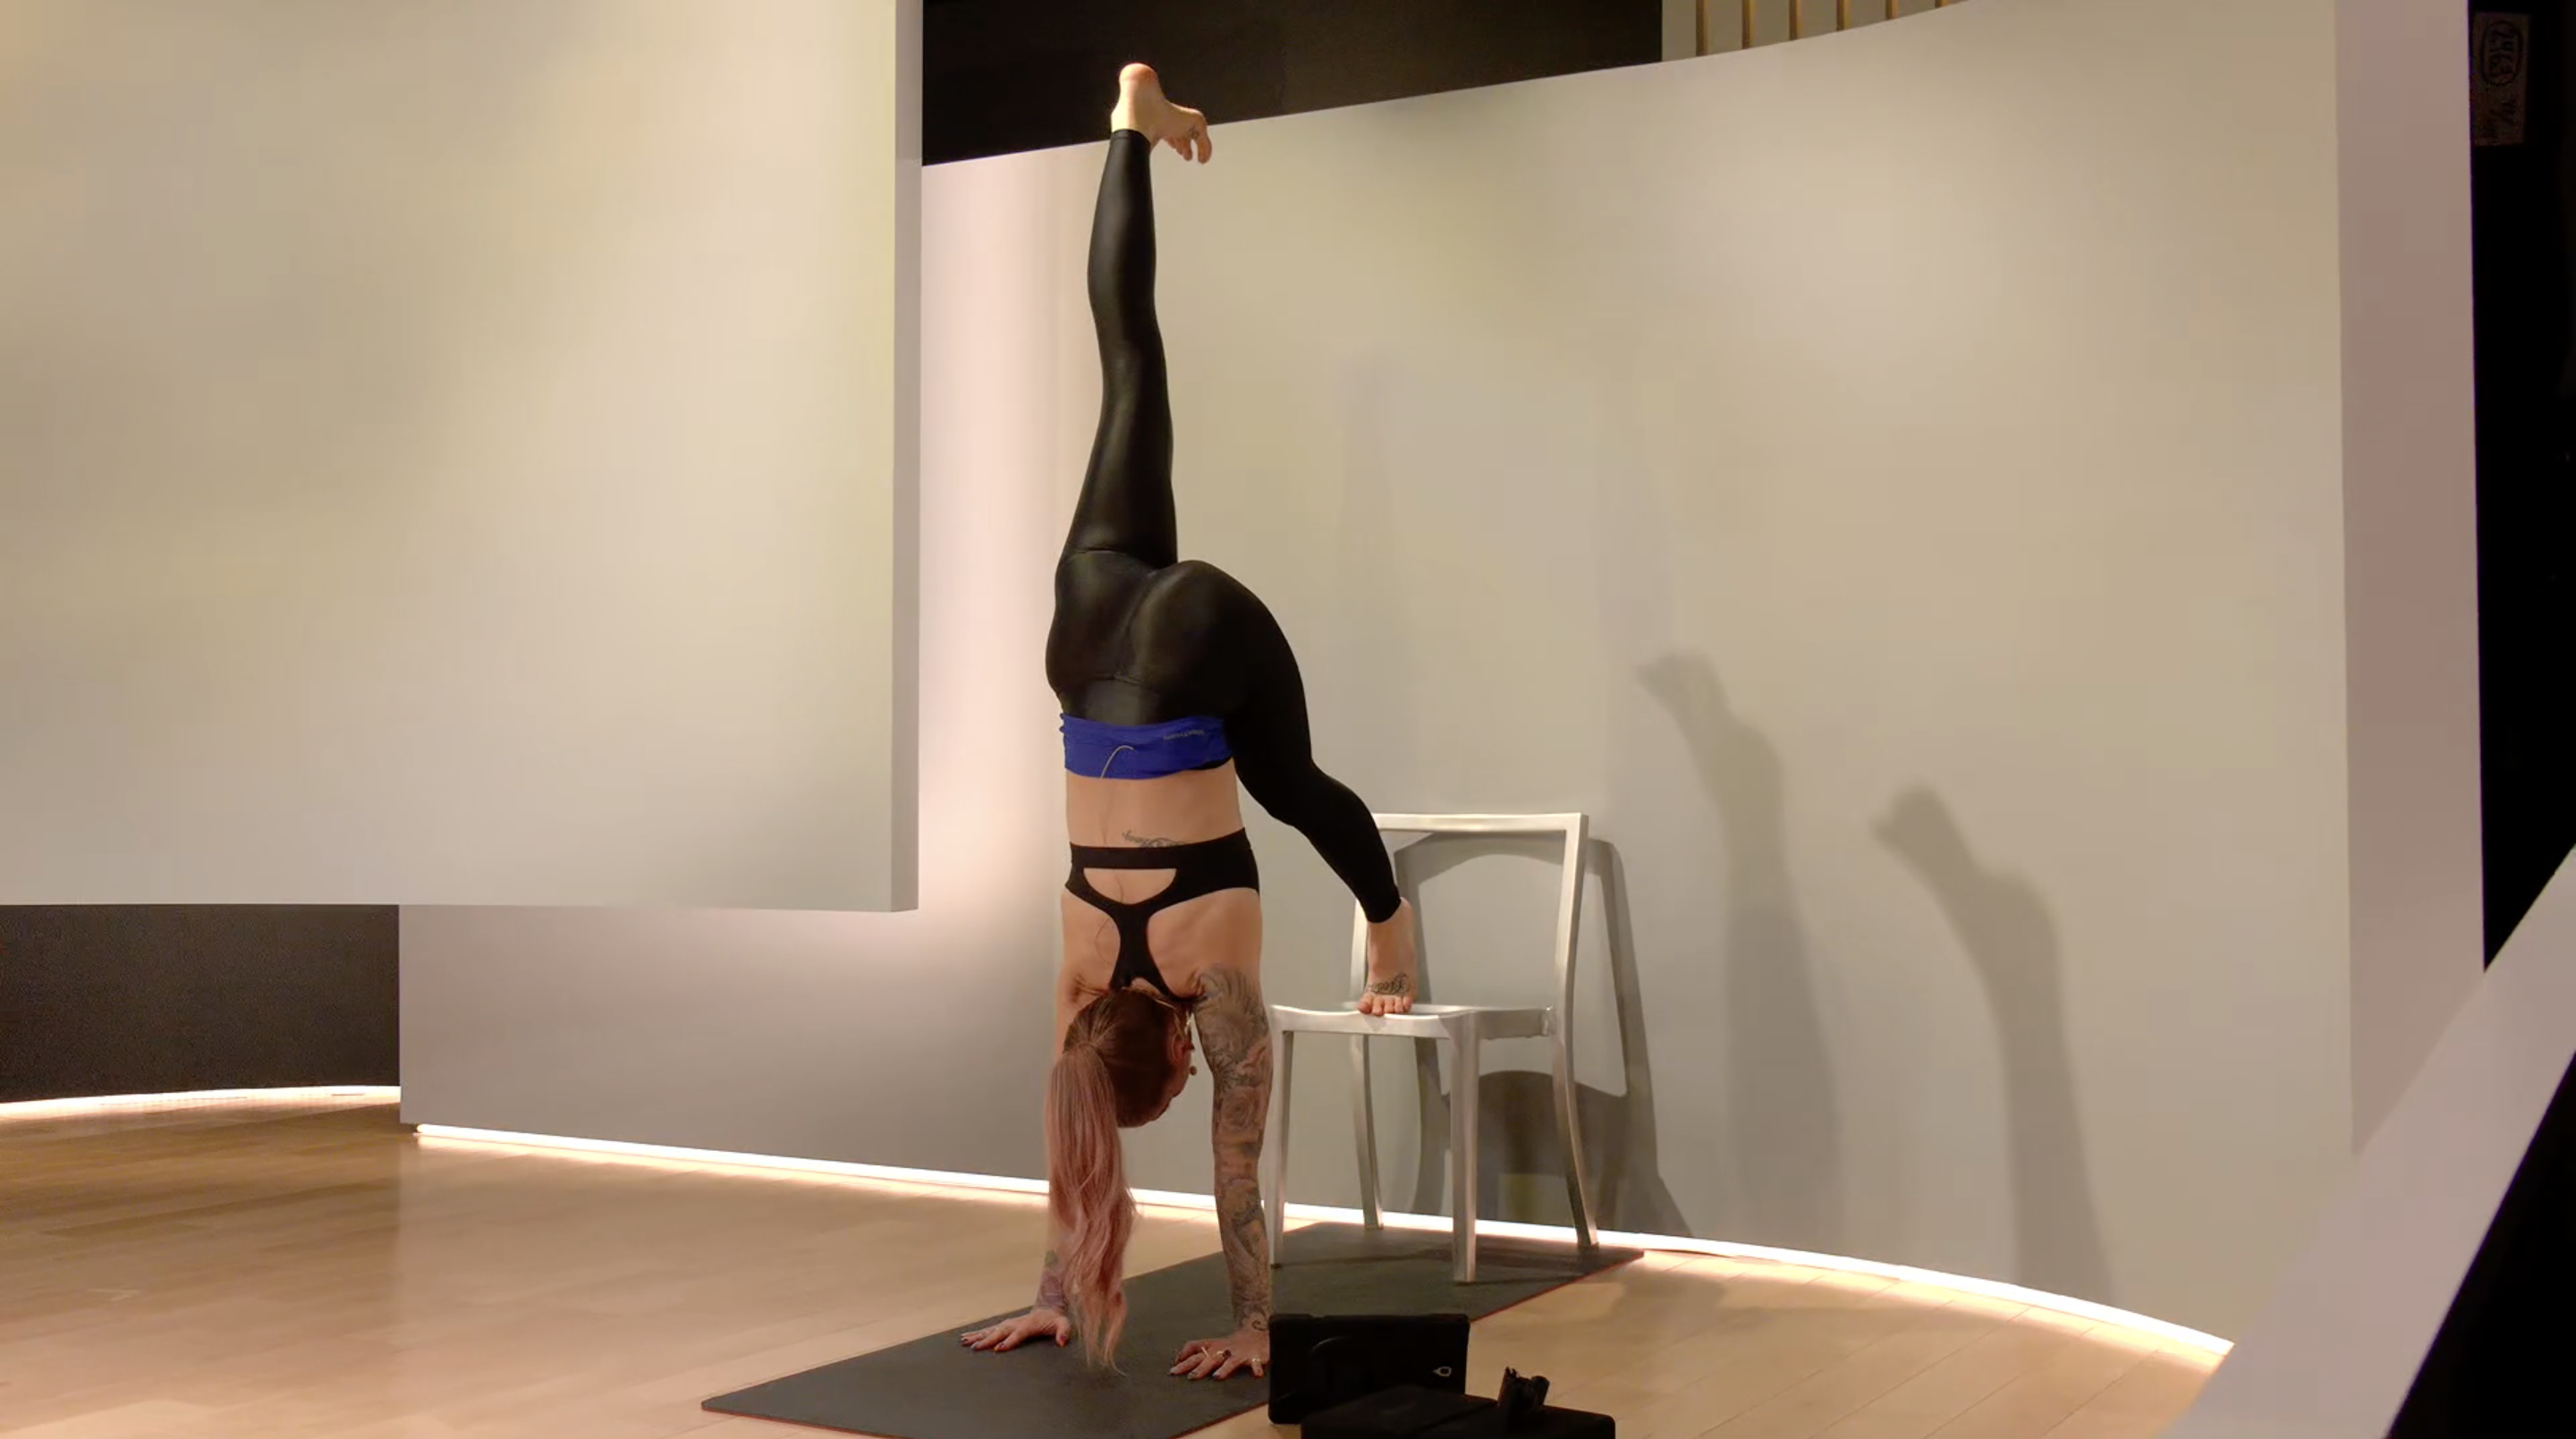
L-Shaped Handstand with a Single Leg Lift
This move will expand upon the earlier L-shaped Handstand by testing your balance with a leg lift.
Start in a L-shaped Handstand with your feet on a chair, box, or bench.
Slowly lift one leg toward the ceiling. If this variation is new to you, start by lifting your leg only an inch or two off of the chair. Keep both of your legs tight and engaged.
Over time, work on bringing your lifted leg to form a 90-degree angle with the grounded leg.

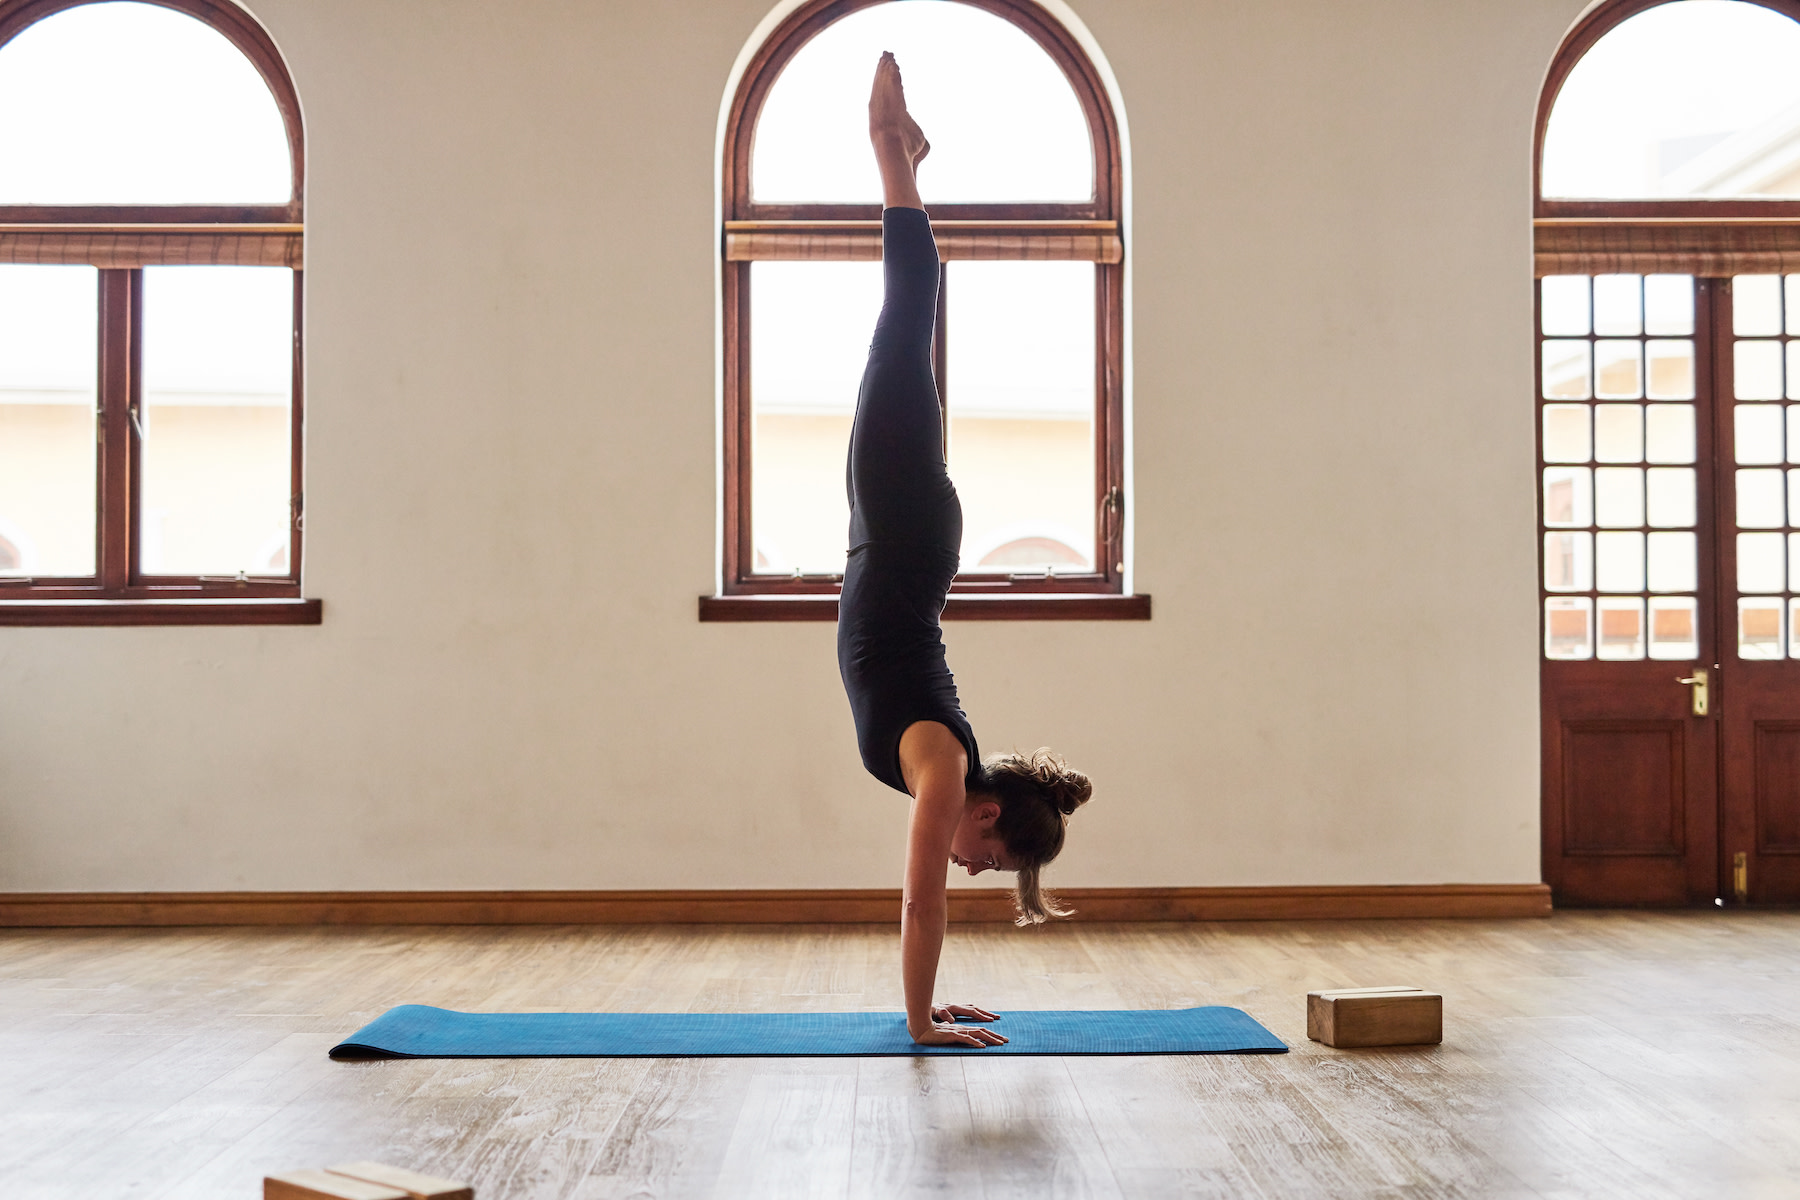
Full Handstand
The full expression of the pose is the final step in your Handstand journey. This should only come “when you have some understanding of proprioception (i.e., where your body is in space) and when you learn how to control your body upside down,” Kirra says.
There are different ways to come into Handstand. Make sure to find the variation that works best for you. In this variation, as Kirra breaks down in a Handstand-focused class, you’ll kick up into this peak posture.
Try a Handstand-Focused Class

Place your hands shoulder-width distance apart. Point your index fingers forward. Stack your shoulders on top of your wrists.
Your right foot should be approximately a foot away from the midpoint of your hands. Your left foot should be raised straight back in the air. Kick your right leg up, creating an L-shape with your legs.
If you have the strength and stability, your right foot can meet your left foot, creating a straight line from your hands to your toes. Activate your glutes and core.
To come out of this position, slowly lower your right leg back down to its starting position, followed by the left.
Handstand hops are just one way to come into this posture—and should only be done after you’ve confidently practiced other preparatory variations. Move into Handstand in the way that works best for you and your body, whether that’s using a wall, a hop, or a variation.
“When you work on this drill, aim to under shoot rather than over shoot your legs while kicking,” Kirra says. If and when you need to fall, be sure to cartwheel out one leg at a time.
3 Key Tips to Keep in Mind
It’s crucial to know the basics before you work your way up to a full Handstand. Unfortunately, there aren’t any shortcuts to nailing the full expression of the posture. ”There are no tricks,” Kirra says. “It’s all hard work and repetition.”
Here, she shares a few parting insights—including common misconceptions and mistakes—to be mindful of as you navigate your Handstand journey:
Strategize and conquer: “Many people try to do a Handstand without understanding the mechanics or having a solid plan,” Kirra says. If you want to (safely) nail this peak posture, learn the basics, warm up, and take things one step at a time.
Strengthen your shoulders: “There's a big misconception that Handstands are predominately a core-based skill,” Kirra says. “Yes, the core is involved, but it’s much more about shoulder mobility and strength.” She suggests prioritizing strengthening and stretching your shoulders in your Handstand prep.
Address all factors necessary for a safe and successful Handstand: Some people can get a bit impatient or ambitious, working solely on “flinging” into handstand kick-ups near a wall. While a wall can be a helpful tool in your practice, avoid using it as a crutch. Remember: Feeling safe and secure upside down, as well as maintaining alignment, balance, focus, and strength are all crucial to land this tricky inversion.


This content is for informational and educational purposes only and does not constitute individualized advice. It is not intended to replace professional medical evaluation, diagnosis, or treatment. Seek the advice of your physician for questions you may have regarding your health or a medical condition. If you are having a medical emergency, call your physician or 911 immediately.
Level up your inbox.
Subscribe for a weekly dose of fitness, plus the latest promos, launches, and events.
By providing your email address, you agree to receive marketing communications from Peloton.
For more about how we use your information, see our Privacy Policy.